

Included in Simplero plans: Scale and Skyrocket
Sometimes email isn't the preferred method of communication. With Simplero, you can also send Text Messages to your Contacts! Text Messages are great for short to-the-point messages that jump immediately to the awareness of your recipients. Note that this is only included in certain Simplero plans. Have a look here.
In this guide, we cover:
Via a Trigger
Text messages can be sent to your customers via a trigger on product, list, automation, or segment.
Trigger a text message to send when they sign up for a Product or a List
-
Select Products or Lists from your Simplero Dashboard
Sales >> Products for Products
Contacts >> Lists for Lists
From the Products page or Lists page, locate and click on the product or list you want to perform the trigger
Select the Content tab
Scroll down to the Triggers section and click the white +Add trigger button:

-
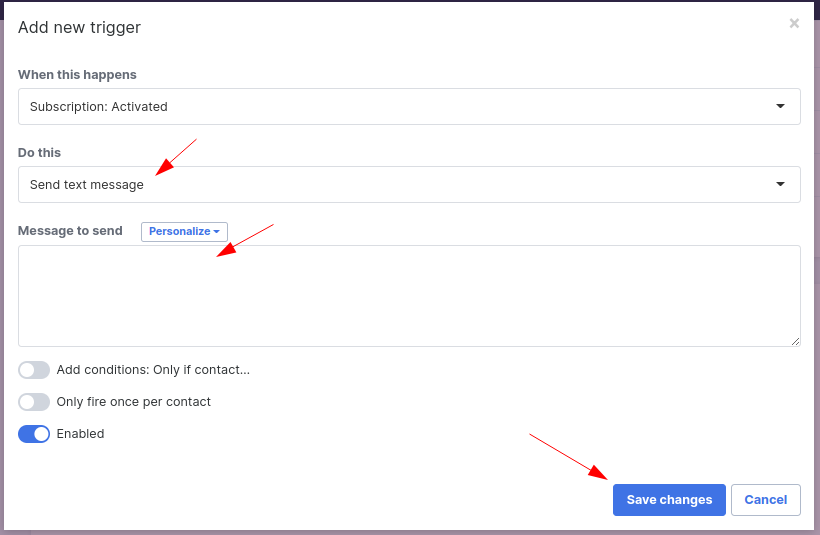
The Add new trigger screen will open. Complete the fields:
Select what you want to happen
In the Do this field select 'Send text message' option
Type your message in the Message to send field
Click the Save changes button and you are set:
Via an Automation
Select Marketing from your Simplero Dashboard
Select Automations from the dropdown menu
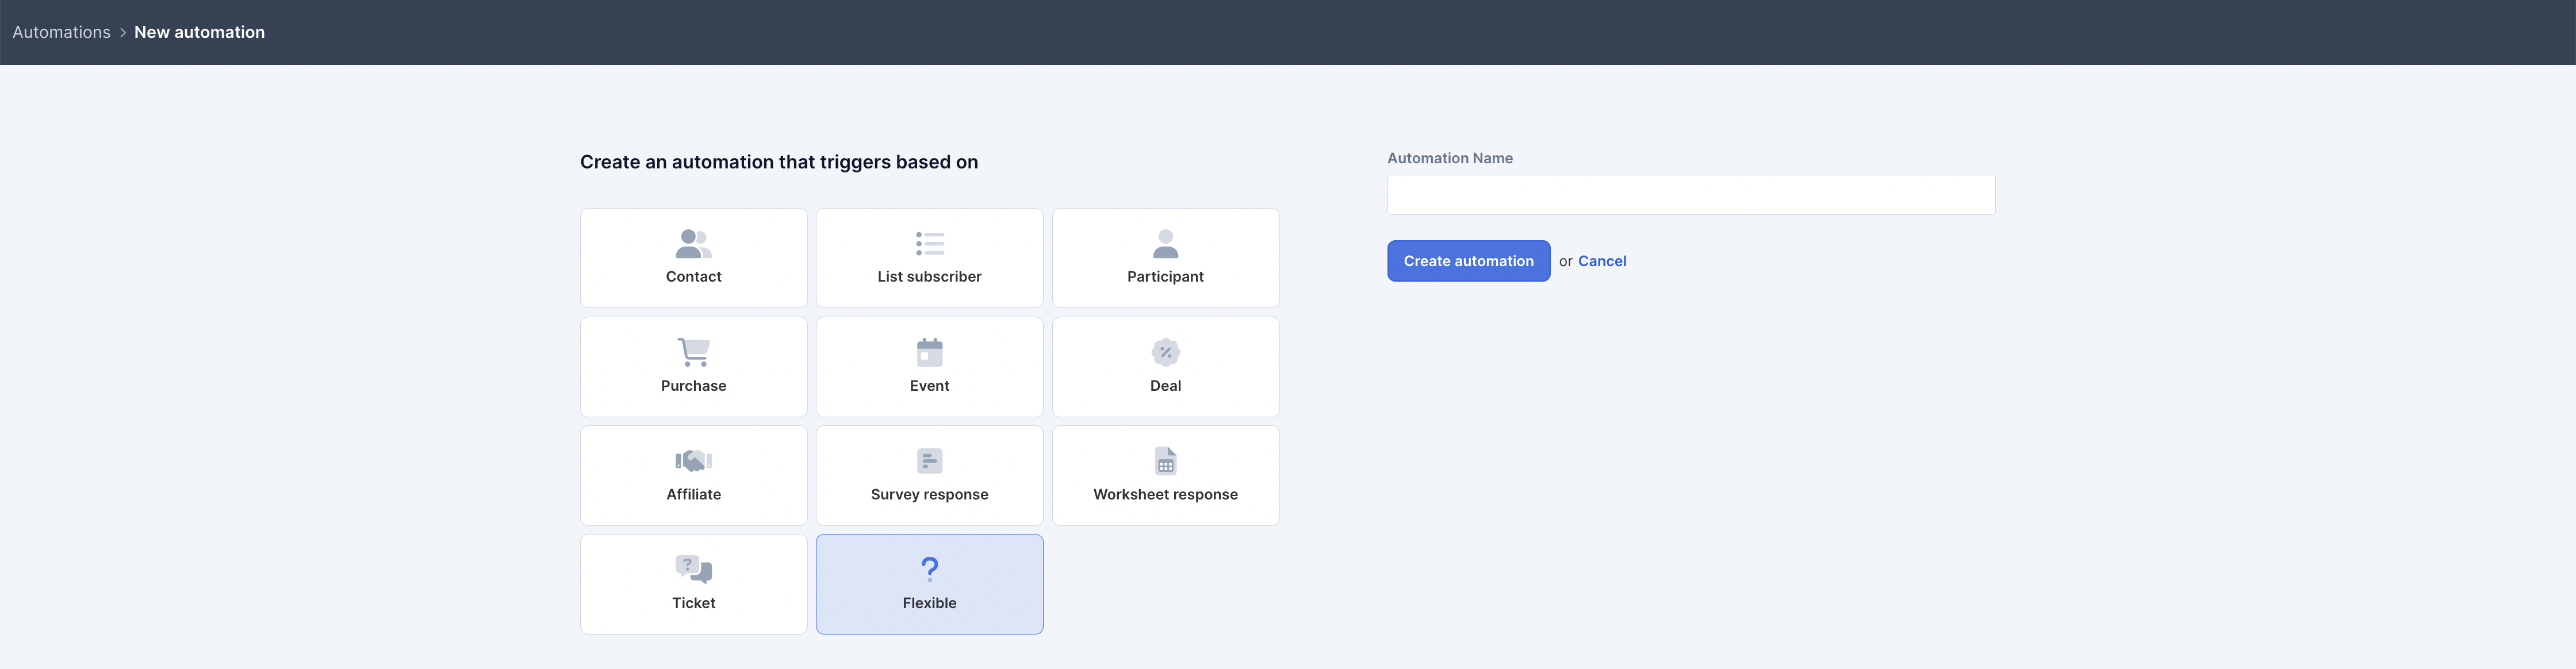
Click the Create new automation button in the upper right corner:

Select what the Trigger will be based on, name your Automation and click Create automation:
Click the blue + Add a step button for your automation:

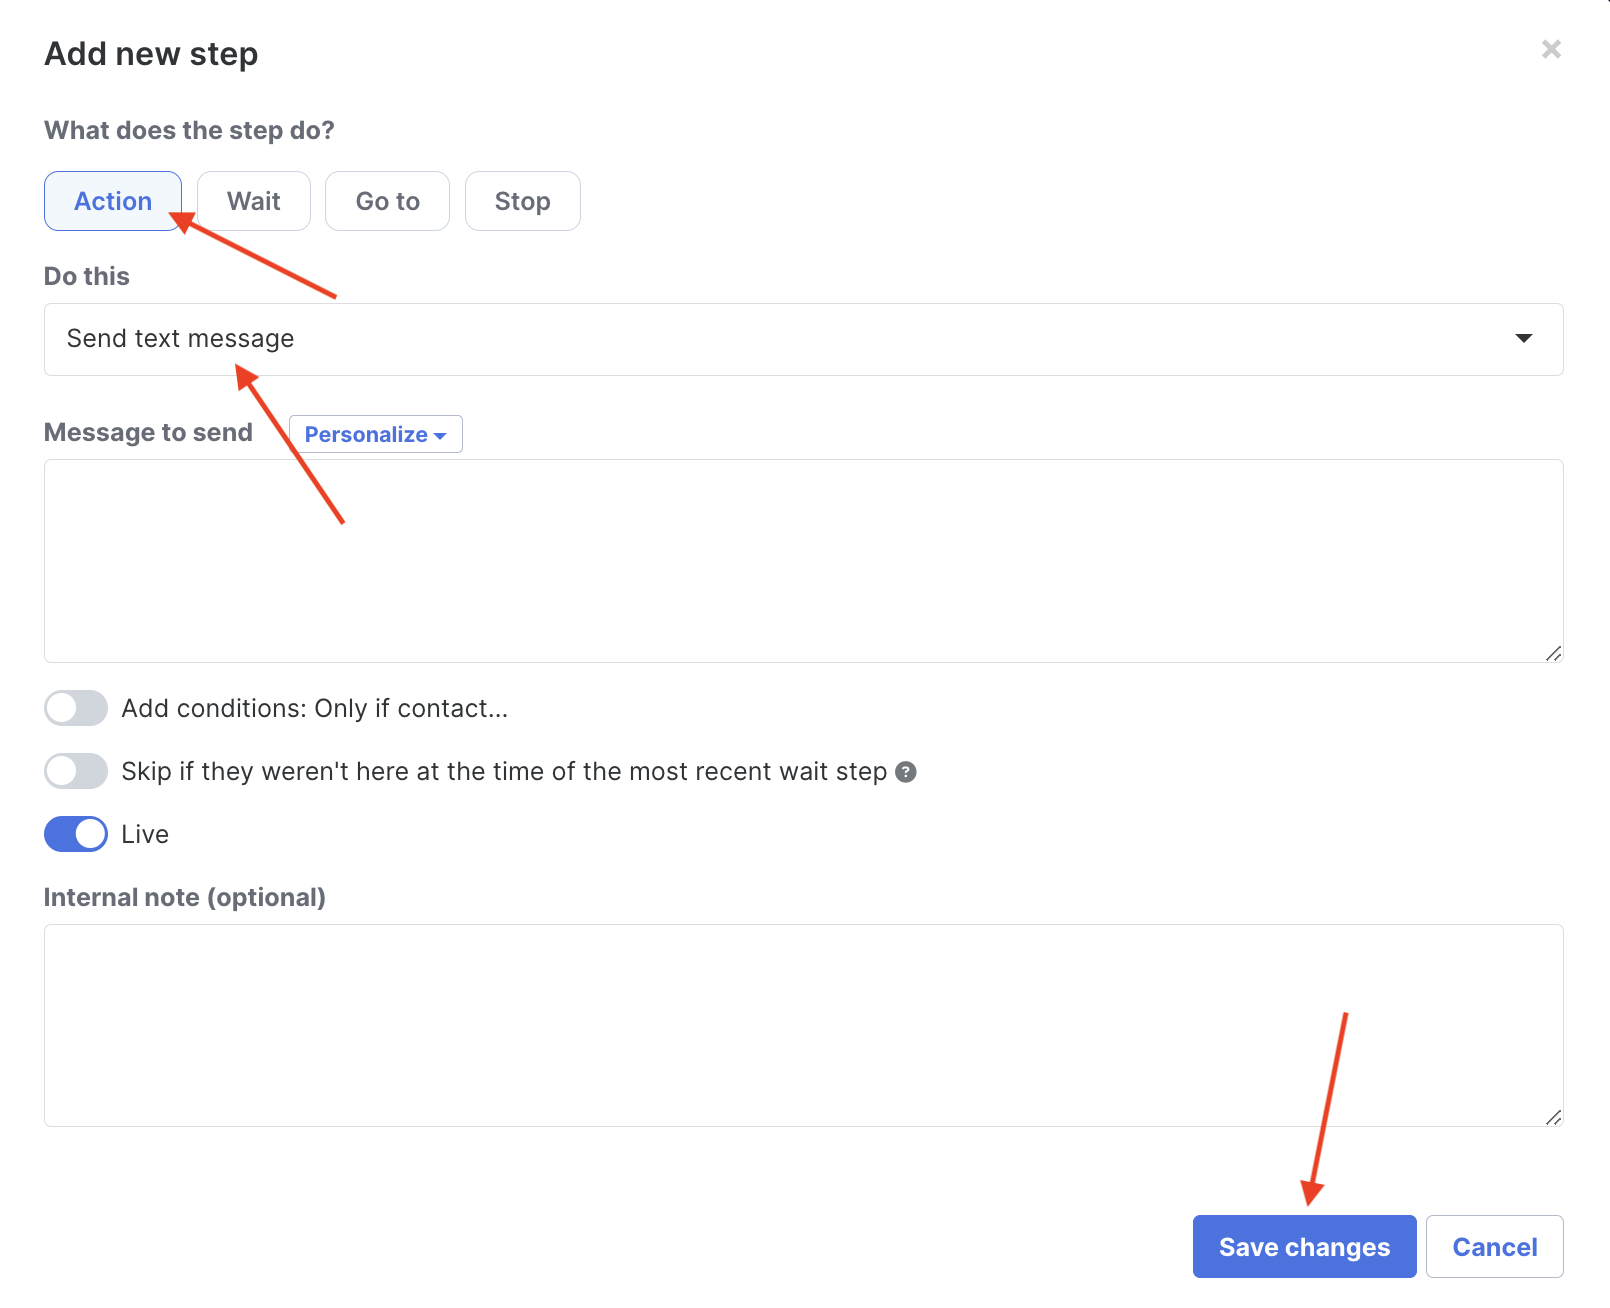
Select Action for the step
In Do this section, click the drop-down arrow and select the Send text message option
Type your text message
Click the Save changes button:
Via a Product or a List
-
Select Products or Lists from your Simplero Dashboard
Sales >> Products for Products
Contacts >> Lists for Lists
From the Products page or Lists page, locate and click on the product or list you want to perform the trigger
Select Product or Contacts from your Simplero Dashboard
From the Products tab or Lists tab, locate and click on the product or list
Select the Participants tab (for Products) or Subscribers (for Lists)
In the Participants/Subscribers screen, check the box next to the participant's name you want to perform the trigger
Click on the Select action... drop-down menu and select Send text message option:

The Send text message screen will open
Type your text message and click the Send text message button:
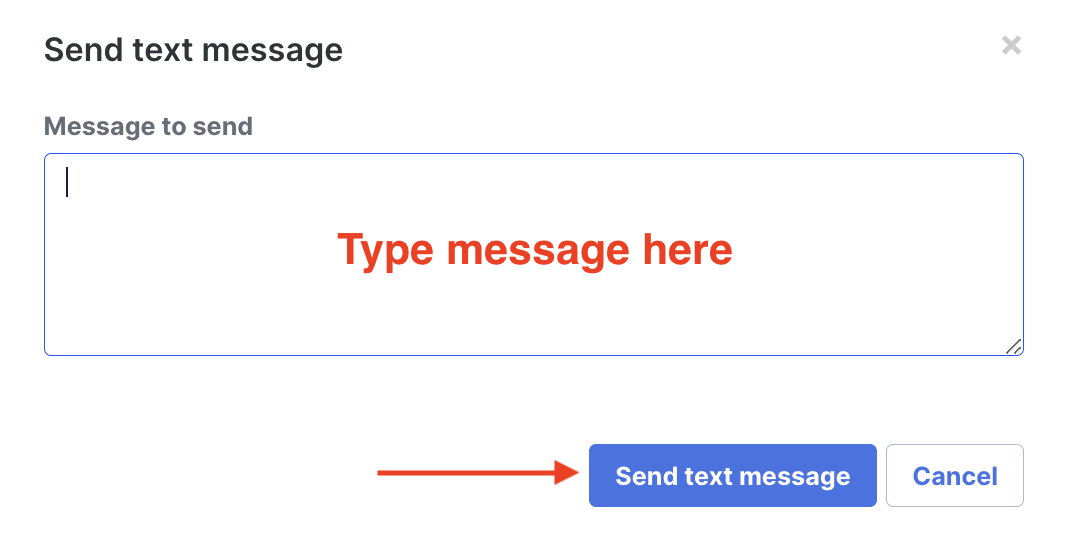
And you're good to go 🎉
Via a Segment
Step 1: Create a new List
Select Contacts from your Simplero Dashboard
Select Lists from the dropdown menu
Select the blue Create new list in the upper right corner:

Give your list a name and press the blue OK button when done
Step 2: Add your Customers/Subscribers to the List
There are 3 ways to add customers/subscribers:
-
Manual Add: This section allows you to enter the names and email address of your subscribers.
Select Contacts from your Simplero Dashboard
Select Lists from the dropdown menu
Select the list you want to edit
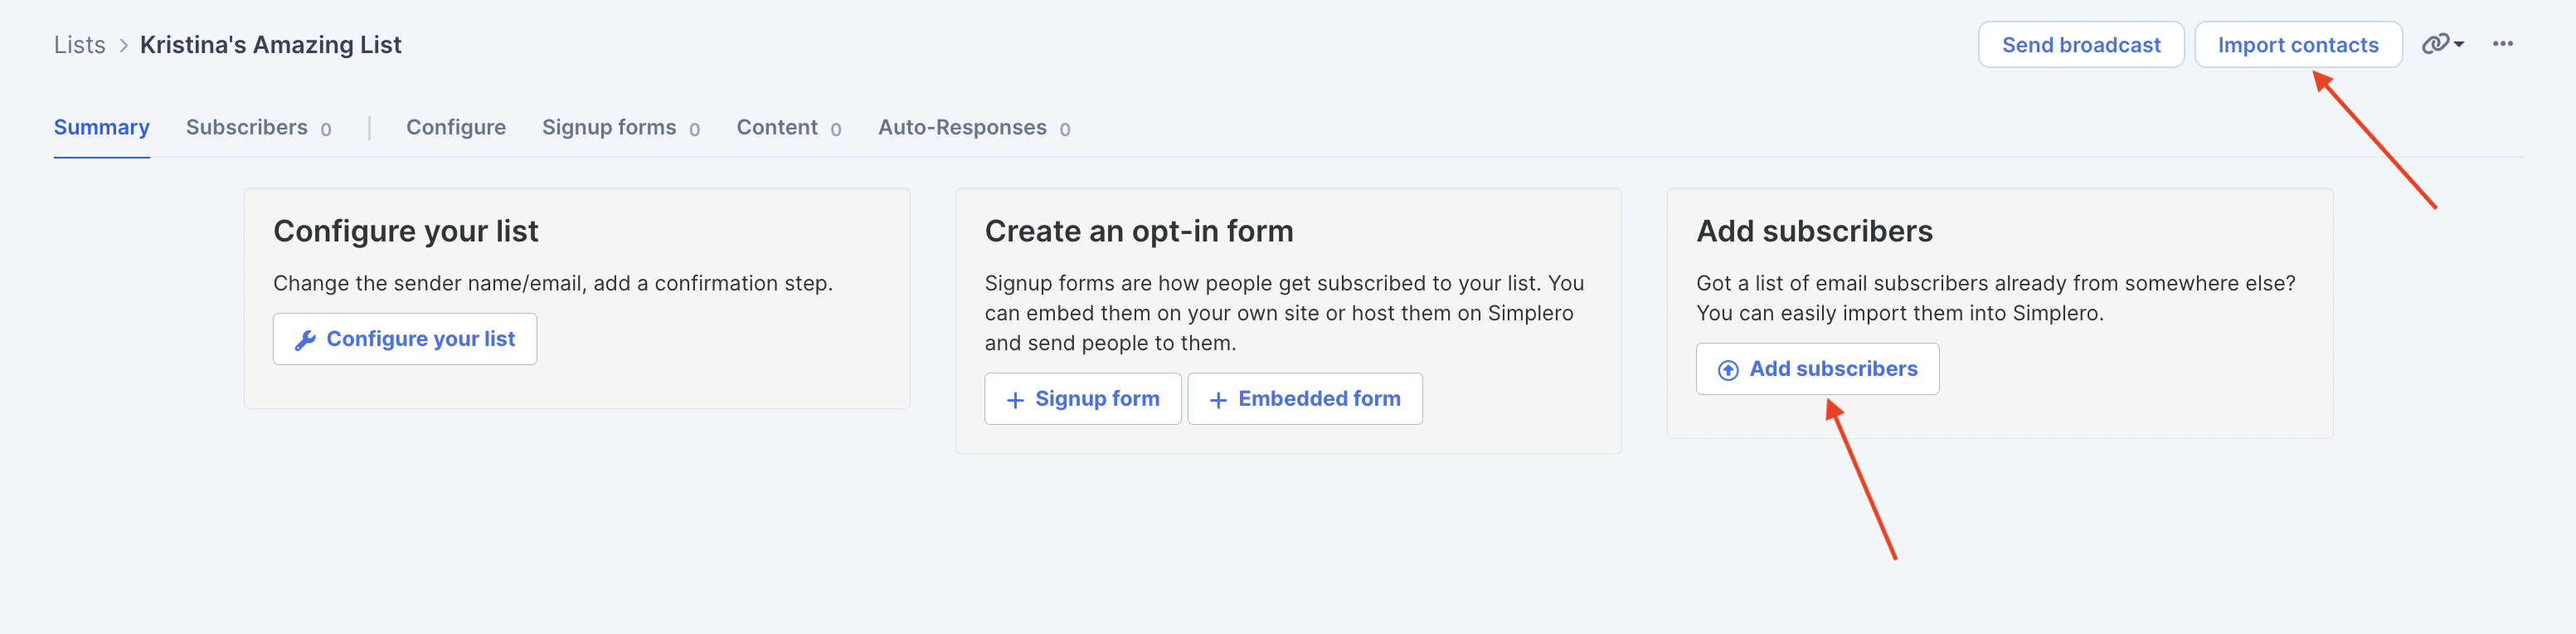
Select the Add subscribers button OR the Import contacts button in the top right hand corner:
Select the Enter Manually tab:
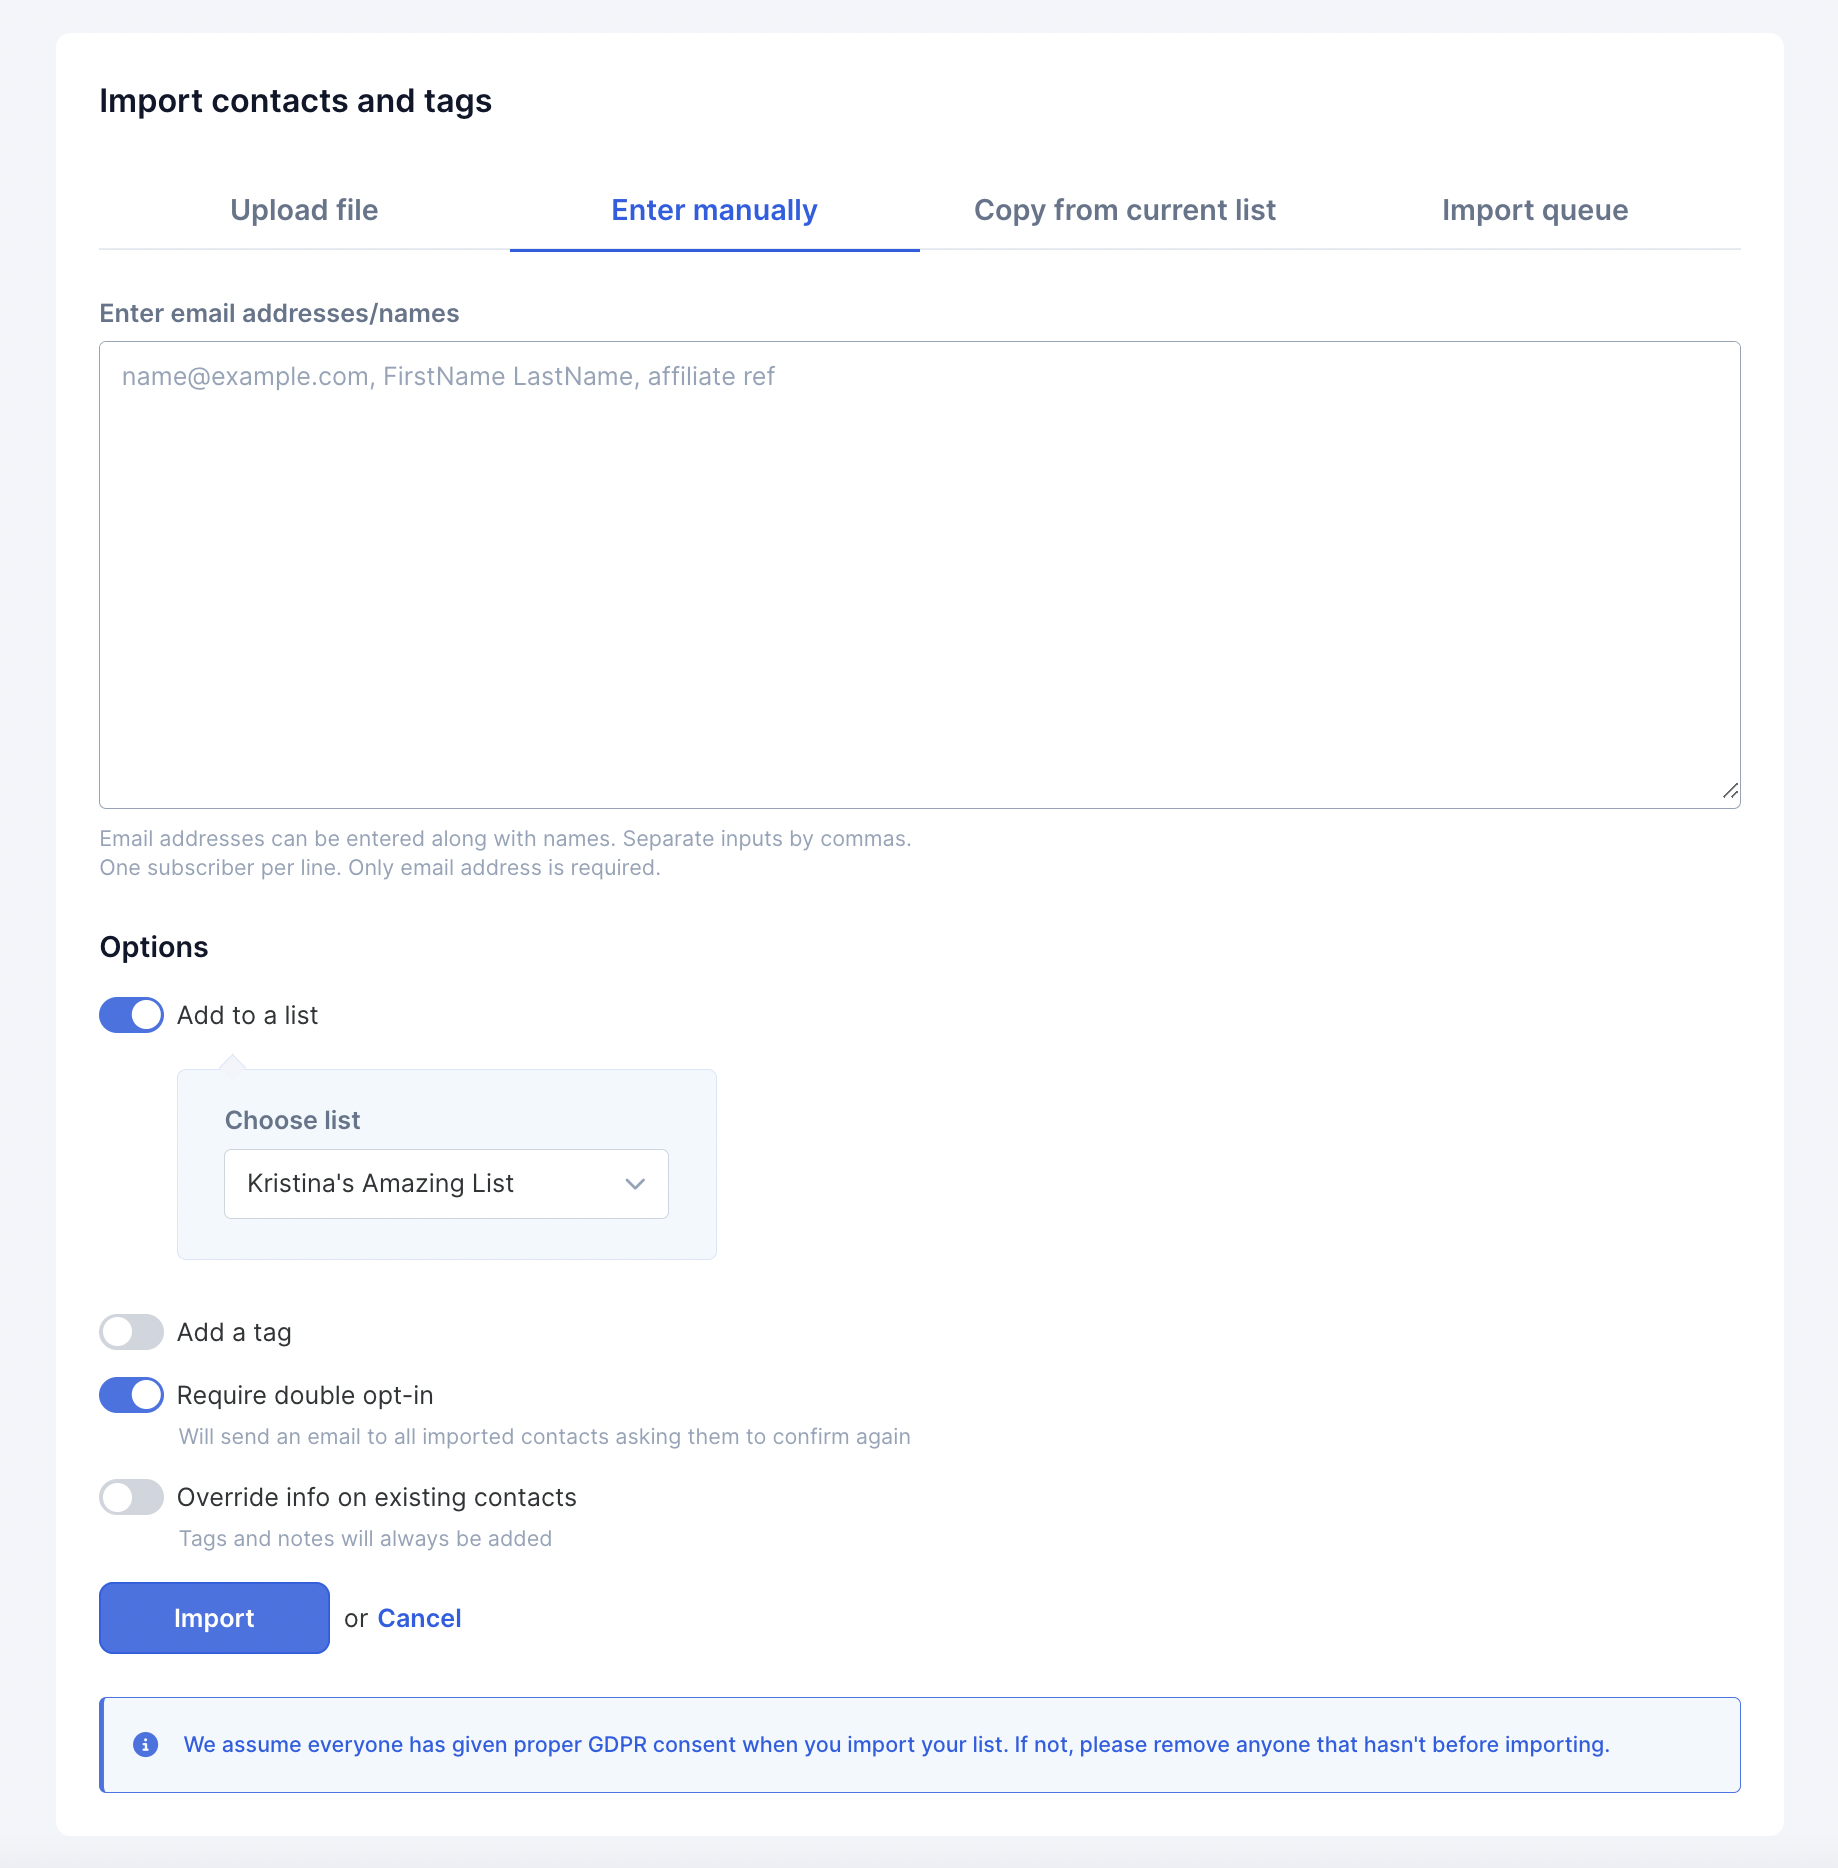
Enter the email address and name in the box with this format: Email, FirstName LastName
-
Configure your Options:
Choose the list to add to
Add a tag
Require double opt-in
Override info on existing contacts (if contacts exist in the system, we’ll update their existing record).
Click the blue Import button to add your subscribers
-
Copy Subscribers from a List or Product: This section allows you to move people from another lists or products over to this new list.
Select Contacts from your Simplero Dashboard
Select Lists from the dropdown menu
Select the list you want to edit
Select the + Add subscribers tab
Select the Copy from current list tab:
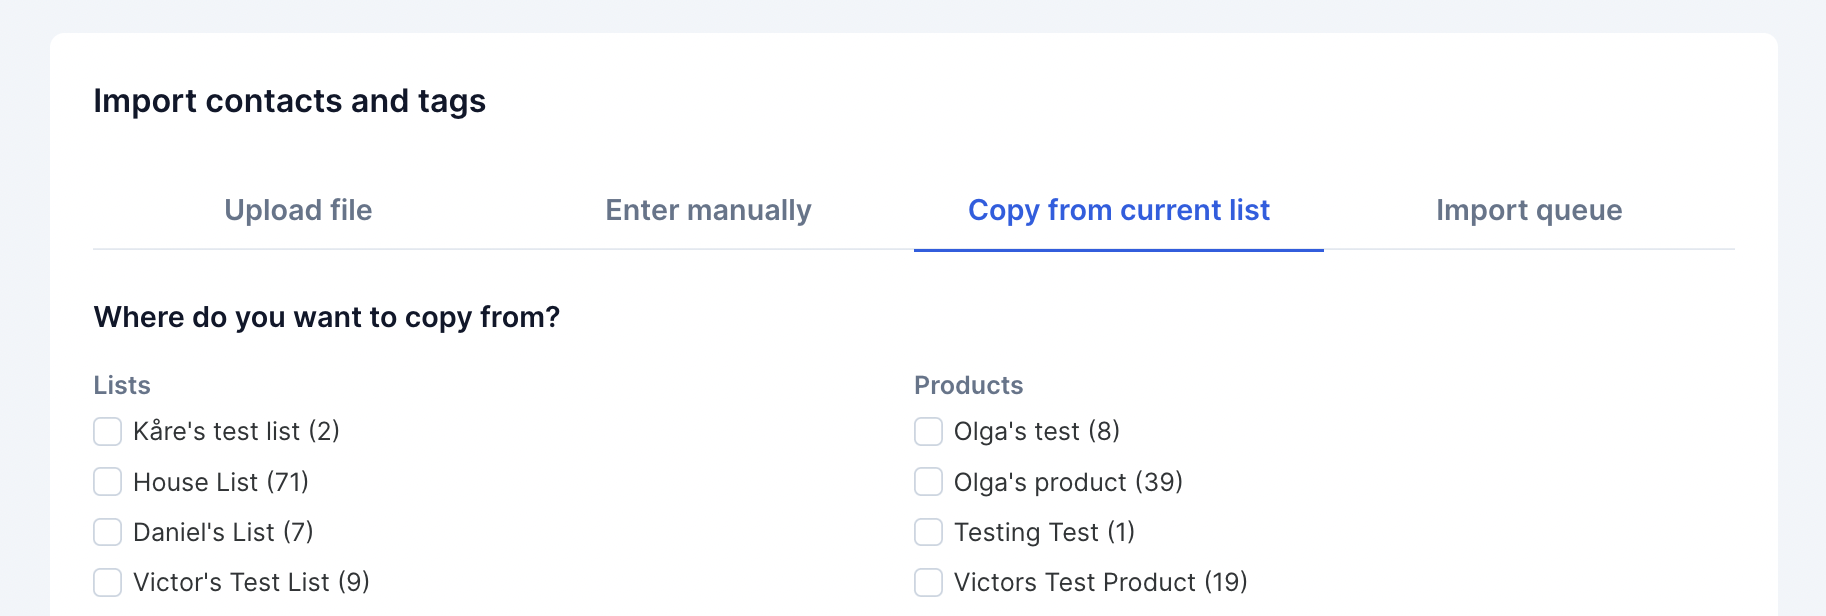
Select the list or product from the List or Product columns
-
Configure your Options:
Choose the list to add to
Add a tag
Require double opt-in
Override info on existing contacts (if contacts exist in the system, we’ll update their existing record).
Click the blue Copy now button to add your subscribers
-
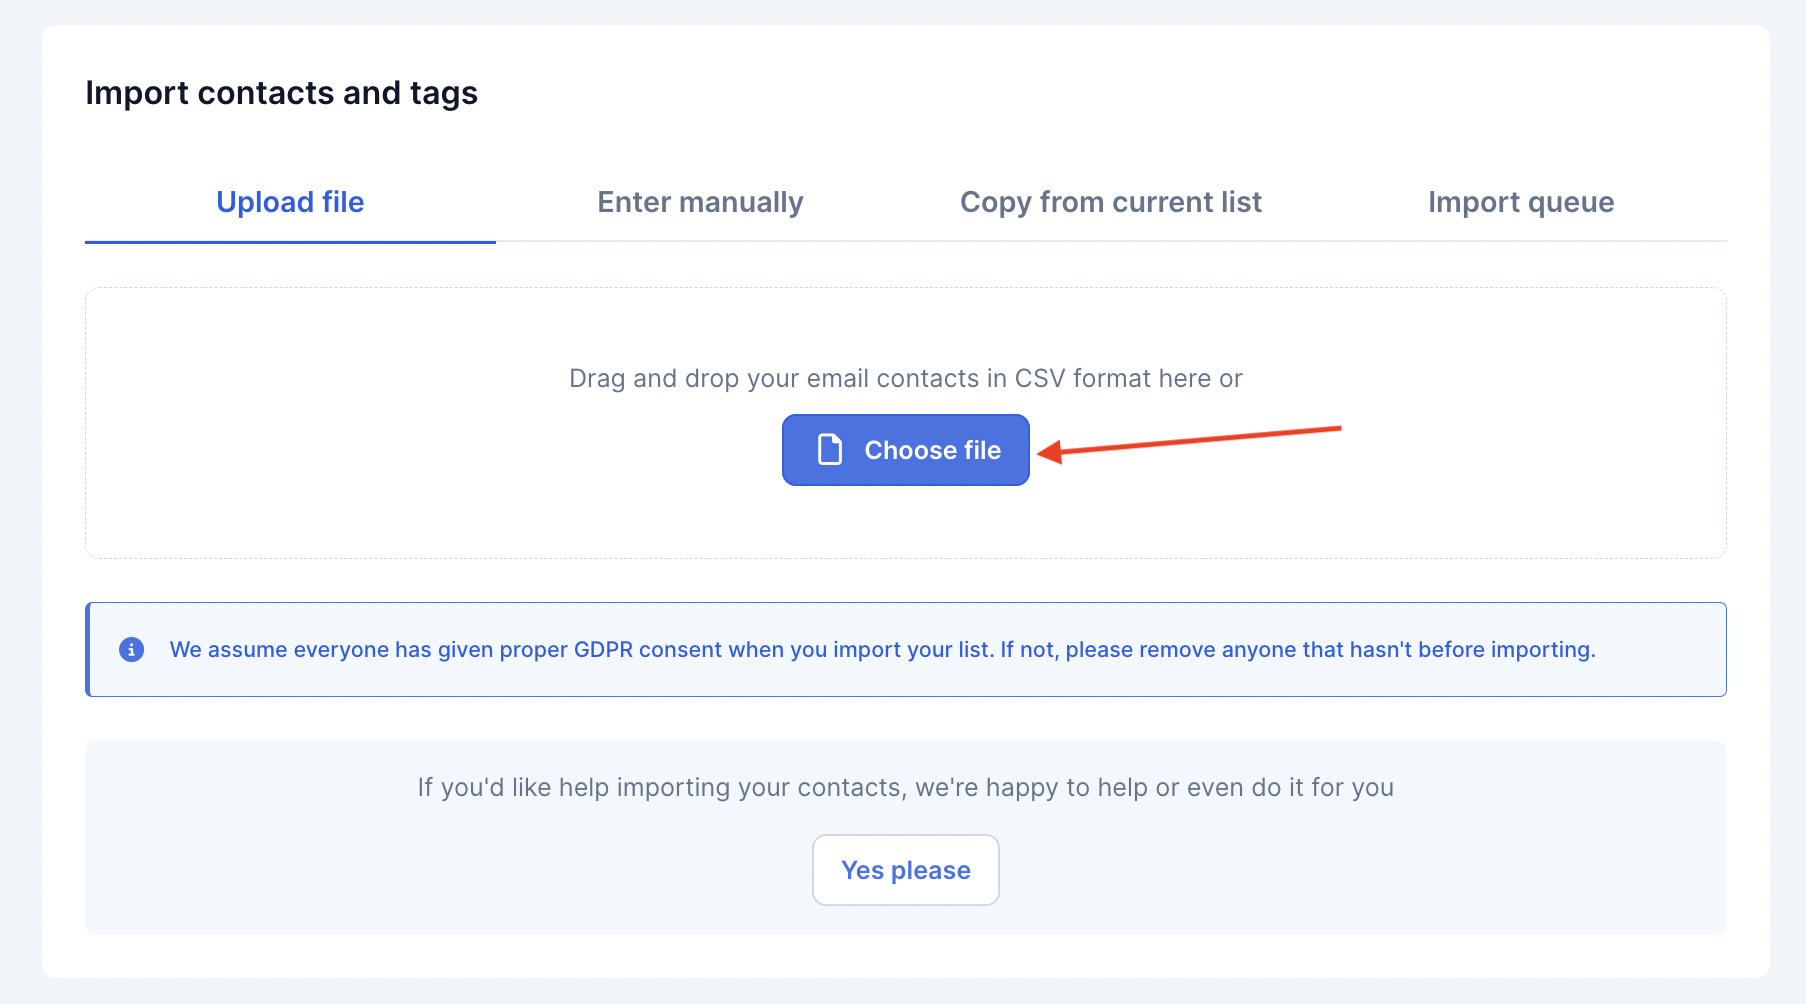
Upload File: This feature allows you to import a list you’ve saved in CSV format.
Before importing, make sure the encoding of the file is UTF-8. That's an indication of how special characters - basically anything but the 26 letters of the English alphabet and the digits 0-9 - are stored. If it's not UTF-8, then it's probably going to get rejected by Simplero, and you'll need to change the encoding before uploading. Here's an online tool that can help you detect encoding and convert it to UTF-8.
Select the Contacts from your Simplero Dashboard
Select Lists from the dropdown menu
Select the list you want to edit
Select the Add subscribers button OR the Import contacts button in the top right hand corner
Select the Upload file tab
Click the Choose file button to choose your subscribers list from your computer:
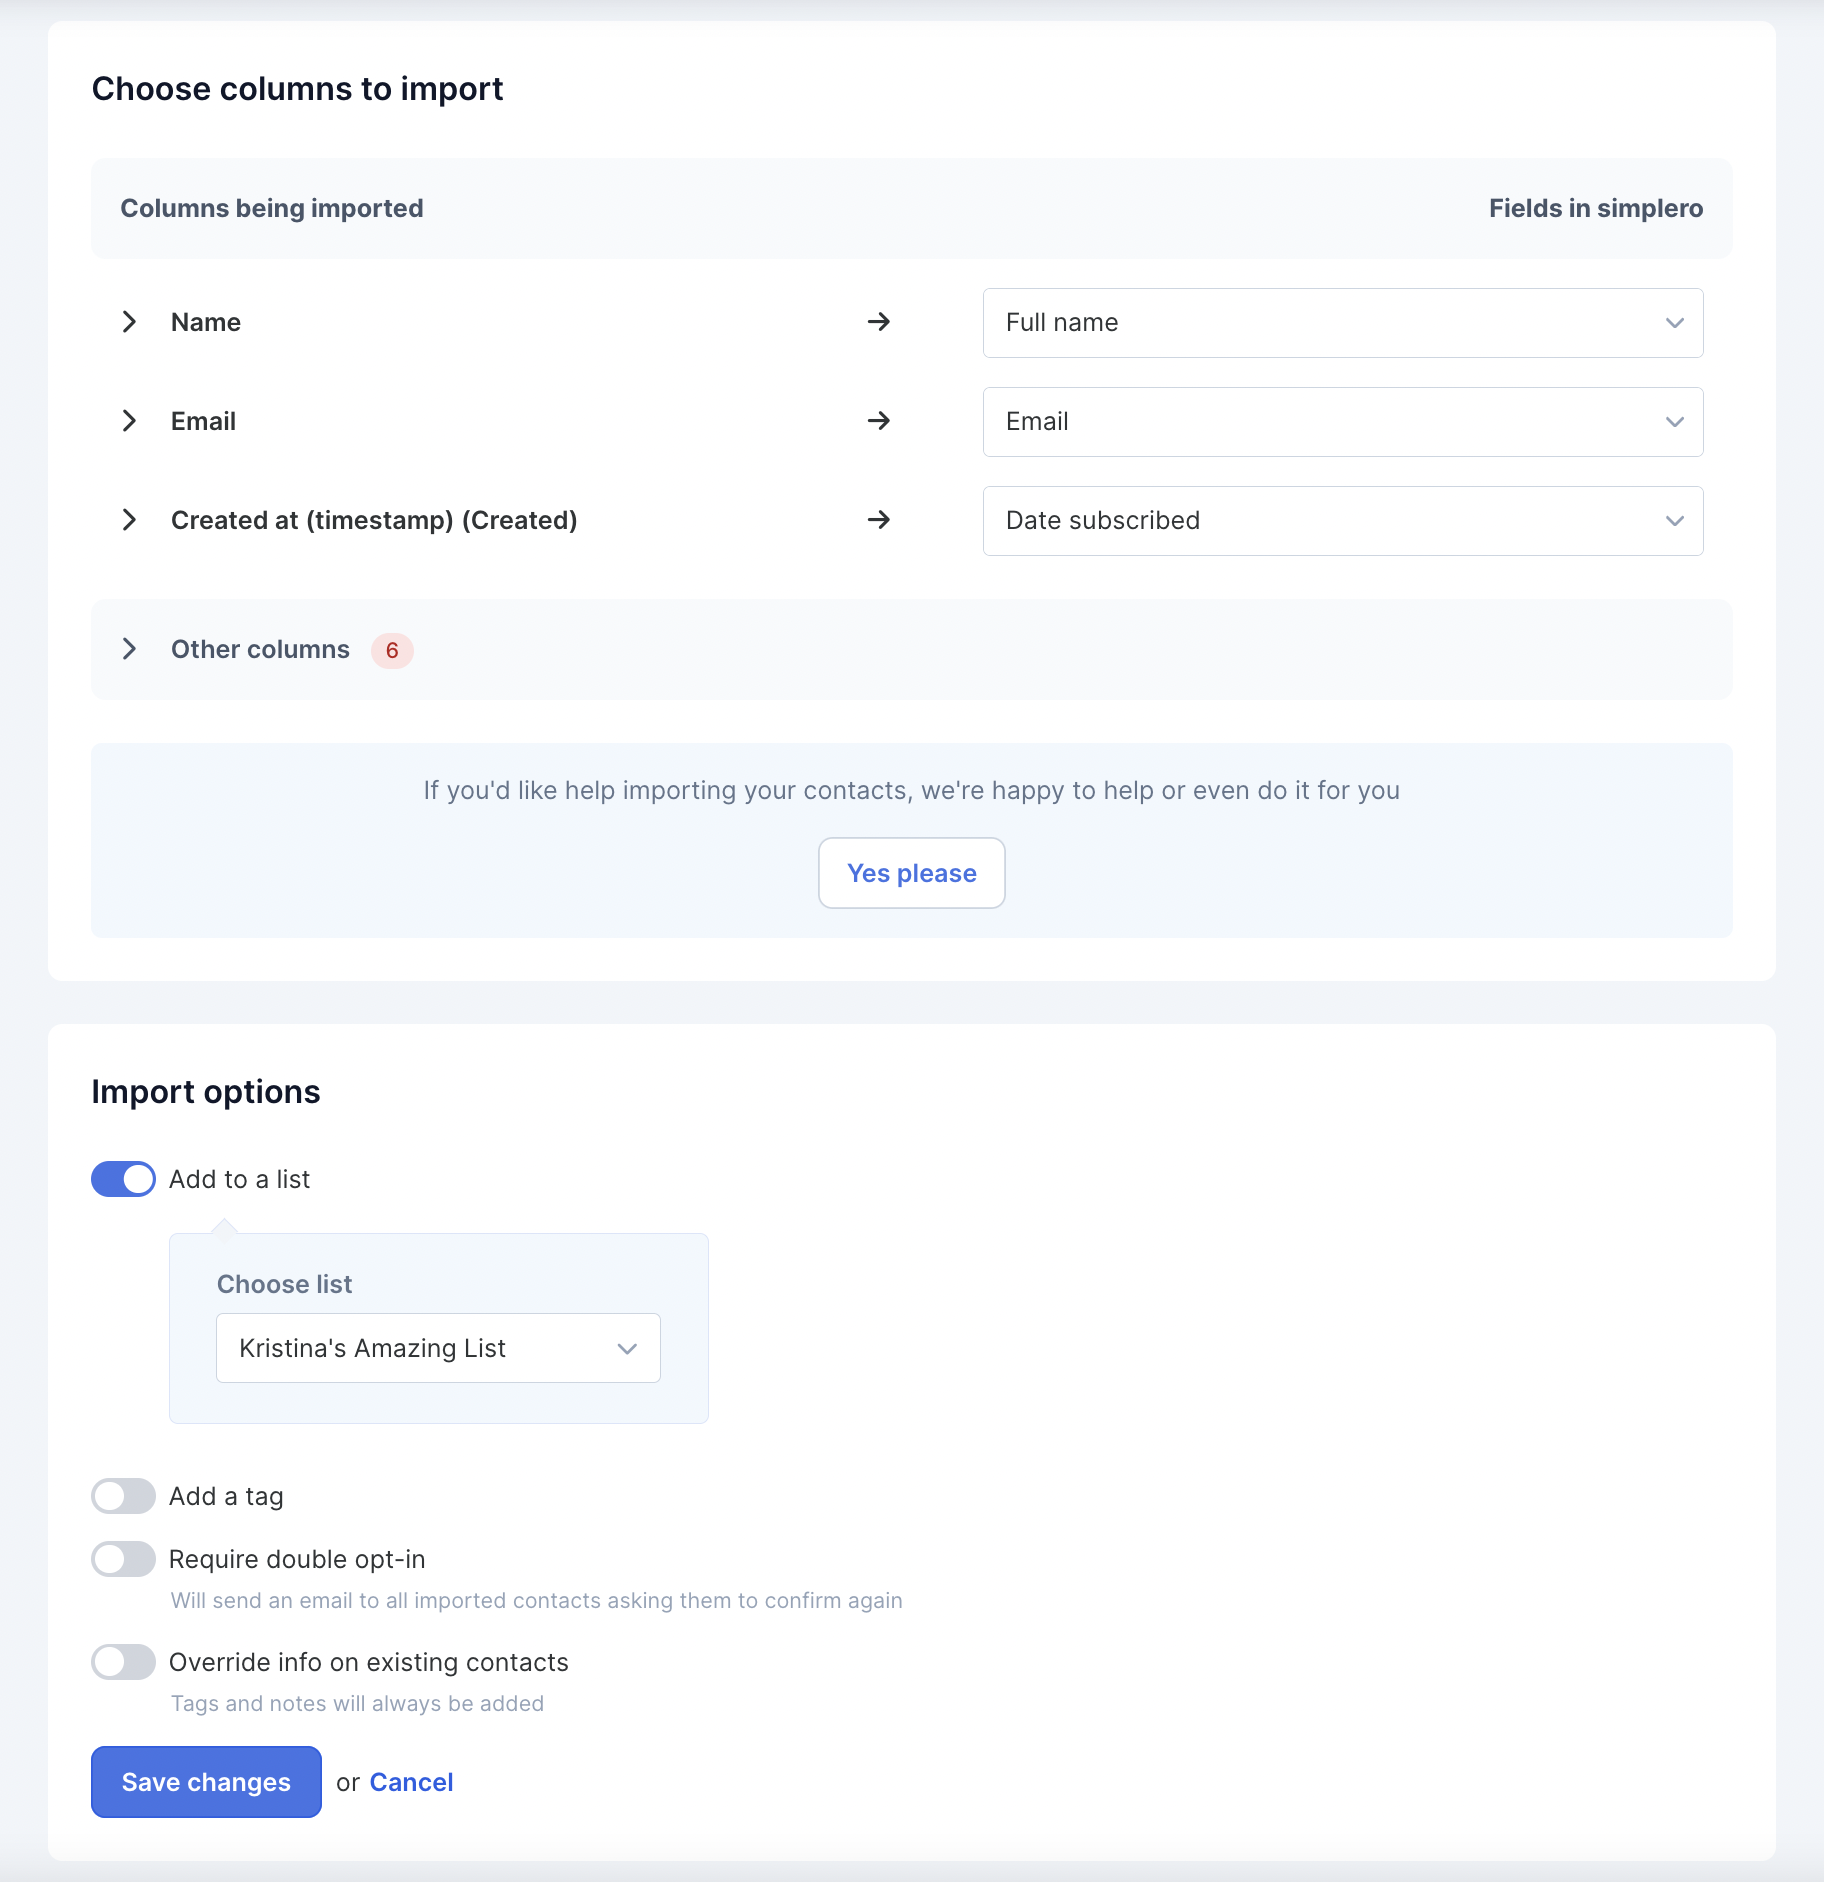
Choose Columns to import
Configure your Import options
Press the Save changes button to upload the file:
NOTE! If your file downloaded as a zip file, you’ll need to open the zip file and save the CSV file before importing.
***If you’re migrating from another mail platform, check out our guides on Migrating
Step 3: Create a Segment
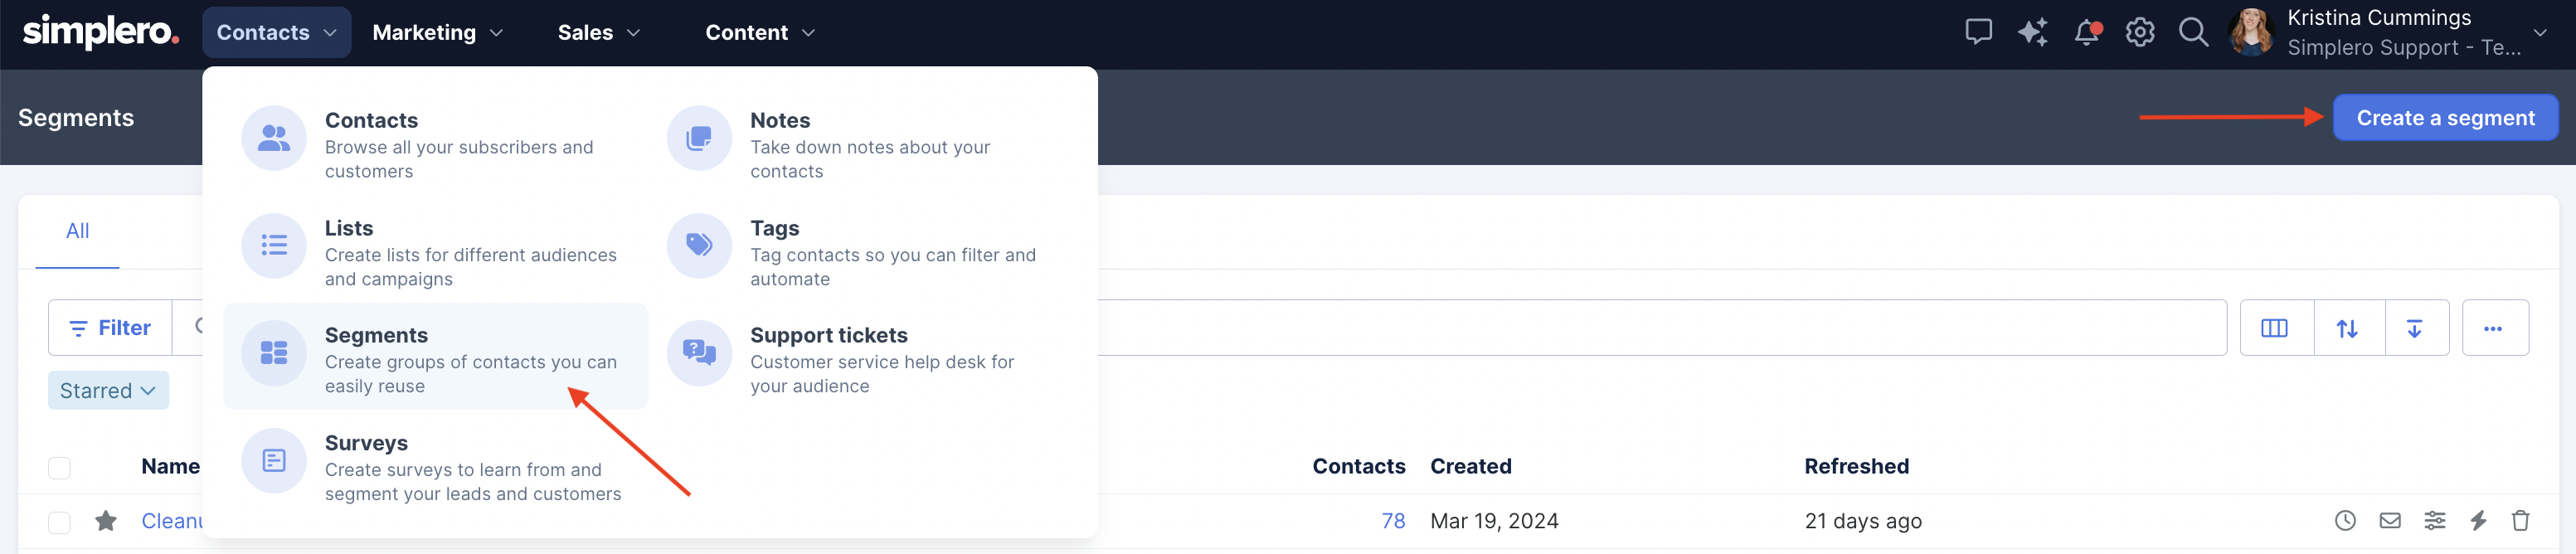
Select Contacts from your Simplero Dashboard
Select Segments from the dropdown menu
Click the + Create a segment button located in the upper right corner:
In the Include section, choose where you are collecting these contacts from (e.g. a list, broadcast, product, auto-response, automation, space, etc.) and select the Sources for these Types of recipients:
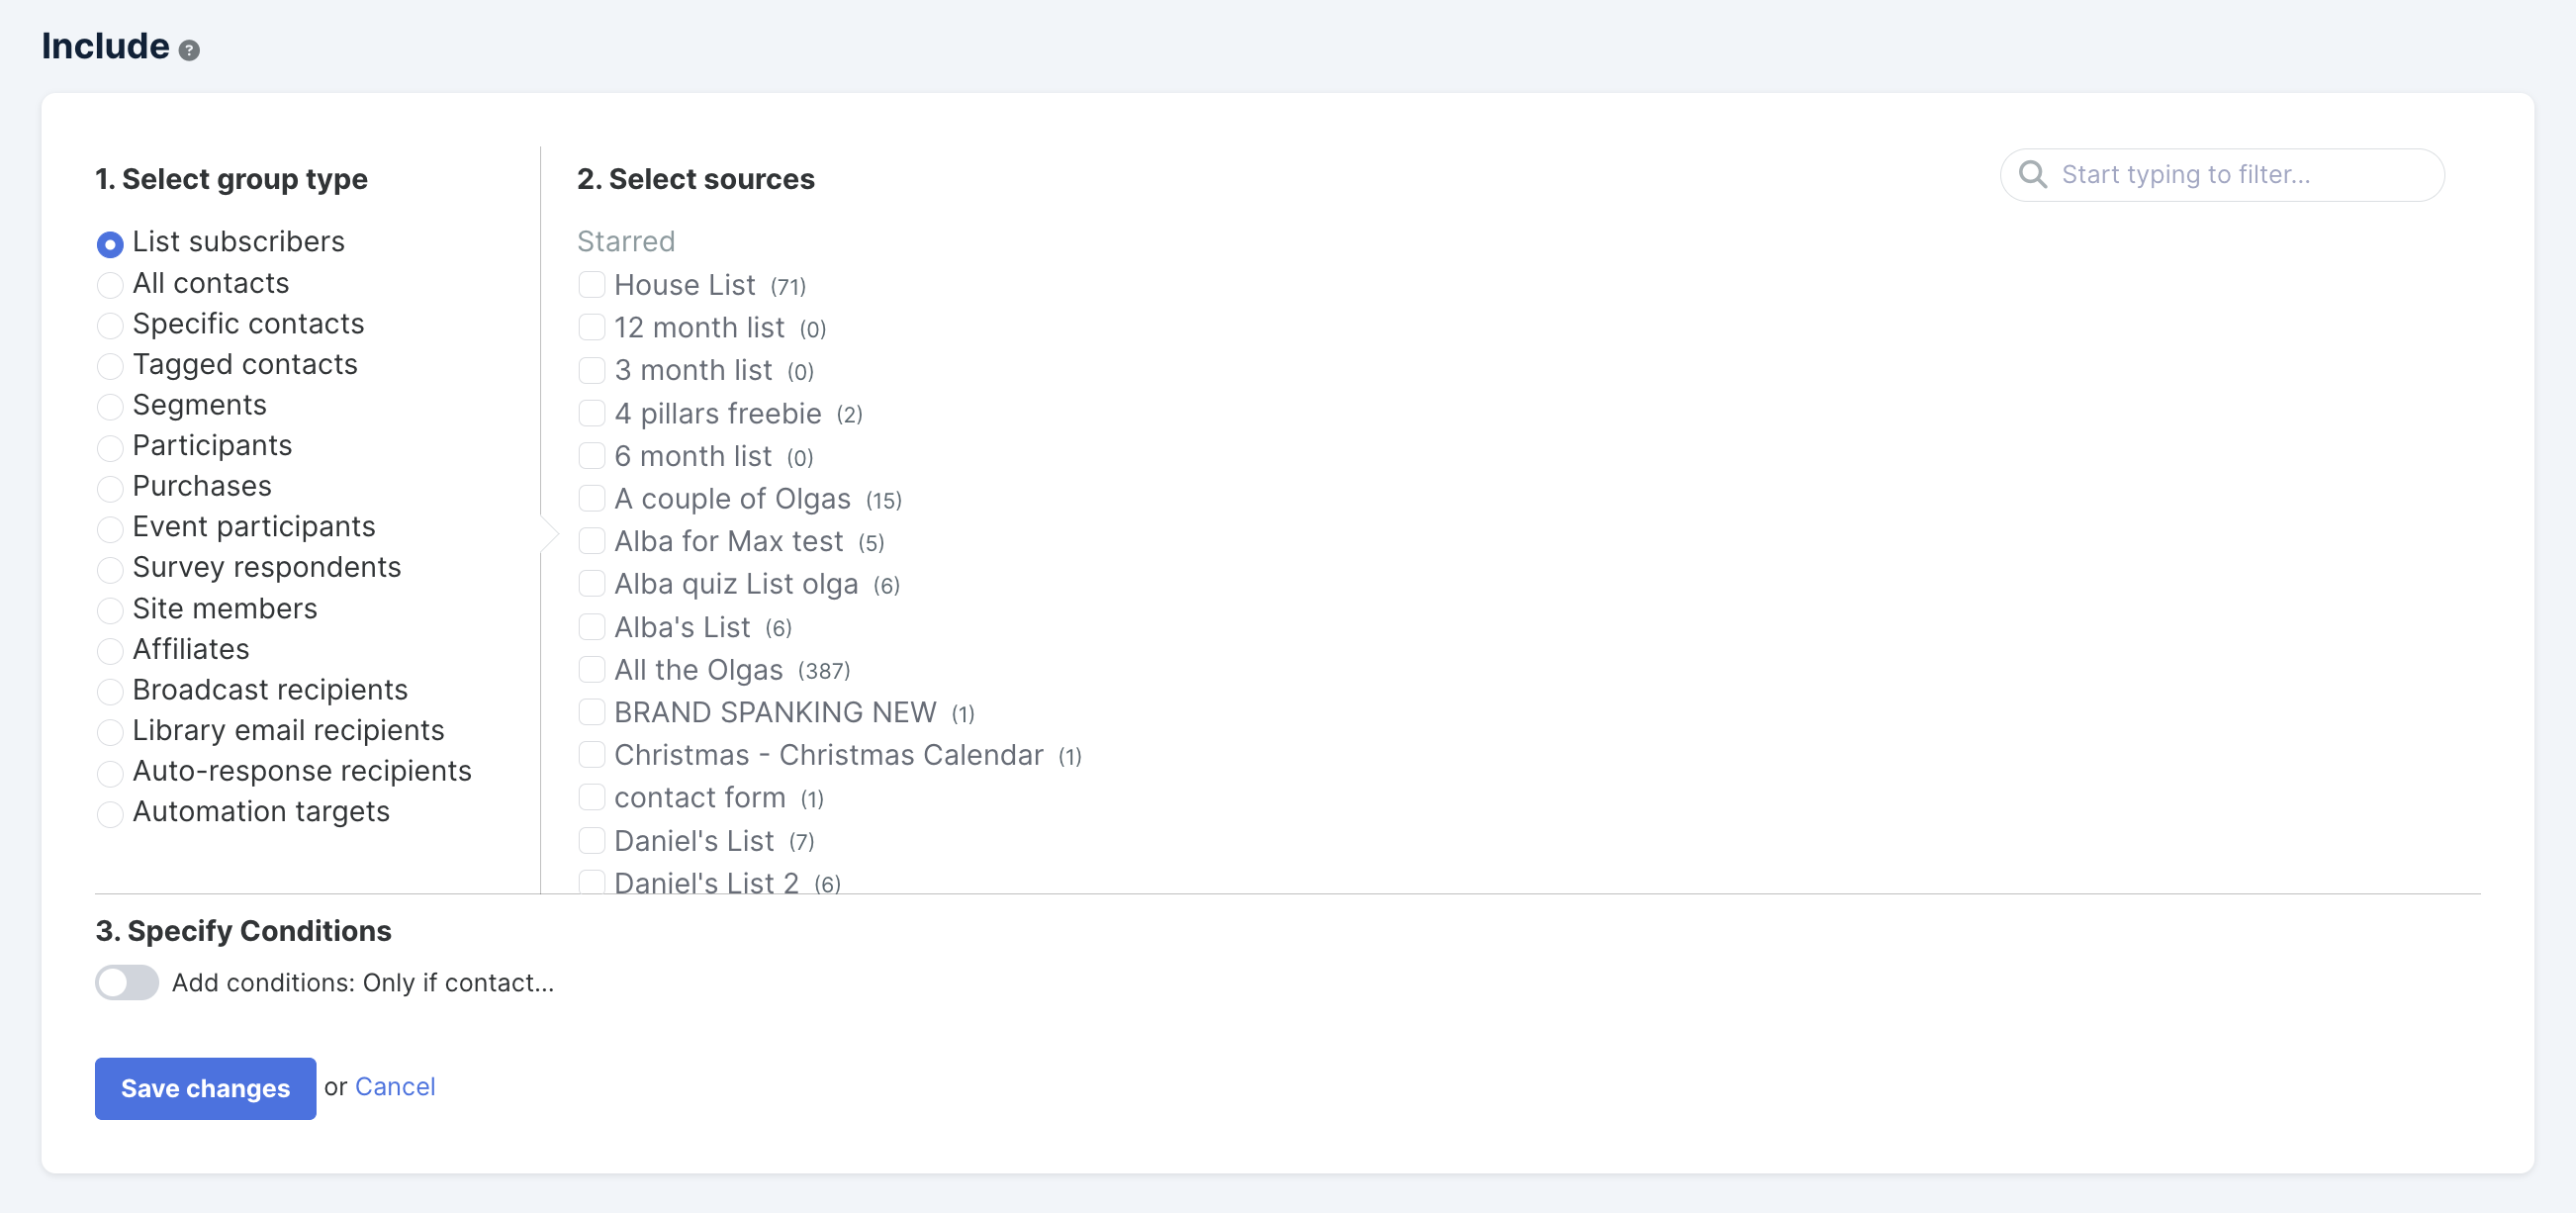
These are the contacts you want to send the text message to.-
Click the Save changes button and this will start populating all the contacts for that segment
NOTE! You don't need to select anything in the filter, it will automatically choose "active subscribers"
Once the list is done "calculating" the contacts, click the Perform action... button:
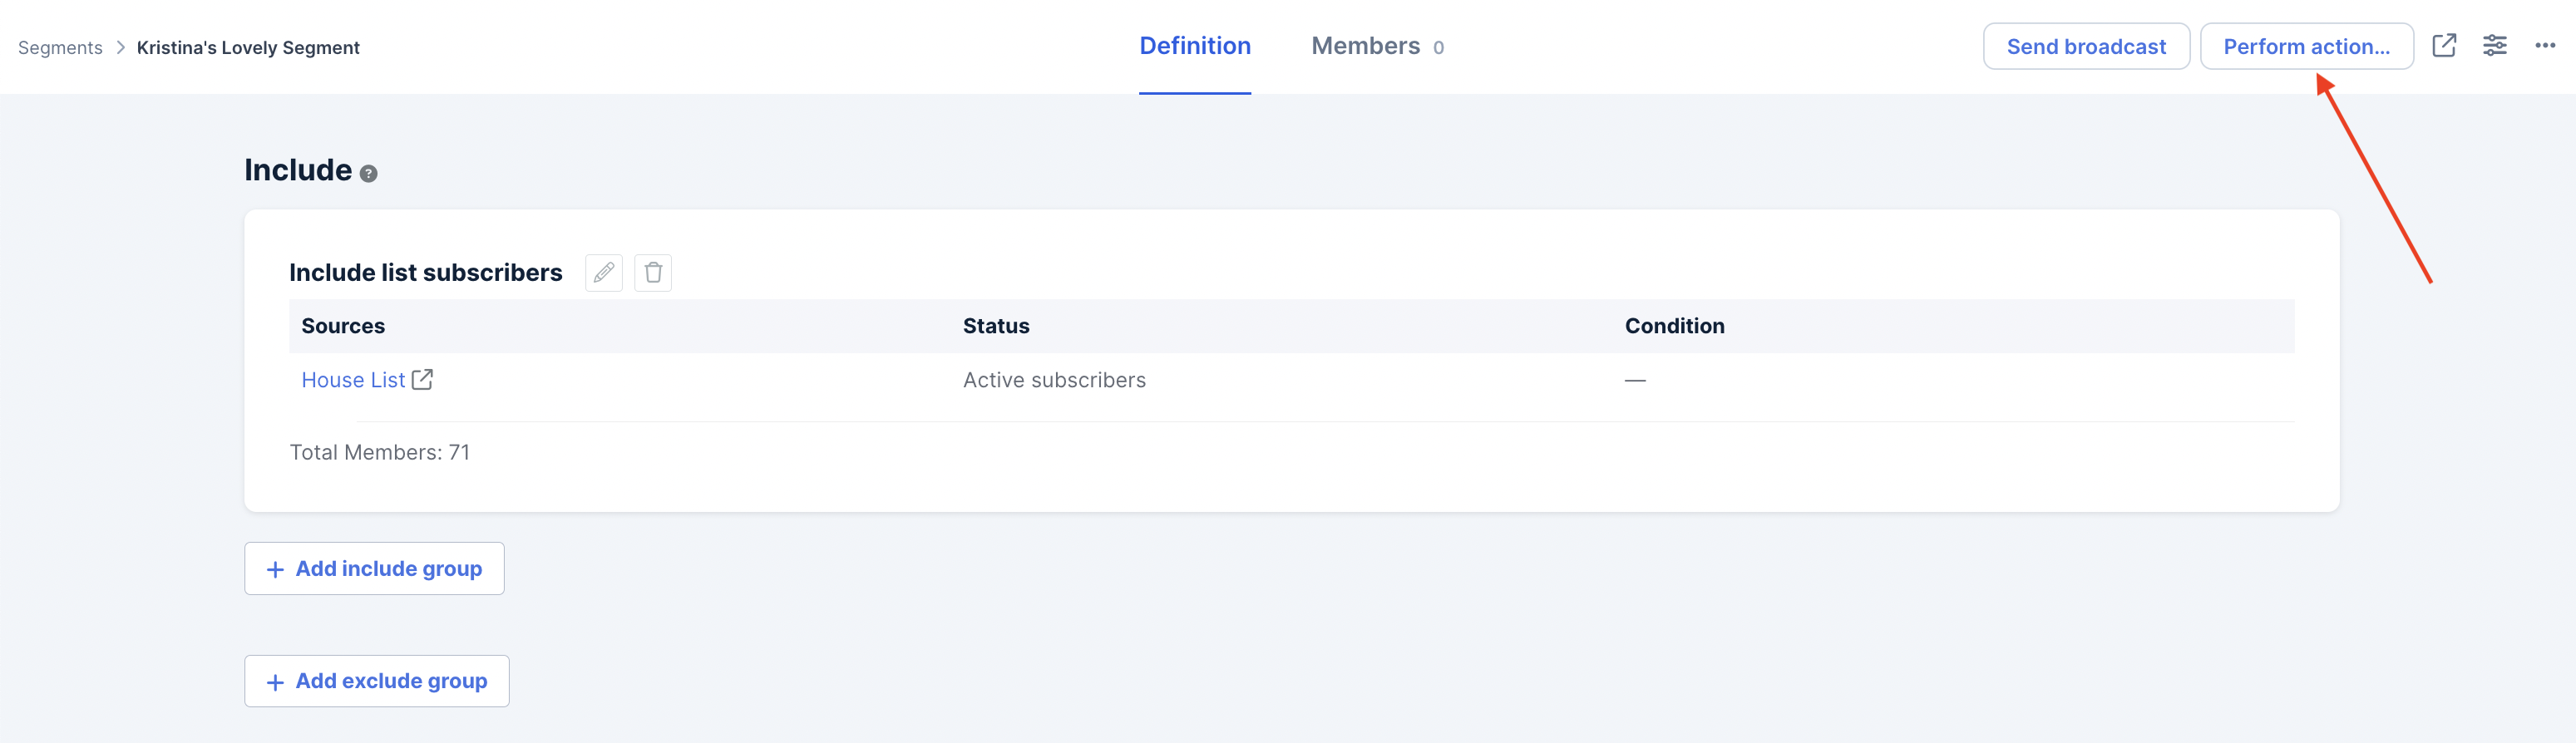
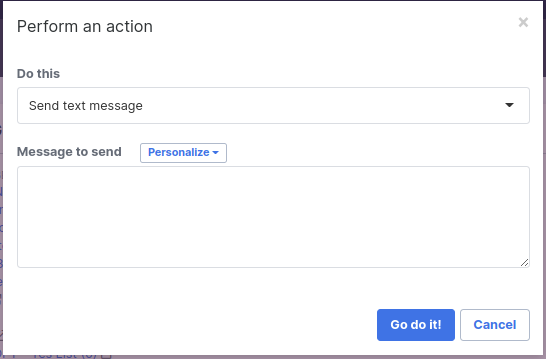
Under Do this, select Text message to customer, type your message and click the Go do it! button:
NOTE!
-
Due to the way text messages work, a message longer than 153 characters, or 67 characters if special characters are used, will be broken into multiple text message segments.
A message of 240 characters will, therefore, be sent and billed as 2 messages if no special characters are used, or 4 messages if the message contains special characters. The way messages are broken up into individual messages depends on the country and carrier.
As mandated by the IMDA, A2P messages sent into Singapore from International Phone Numbers will be blocked from July 2023.
Some Nordic countries (Finland, Norway, Denmark, Iceland) have started blocking messages that contain URLs
We recommend not including URLs in text messages - They are often marked as spam and don't get delivered
Billing notes
Each sent message is billed. That means if a text is broken into 3 sent messages you are billed for 3 texts.
Our plans do not include text messages. To see your current usage from your account, go to Settings >> Plan and Billing. Simplero does not stop you from sending texts. Instead, you are billed at the end of the billing cycle for the total cost. The rates can be found on the text message pricing page.
Do also note, that administrator text message notifications about new purchases (set up under Settings >> Product) are not counted towards your usage of text messages.
Numbers used for SMS
The SMS will be sent from our default numbers below:
Texts to Denmark come from +45 92 45 61 87
Non-Danish texts will come from either 855 230 9777 or 855 303 2777
Numbers usually need to be added as +(Country code) as opposed to 00(Country Code)
Text message replies
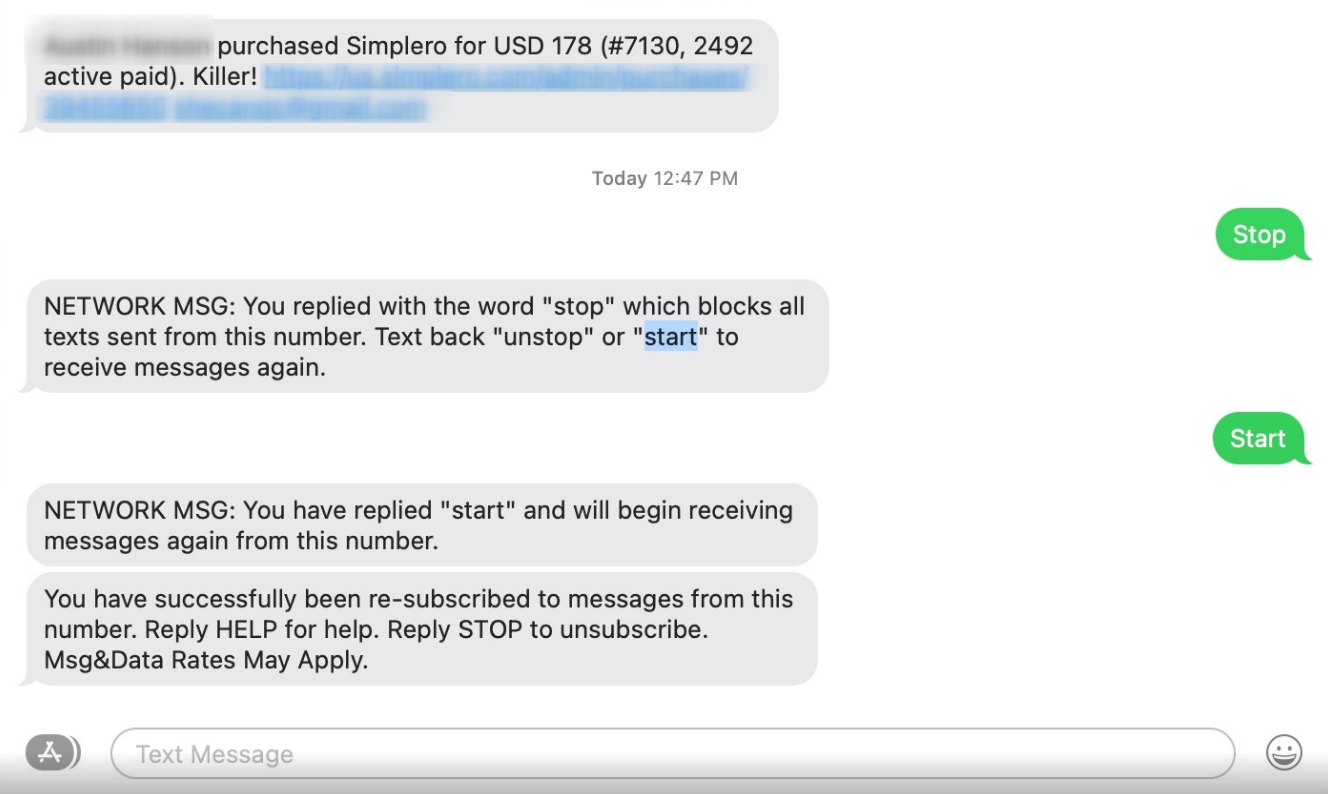
Please note that our system is not set up to receive replies to text messages/SMS you send out, with the exception of Start/Stop.
Recipients have the option to reply with the text ‘Stop’ which will stop the sending of ALL texts from ANY Simplero account.
They can resume receiving text messages by replying with ‘Start’.
Suite 92530
New York, NY 10003
United States