

Connecting with your customers is a great way to create loyalty and build lasting relationships, and consistent newsletters help you do just that. Newsletters keep your customers and subscribers updated on everything you've got going on, like what podcasts you're featured on, interviews you're doing, new products you have, new blog posts, programs and courses you're launching, and so much more.
But we know you're busy, and it's not easy to write a newsletter every single week. That's why the newsletter section in Simplero helps make it simple. With Simplero's newsletter scheduler, you can set up the foundation for your newsletter that covers your Newsletter name, Recipients, Email Settings, and the Schedule.
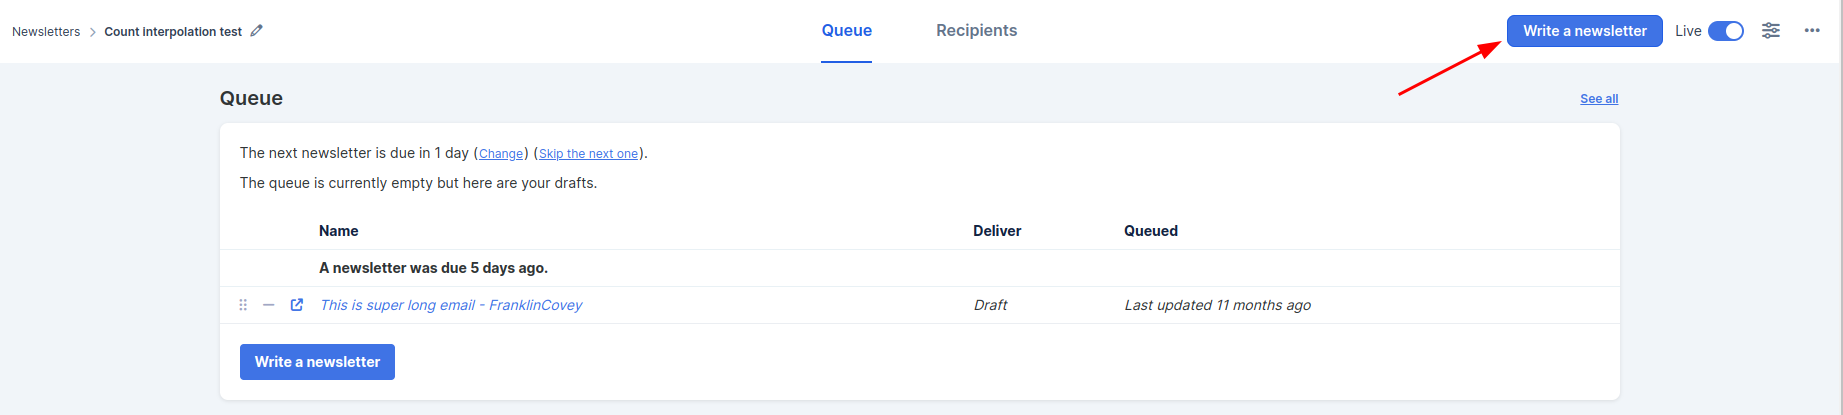
Once you set up your schedule, you'll be able to see all the drafts, queued, and delivered newsletters in one place. From the same screen, you can write as many newsletters as you want in advance, easily find them, and schedule them to be delivered at the perfect time.
This process gives you a chance to get ahead of the game, and once you schedule your newsletter, it's set it and forget it! You can also create a reminder so that you get notified when it's time to write or send another newsletter, so you never miss a chance to connect with your customers.
Creating a Newsletter
The first step to using the newsletter section is to set up the basic framework for your newsletter. This is where you set up your newsletter name, who it goes out to, where it's sent, how often it's delivered, and when you want to be reminded about writing it.
Here's the step by step:
Select Marketing from your Simplero Dashboard.
Select Newsletters from the dropdown menu
Create a Newsletter by clicking the blue Create a newsletter schedule button in the upper right corner.

Enter the information for your New Newsletter Schedule.
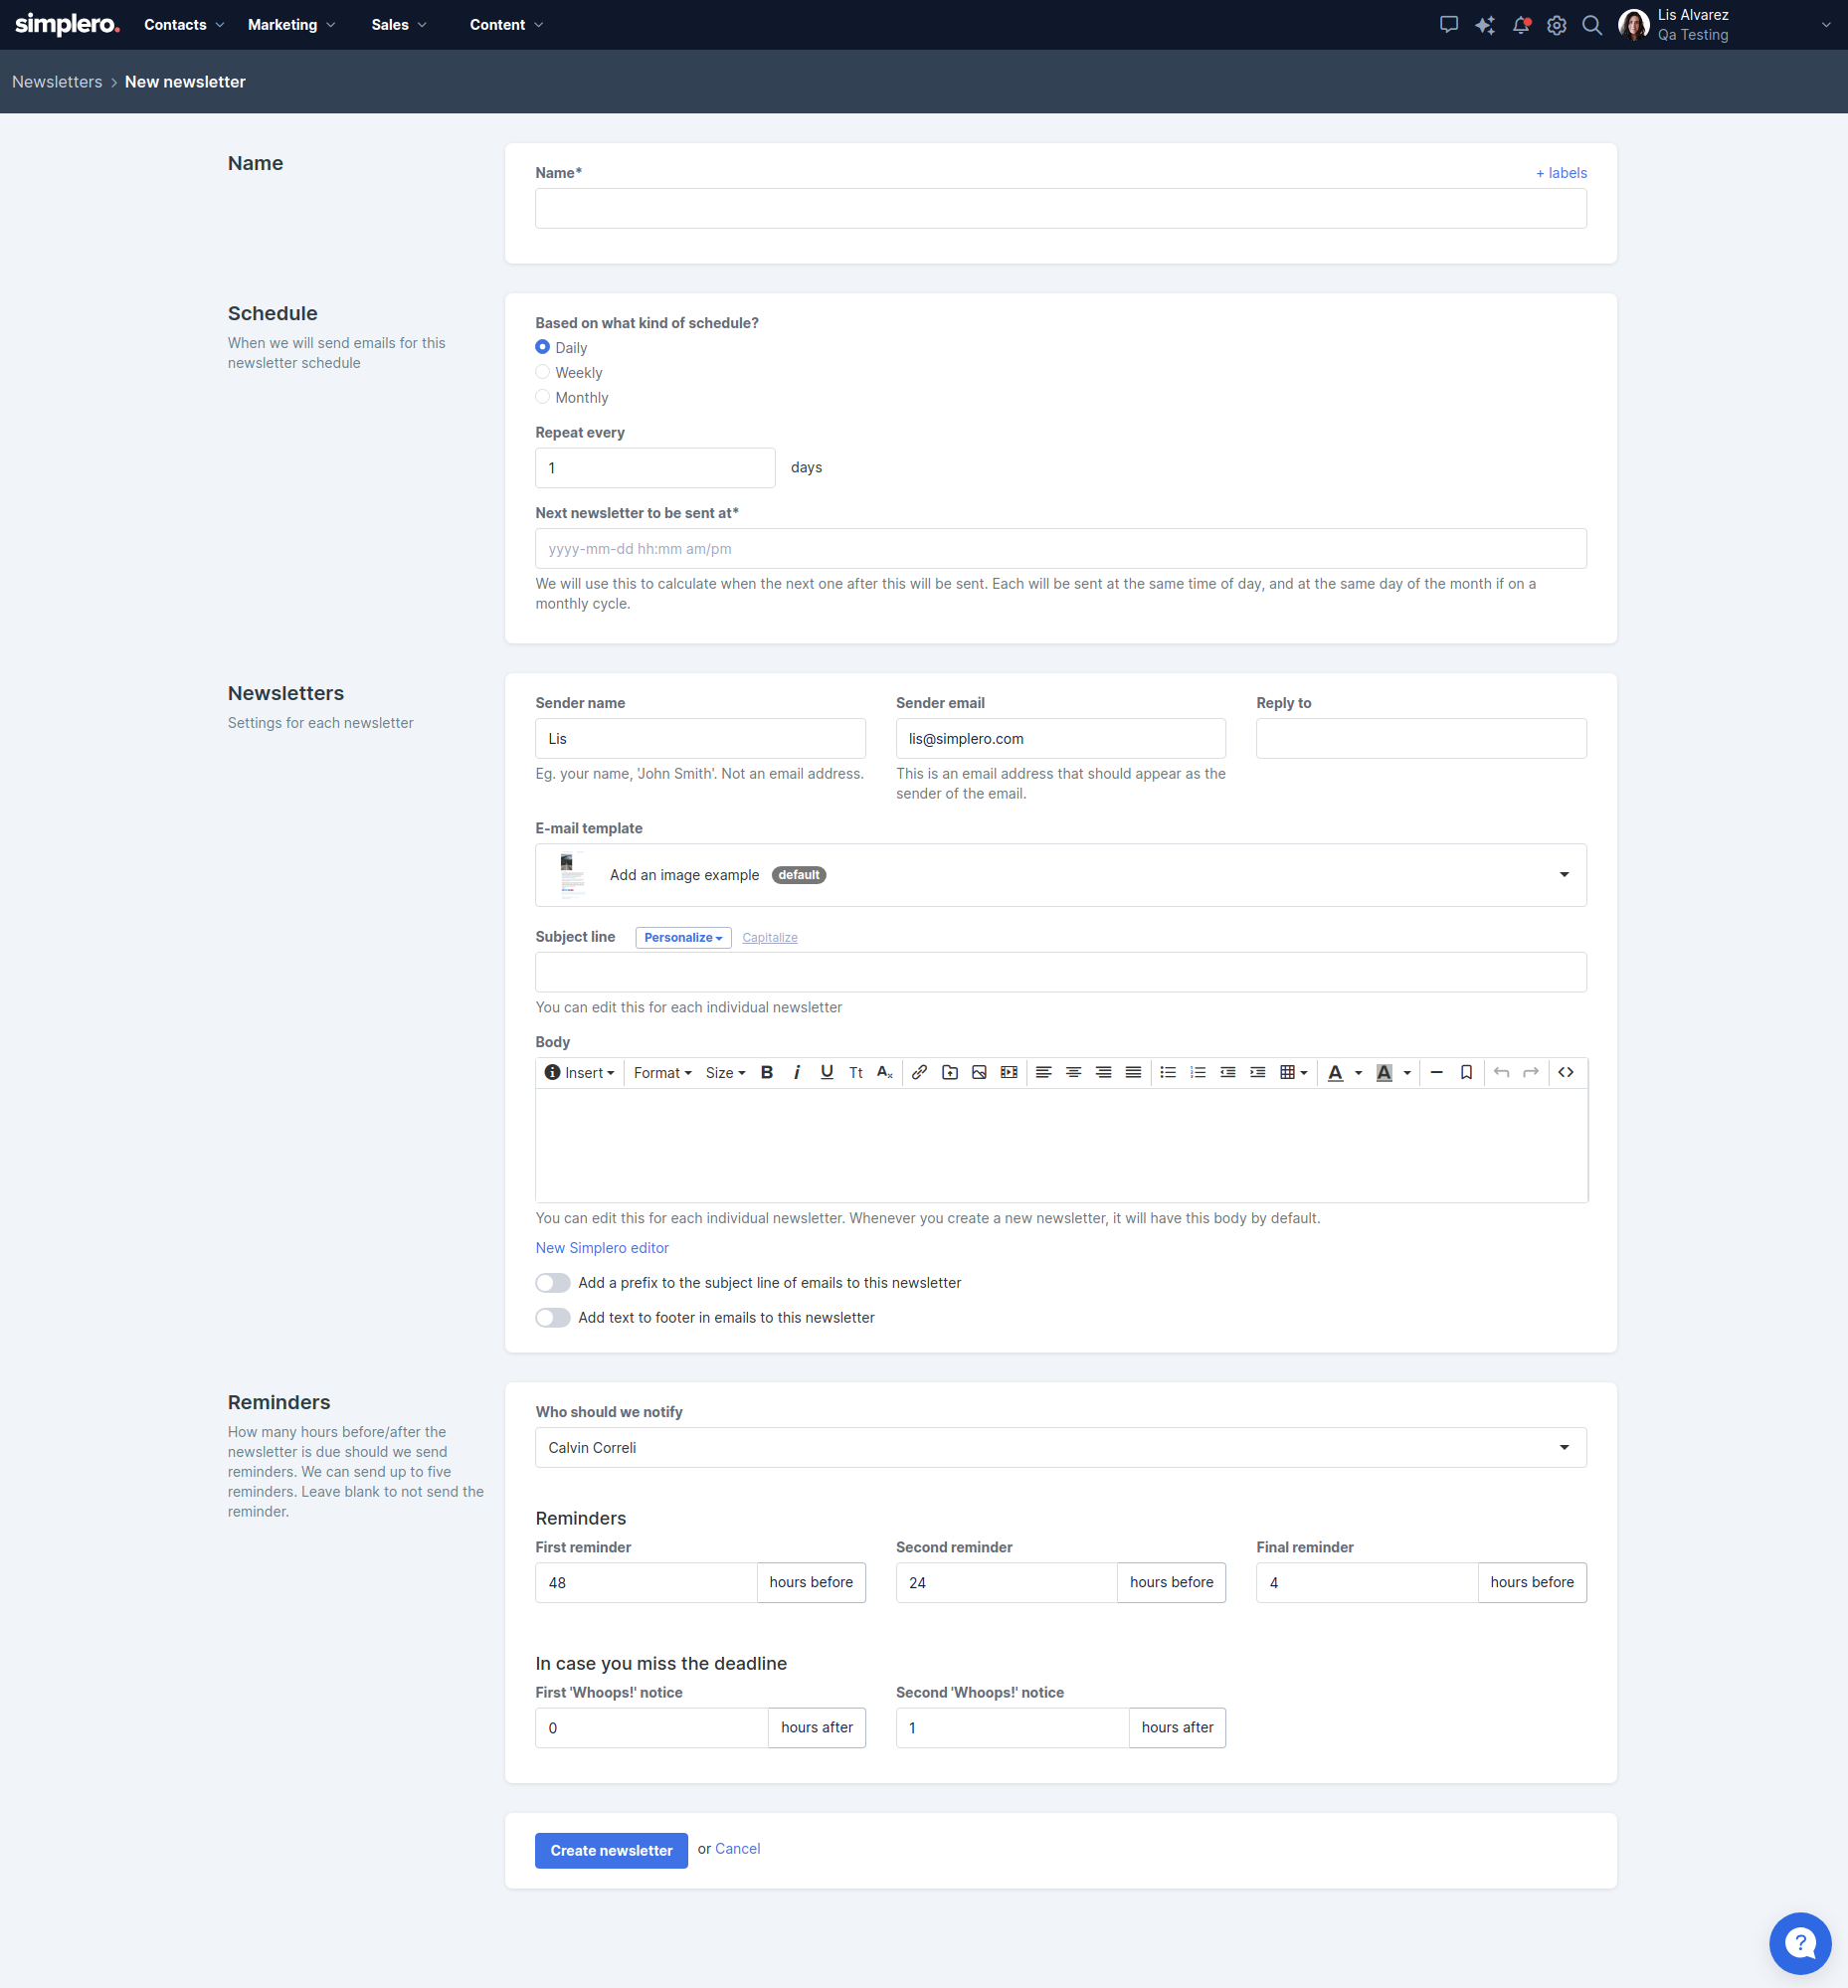
Give your newsletter schedule a Name.
Set your schedule (either weekly, biweekly, or monthly) and choose your start date.
Choose the List (or lists) the newsletter will go out to.
Set your Email settings such as Subject line, Sender name and email, and Reply to email.
Set up your Reminder schedule.
Click the Create newsletter schedule button when you're done.
Once you've set up your newsletter, you're ready to write!
Select Marketing from your Simplero Dashboard.
Select Newsletters from the dropdown menu
Click on the Newsletter Name you've just created.
You'll be directed to the Queue for that newsletter.
Click the Write a newsletter button.
You'll be directed to the Broadcast screen where you will enter the subject and name, choose the split-test option, etc., like you would with any other broadcast.
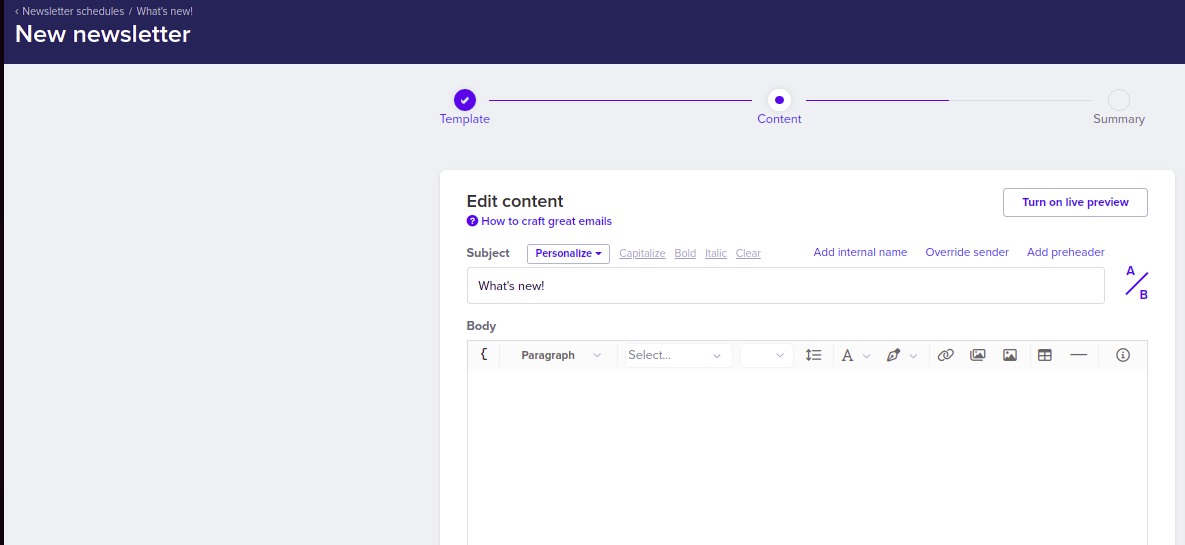
Complete the information and click the Next button.
You'll be taken to the Broadcast overview screen. Once you've completed all edits, click the blue Queue button.
Not ready to schedule your newsletter? Have more edits to make? That's ok! Don't hit that Queue button and keep your newsletter as an easy to find draft. Just head back to that specific newsletter schedule when you're ready to publish. This allows you to write as many newsletters as you want ahead of time, saving you time in the long run and helping you put out better content.
Notes:
The Draft, Queued, and Delivered newsletters will also appear in the broadcast section.
If the recipients of the newsletter are subscribers to a list, the sender settings will be the ones set up on the List>>Configure tab, overriding the settings on the Newsletter Schedule.
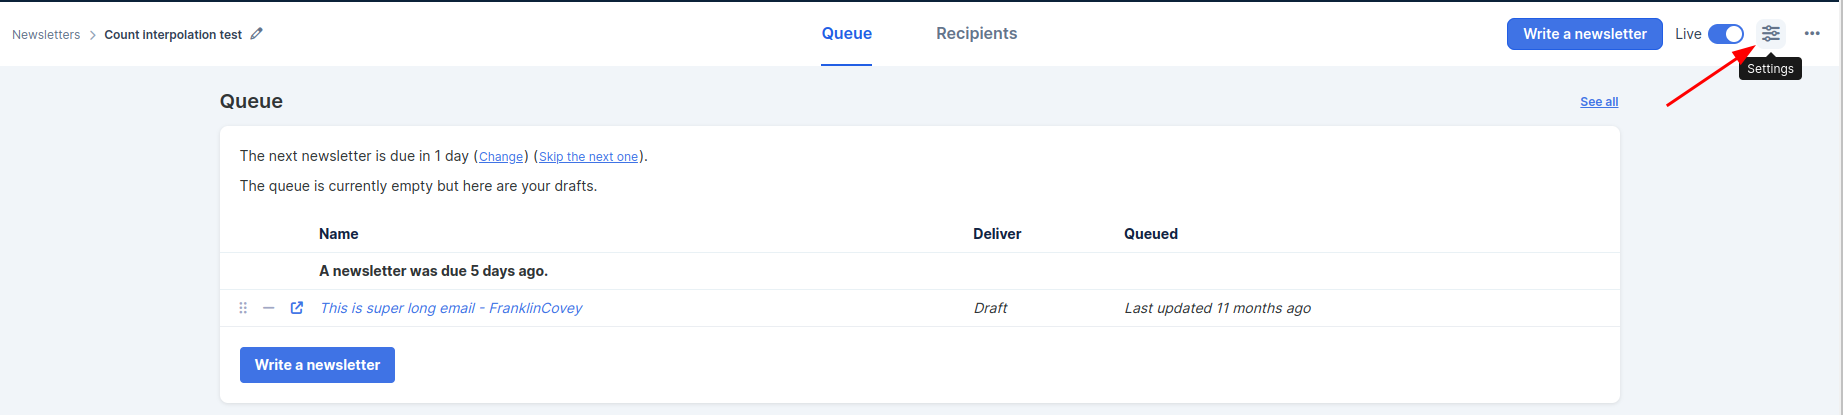
If you ever need to edit your Newsletter Settings, access them through the navigation header.
Suite 92530
New York, NY 10003
United States