

You can link your own Google Calendars with your Sharing Links so that events created on the Scheduling link get synced in your Google Calendar.
We will also show as unavailable those presets where you already have a blocking event in your calendar.
Navigate to your Simplero Profile page >> Scheduling:
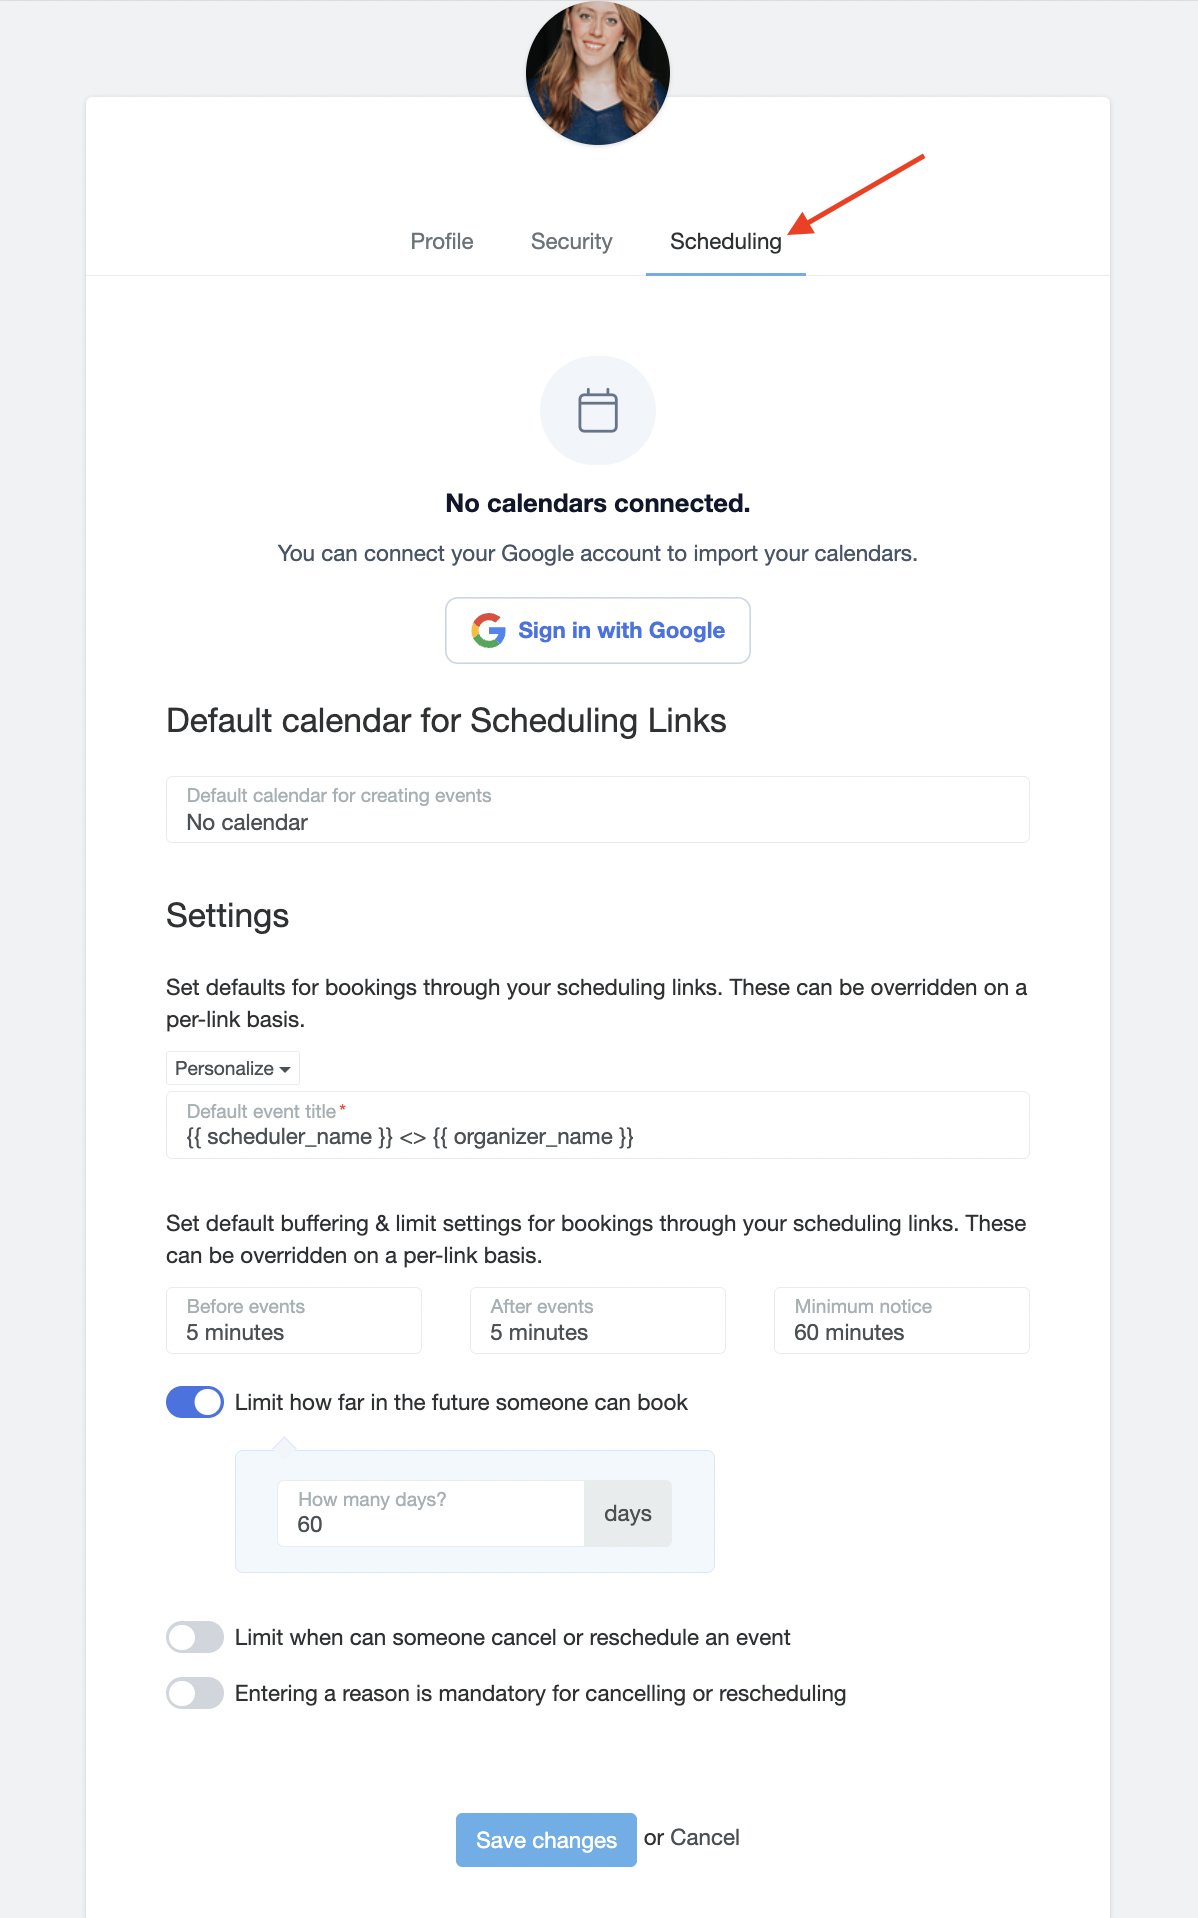
Click on Sign in with Google and follow the connecting steps.
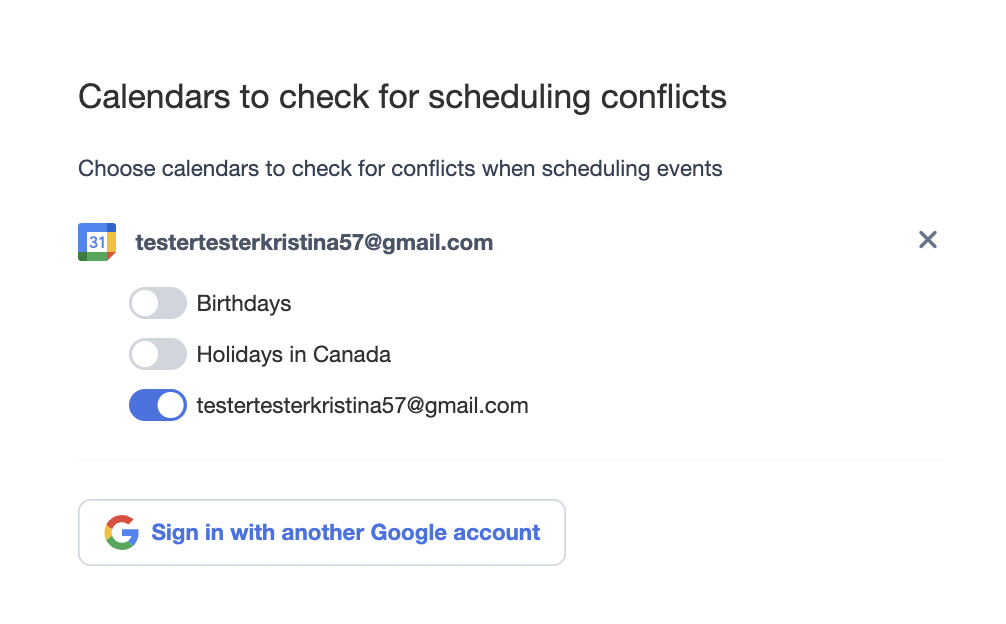
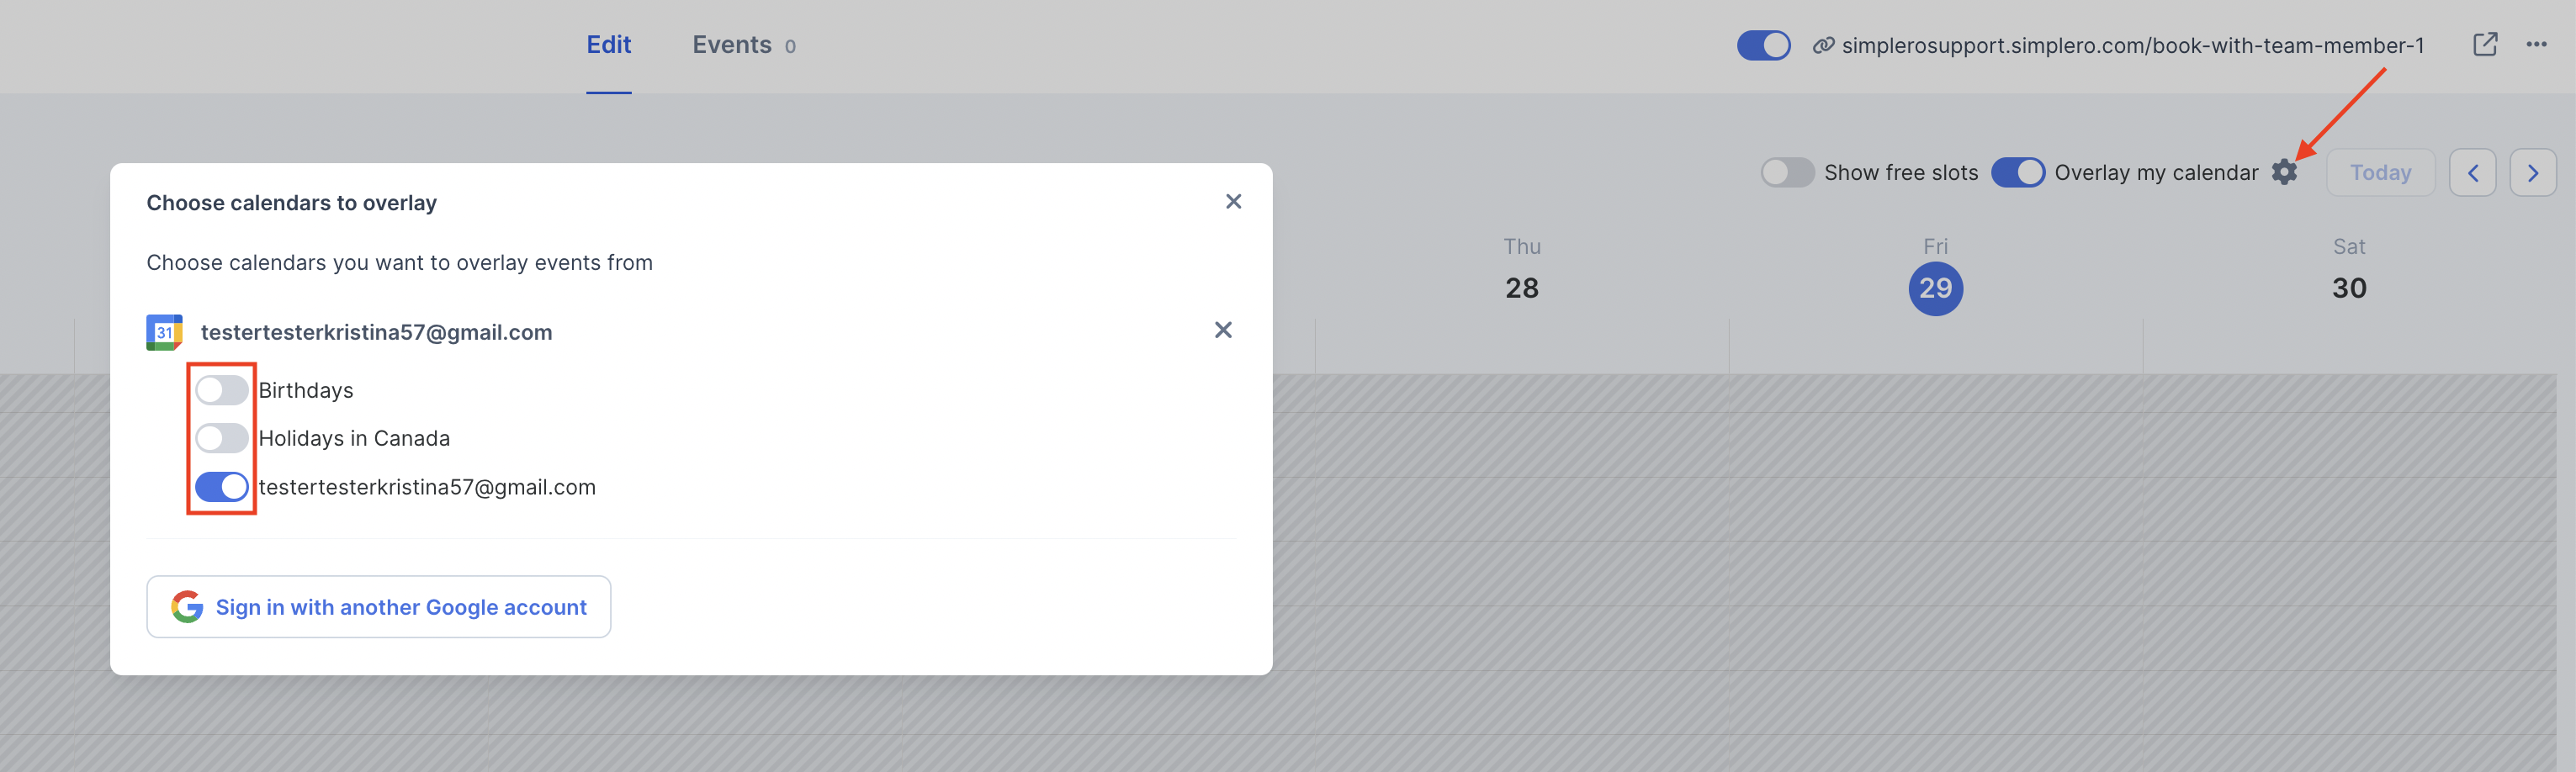
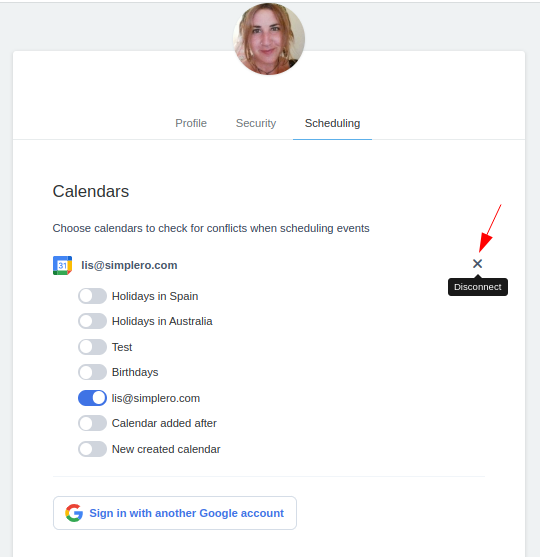
Once connected, you will be able to choose which calendars should Simplero check for conflicts using the toggles on the left.
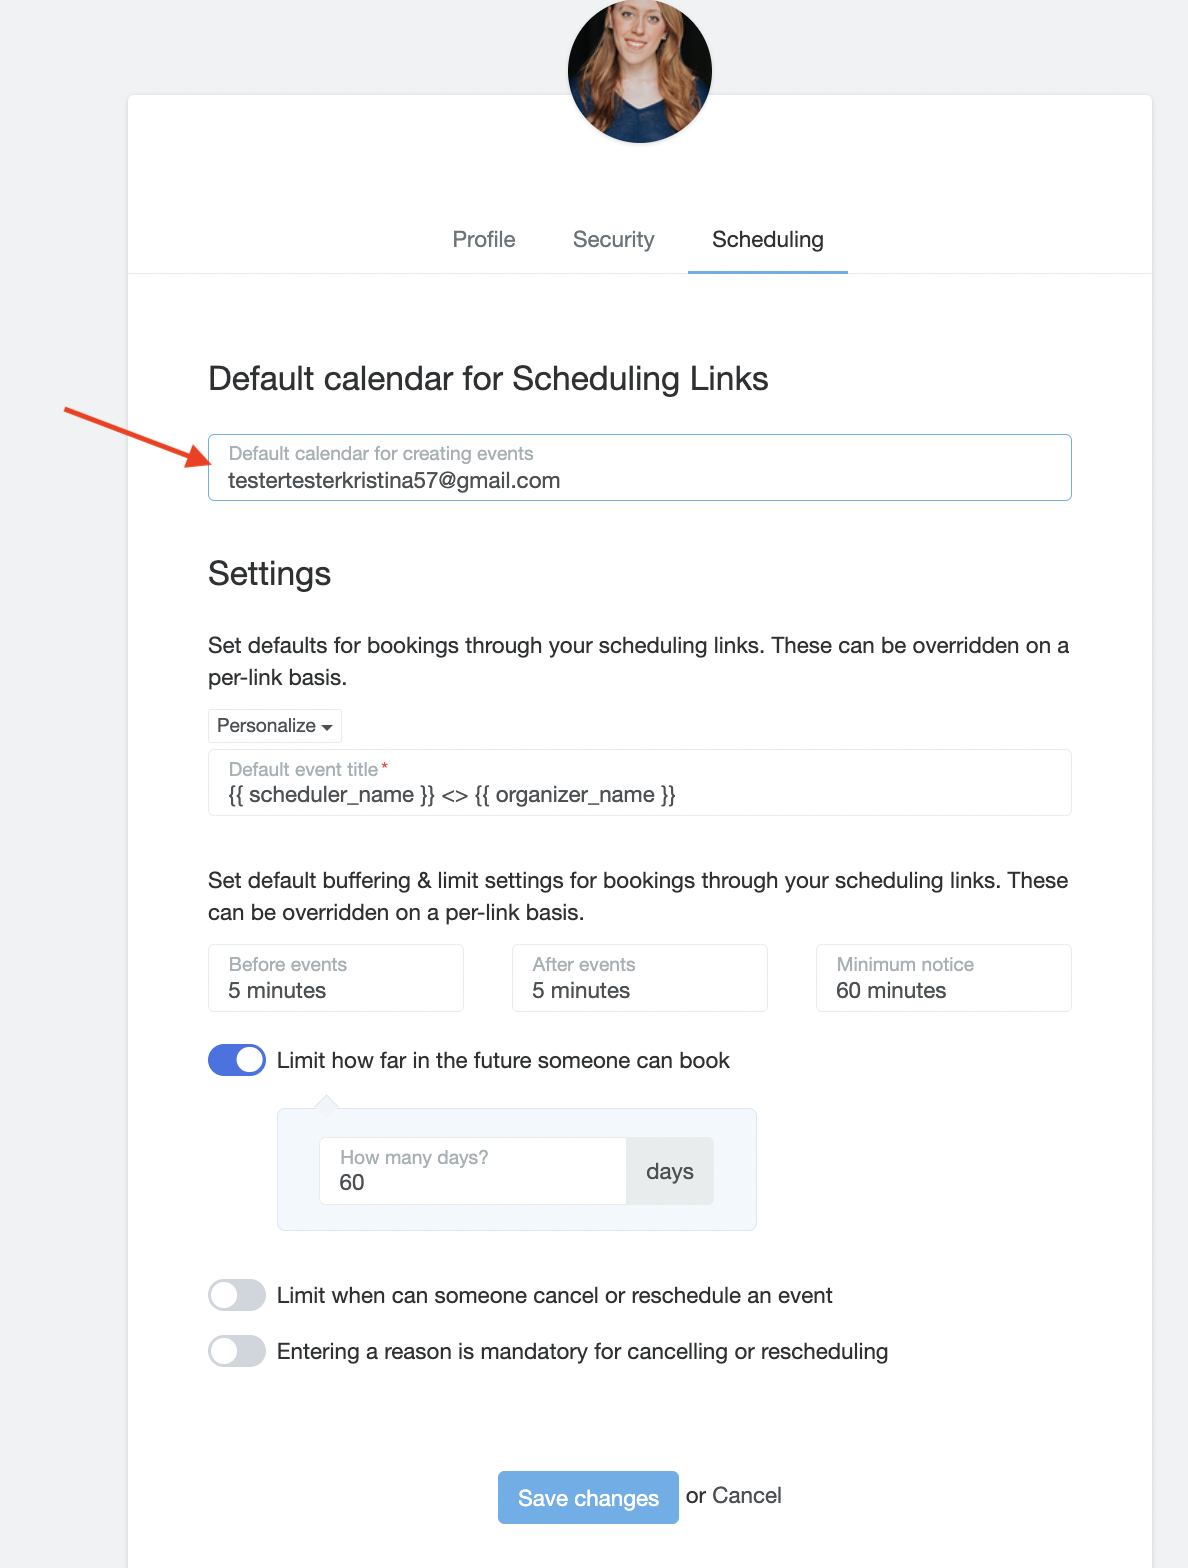
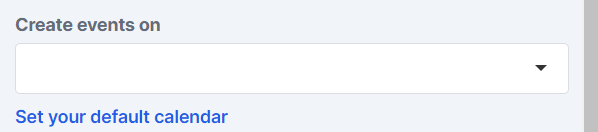
It’s very important that you also set up your Default calendar for creating events so we know where to add events created through your Scheduling links:
You can also connect and manage your Google Accounts from every scheduling link in your Simplero account.
On the Scheduling Link, click on + Connect your Google Calendar, then Sign in with Google and follow the steps in Google's account manager:
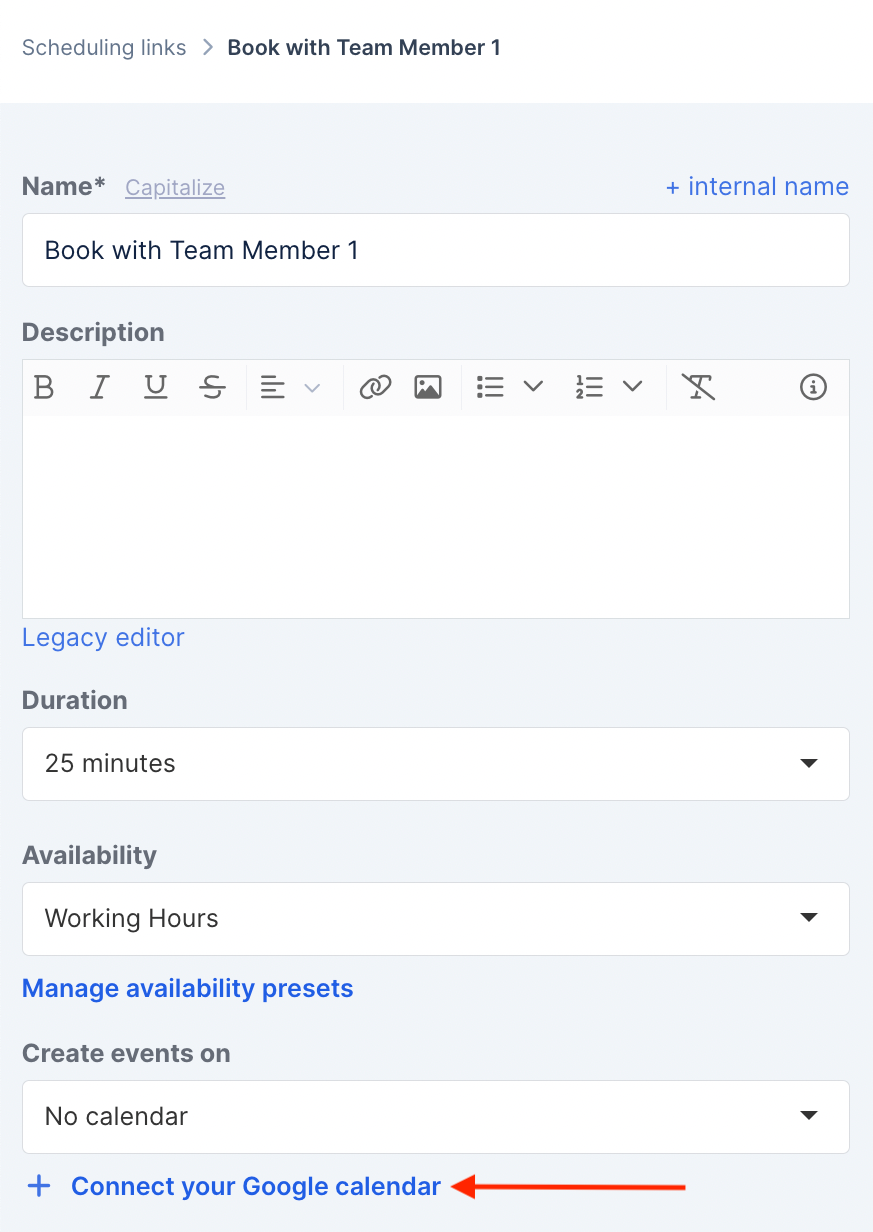
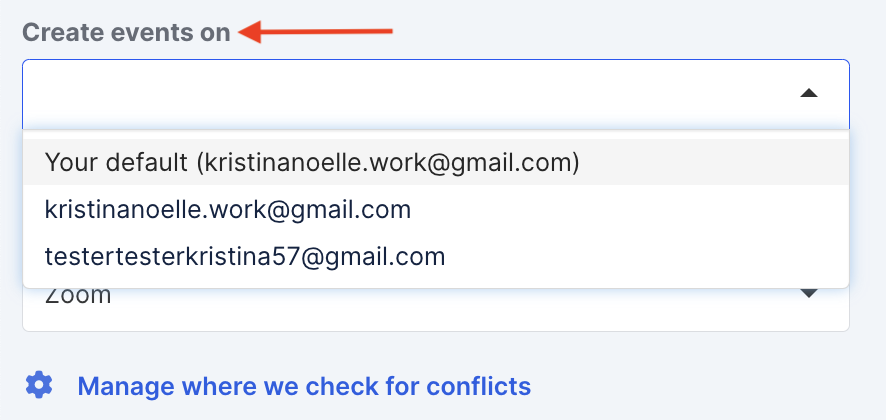
Once connected, you‘ll see the available calendars under the section Create events on. That will determine which calendar we’ll add your bookings to automatically when booked from that particular scheduling link:
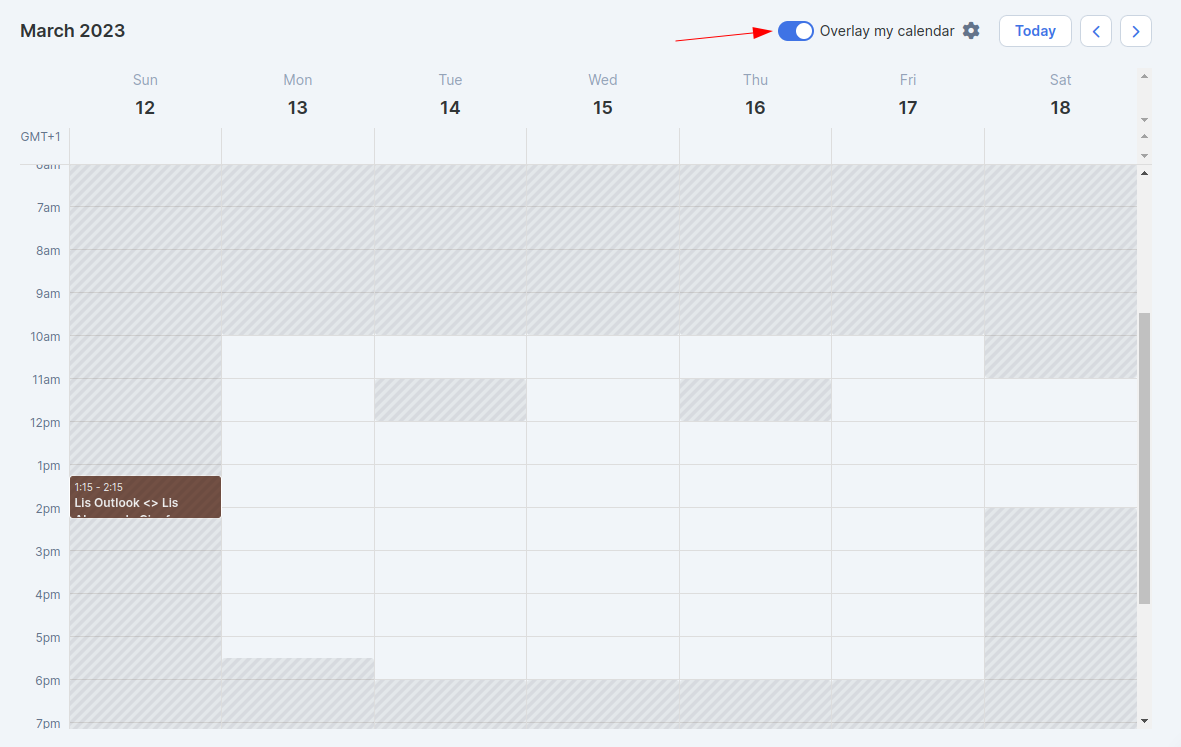
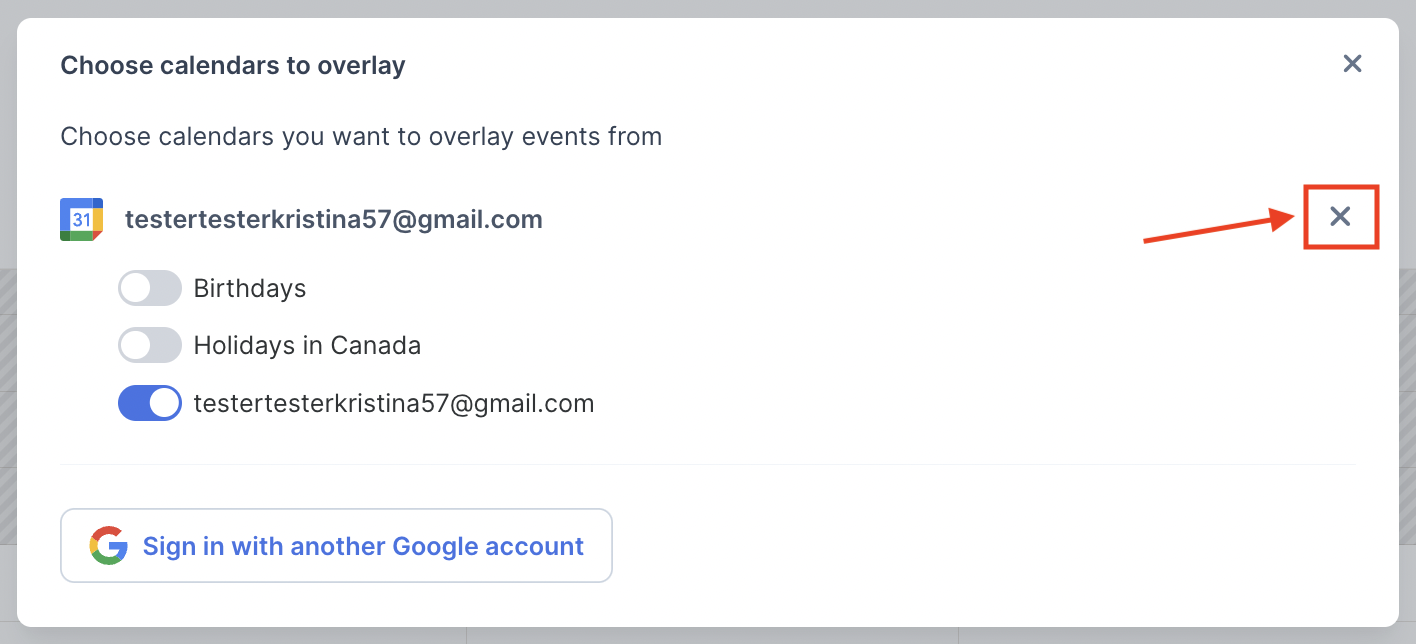
You'll also have the option to turn on Overlay my calendar so you can see current events in your Google calendar:
Choose if you want to show several calendars on the settings icon at the top right corner:
Note! You can also disconnect your Google Account at any time with the ‘x’ right next to it on the Settings and Manage where we check for conflicts popups:
As well as from your Simplero profile page >> Calendars & Scheduling Preferences:
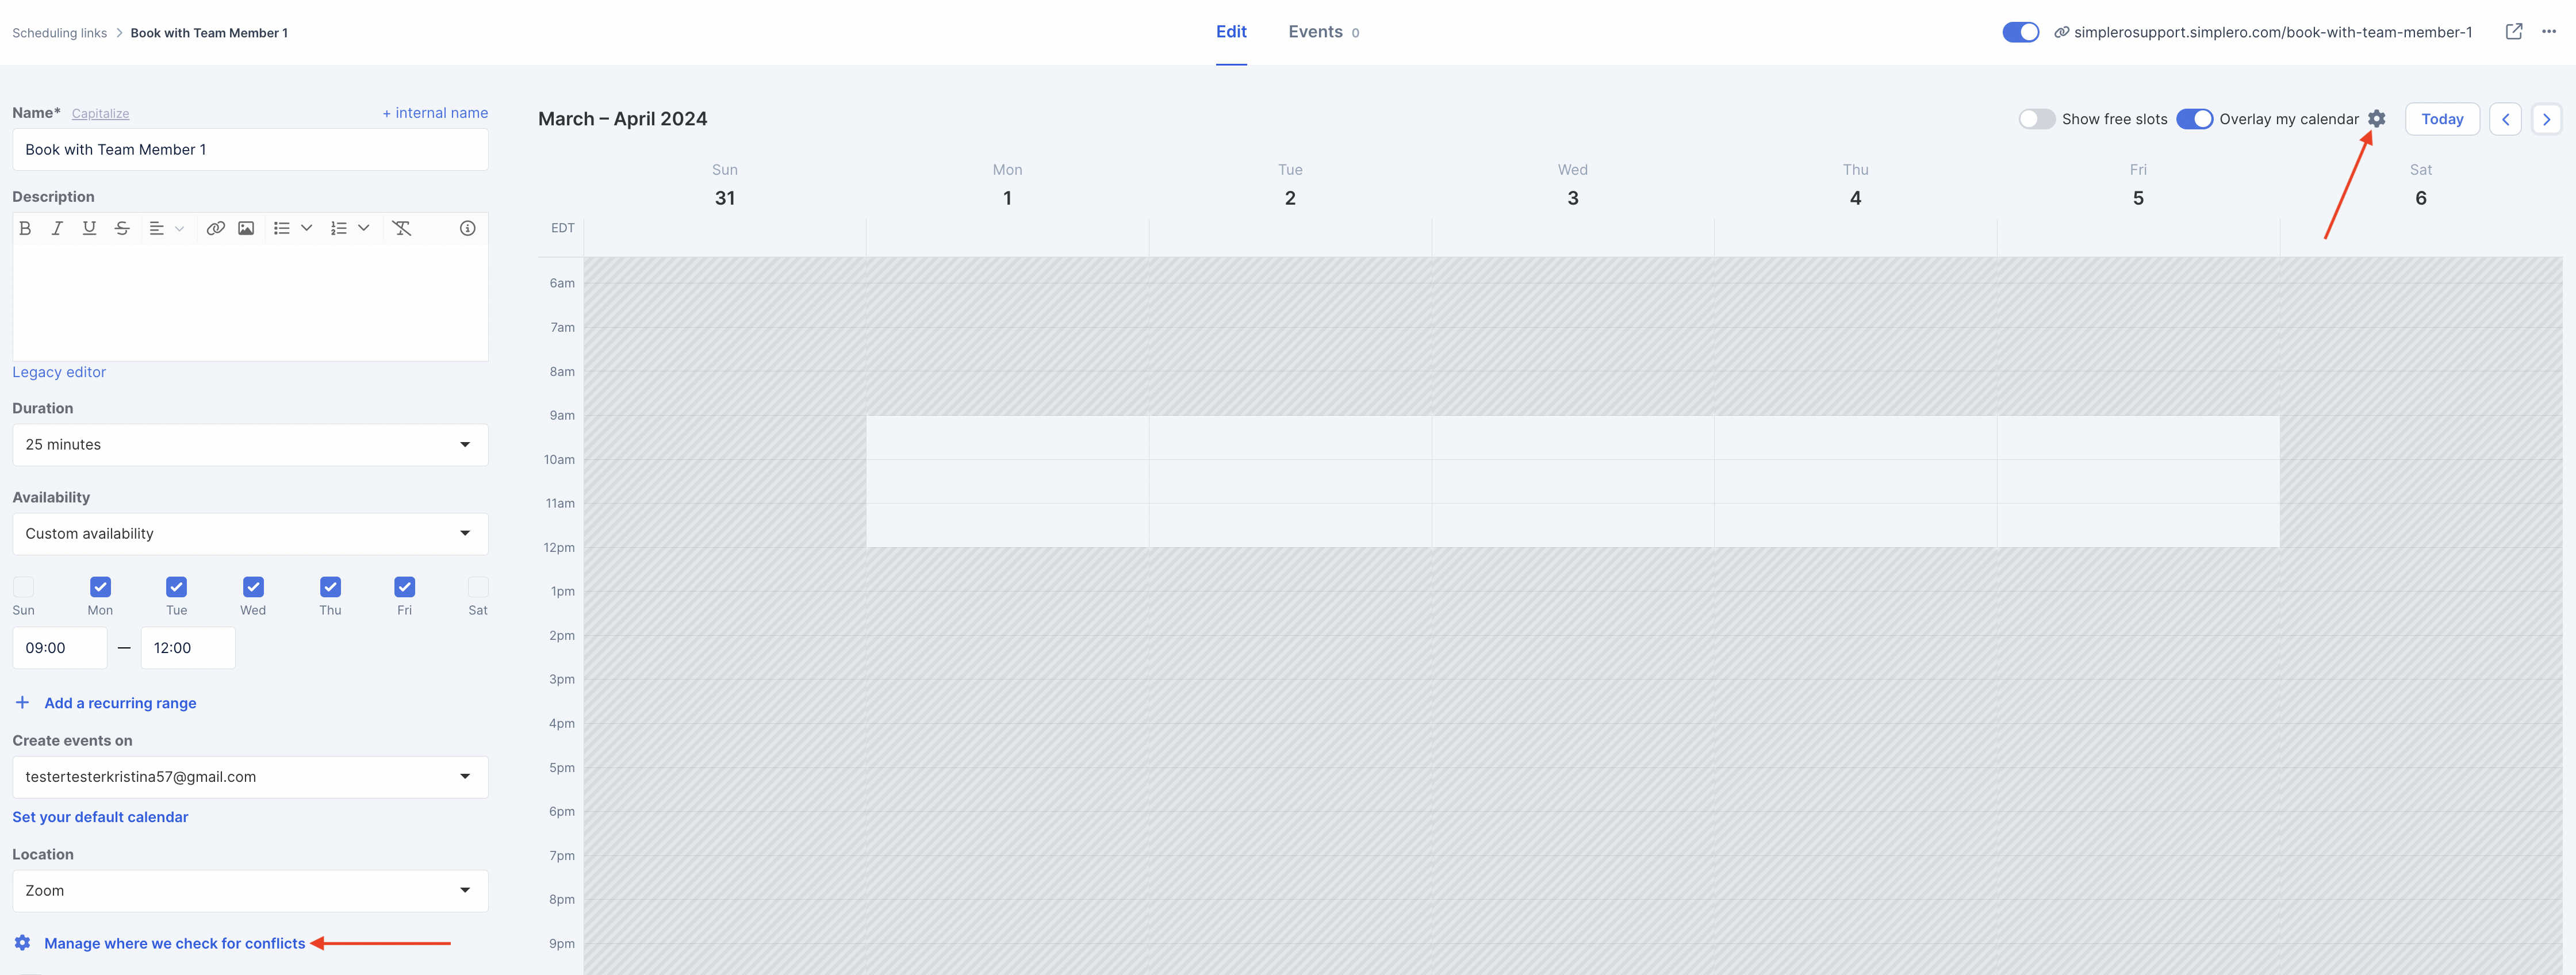
You can also choose to Show/hide free slots. This makes it easier for the Admin to visualise what’s available based on the events duration:
.png)
Adding events to more than one Google Calendar
If you want to add the events to more than one Google account, you can use a Google shared calendar. Check the guides from Google to learn how to create one.
You’ll then need to select it on the Create events on setting:
Suite 92530
New York, NY 10003
United States