

Automation Settings
Select Automations from your Simplero Dashboard
In the Automation tab, select the automation name you want to add conditionals to
Navigate to the Settings on the top right corner.

Object Type
When you create an automation, you get to pick an object type for it. Think of it as a context where the automation will be used.
If the automation starts when someone subscribes to a list, the object type would be ‘List subscriber’, but if it starts when someone purchases a Product, then it will belong to the object type ‘Purchase’. If in doubt, choose Flexible. This should work for most scenarios.
If you create an automation using an object type, and then choose a start trigger that doesn’t belong to it, we will let you know through the warning below:

So what if you are using the automation in multiple contexts or objects? You can simply pick the object type ‘Flexible’ and that will allow any sort of trigger to start the automation.

Note! Only Flexible type will allow you to manually add contacts to the automation.
Conditions
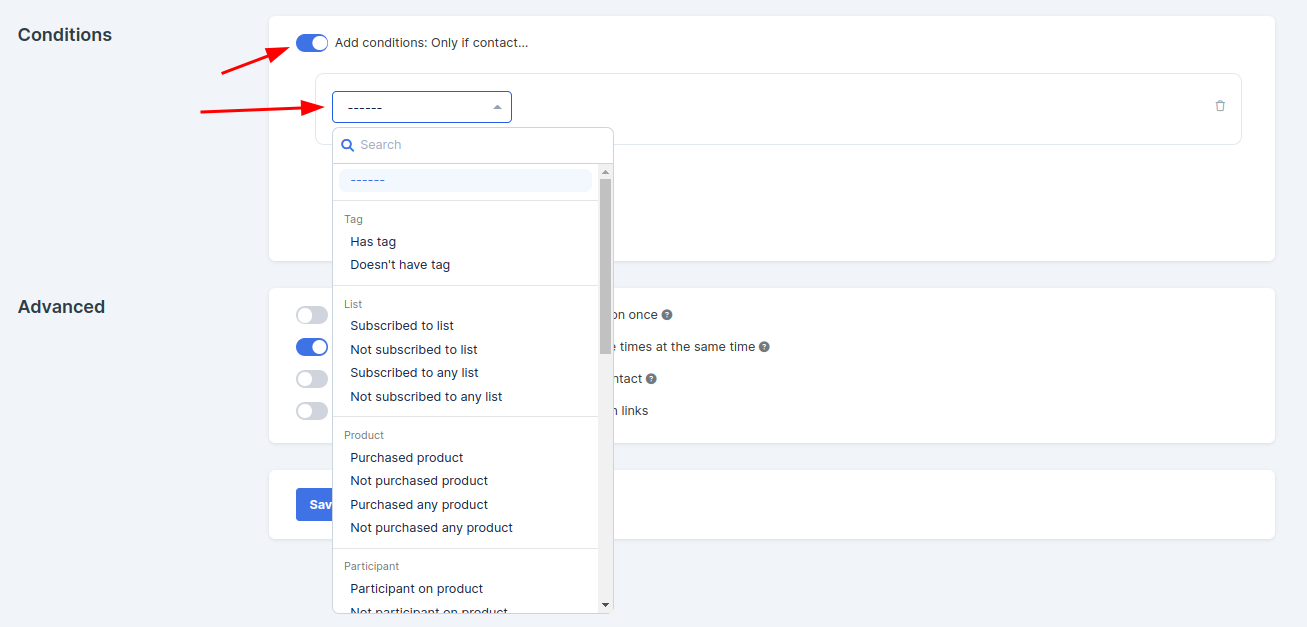
Scroll down the Conditions section where you will have 2 options...
Toggle Off: Always run means that every time a contact enters the automation they will be allowed to go through it assuming of course that you have the settings set to allow him/her to enter it more than once.
Toggle On: Set up a condition so that only contacts who comply with the condition will enter the automation.
Advanced Options
You can also set up more Advanced conditions in the section below.

Only allow a given contact to run this automation once - If On, we will prevent a contact from entering the automation if they have been in it before.
Allow contacts to be in this automation multiple times at the same time -If Off, we will prevent contacts from starting the automation if they are currently in it.
Force automation flows to always be on the contact - If On, we will associate the flow with the contact, instead of the subscription, or purchase… that started it for them.
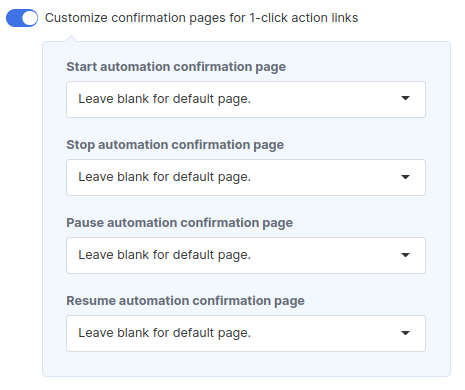
Customize confirmation pages for 1-click action links - You can customize the start/stop/pause/resume confirmation page for 1-click links. This is useful when you are adding, for example, a link to start an automation on an email.
Advanced Automation Step Settings

Internal Note

You can add a note to any automation step. These are internal notes for your reference. This is a great way to help you remember down the line why you set up a condition on a step, or maybe you run a seasonal course and need to remember to update certain action steps each round.
Add Conditions
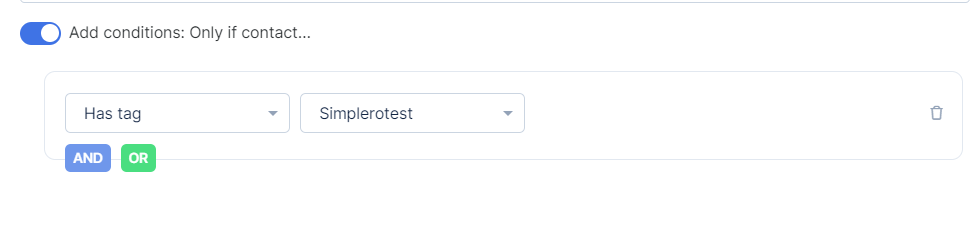
If you toggle this option on, you could exclude some contacts to run the steps only under certain conditions (ie. if the contact has a tag, or, if is subscribed to a list, has purchased a product…). This option is helpful to exclude contacts to run specific steps on the automation.
You can create several conditions for the same step using And and Or connection:
Skip Step if wait step exceeded
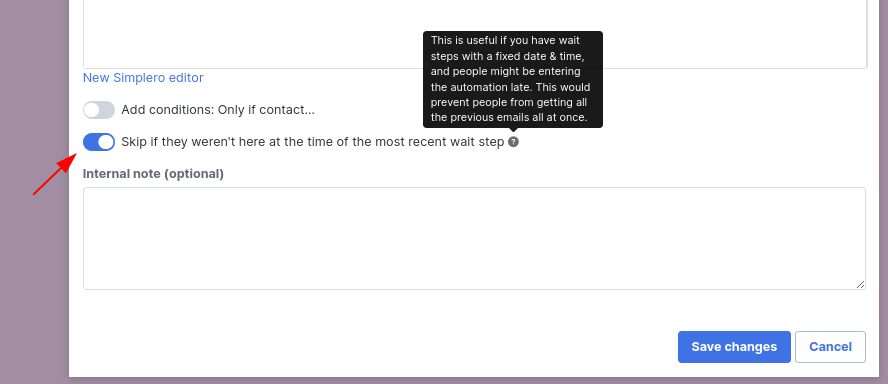
If you have a waiting step set to a specific date, let’s say wait until May 5th, to then give access to a course lesson and send an email. If a contact starts the automation on May 6th, you may want to skip sending the email but allow getting access to the lesson. In that case, Step#2 would be set to skip if the last wait step was exceeded (do not fire this step if we are past May 5th).

Suite 92530
New York, NY 10003
United States