Heads up! We just made some big improvements to Simplero, and a lot of the videos and screenshots here aren't updated yet.
How To Guides
Current Lesson
Course Content
Course Content
-
0 / 25
Your Account
-
How the Trial Works
-
How to Change Your Plan and Billing
-
How to See Your Account Overview
-
Account Administrators
-
Changing Your Time Zone
-
Merging Multiple Simplero IDs
-
Password Security
-
Submitting a Feature Request
-
Submitting a Help Ticket
-
Simplero Account FAQ
-
Closing your Account
-
Simplero Search and Filter Option
-
Setting Brand Colors
-
Places to Change Colors and Graphics
-
Setting Labels
-
The Notice Box
-
Default Account Currency
-
Default Account Email Contact Information
-
Account Location and Language
-
Account Terms
-
Flex Plans
-
Billing at Simplero
-
Your First Three Wins
-
Getting In-Person Help with Concierge
-
Cookie Consent Banner
-
-
0 / 6
Domains and URLs
-
0 / 17
Website
-
Website Overview
-
Website Settings
-
Website Pages
-
Website Blog
-
Website Navigation
-
Understanding SEO
-
How to Customize Your Website Theme
-
Save As Template Feature
-
Product Catalog
-
Editing your Theme Code
-
Save Website to Phone Home Screen
-
Create Your Own 404 Page
-
Social Sharing
-
Social Sharing Image
-
How to Create Anchor Links
-
How to Add a Custom Font to Your Simplero Website or Membership Site7:14
-
How Can You Add the Pinterest Save Button to Your Website Images?2:21
-
-
0 / 11
Your Media Files
-
0 / 4
Landing Pages
-
0 / 10
Forms
-
Form Fields
-
Creating Opt-In Form
-
How to Setup List opt-in Forms8:53
-
Embedded Opt-In Forms
-
Utilizing More Than One Opt-in Form
-
Sign-up Forms on Your Simplero Sites
-
Viewing Custom Questions On Order Forms
-
Default Opt-in Box on Order Forms
-
Use Merge Fields to Register a Subscriber for a Webinar
-
How to Install Google Analytics Tracking Code3:13
-
-
0 / 16
Lists & Contacts
-
How to Manage Your Lists and Contacts
-
Creating a List
-
List Confirmation
-
Subscription: Auto-subscribe, Unsubscribe, Suspend, Resume
-
Unengaged Subscribers and Contact Cleanup2:29
-
Exporting Contacts from my List
-
Merging Duplicate Contacts
-
Changing a Participants Email Address
-
Seeing What Your Customers Sees
-
Tags
-
Segments
-
Do Not Contact and Bounced Emails
-
Preventing SPAM Contacts
-
5 Kick @$$ Strategies to Build your List
-
Preferred Sender Program
-
Cold Contacts Tracking
-
-
0 / 26
Broadcasts
-
Broadcast Overview
-
Email Template Design
-
Email Font Size
-
Creating a Broadcast
-
Send an Email to an Individual or Single Contact
-
Resend a Broadcast
-
Handle Replies to Mass Emails with Ease
-
Expiring Links
-
Insert Option for Broadcasts
-
Magic Content URL
-
Interpolation Keys
-
Editing an Incorrect Link in a Broadcast
-
Auto-publishing a Page in a Broadcast
-
Using Emojis
-
Subject Lines and Preheaders
-
Newsletter Scheduler
-
Email Deliveries
-
About Open Rates for Broadcasts and Auto-Responses
-
How the Sending Limit Works
-
What Do the Secretive Options Mean
-
Why Simplero Doesn't Do Fancy Graphic Emails
-
Delaying Normal Broadcasts During an Email Funnel
-
What Is the Spam Check on Emails?
-
Editing the email footer
-
Creating a Button in a Broadcast
-
Delivery vs. Deliverability
-
-
0 / 7
Other Customer Communications
-
0 / 18
Membership Sites
-
Creating a Membership Site
-
Membership Site Blog
-
Membership Site Forum
-
Membership Site Pages
-
One Membership Site with Multiple Products/Classes
-
Page Access
-
How to Use Auto-Publishing Pages (AKA Dripping Content)
-
Courses5:12
-
Quizzes
-
Course Preview
-
Membership Site Footer Navigation
-
Membership Site Redirects
-
Membership Site Theme
-
Podcast Feature in Membership Sites (RSS)
-
Embedding Videos on Your Site
-
Free and Paid Access to a Single Membership Site
-
Auto-publishing: A Visual Representation
-
Membership Groups
-
-
0 / 12
Products
-
Creating a Product
-
Closing a Product
-
Deleting a Product
-
Creating Multi-Level Access Products
-
Membership Levels
-
Combining a Tangible Product With Your Online Product
-
Tiered Pricing in a Single Product
-
Evergreen Course
-
Student Paced Course
-
Connecting Content to a Product
-
Selling a Downloadable Product
-
Purchase Confirmation Thank You Page
-
-
0 / 35
Product Pricing
-
Payment Processor Setup
-
Understanding the Manual Payment Processor
-
Switching Payment Processor Mid-Stream
-
How to Create Product Prices in Simplero
-
A Warning about Editing an Active Price
-
Campaign and Discount Pricing
-
Credits
-
Multiple Seat/User Pricing
-
Secret Prices and Coupon Codes
-
Global Coupons
-
Subscription Prices
-
Gift Pricing
-
Pay-What-You-Can
-
Price Restrictions
-
Quoting Prices in Multiple Currencies
-
Collecting Tax
-
EU Vat
-
Taxes on Multiple Currency Products
-
Date Specific Installments
-
Milestone Installments
-
Trial Period (Free or Discounted)
-
Giving a Paid Customer a Free Month
-
Free Products
-
Participant Limit
-
Collecting an Outstanding Balance
-
Upsells
-
Downsales
-
Order Bumps
-
Order Forms
-
Order Form vs Freebie Link
-
Authorize-Only Pricing
-
Why do my customers have to manually go in and pay the next installment/renewal of their subscription?
-
Troubleshooting Payments and Refunds
-
Troubleshooting Payment Processor Issues
-
Understanding Your Change in Monthly Recurring Revenue Graph
-
-
0 / 22
Purchases and Participants
-
Participants 101 and Simplero IDs
-
Purchases 101
-
Editing a Purchase
-
Charges & Payments Box in the Purchase
-
Purchase Summary
-
Moving a Purchase to Another Product
-
Adding a Charge to an Existing Purchase
-
Editing a Charge Amount
-
Manual Product Purchase
-
Manual Credit Card Charge
-
Manual Payment or Partial Payment Collection
-
Refund Period
-
Full and Partial Refunds
-
Credit to Transactions
-
Collecting Money Outside Simplero
-
Stop Customers Subscription Payments and Keep their Access Open
-
Migrating a Customer's Purchases from Another System
-
How to Test the Purchase Process and Send Login Credentials
-
Renewal Notifications
-
Invoice Settings
-
Invoices and Expenses1:31
-
Retrying Failed Charges
-
-
0 / 21
Automation
-
All the Ways You Can Automate Things in Simplero
-
Automations: Creating and Managing
-
Starting an Automation
-
Stopping, Pausing, Resuming an Automation
-
Reentering or Starting Mid Automation
-
Time Zone Specific Automations
-
Flows
-
Advancing a Flow in an Automation
-
Using Automations for Sales Funnels
-
Duplicate Automations in Different Languages
-
Email Library
-
Triggers Overview
-
Adding a New Trigger to an Existing List or Product
-
Triggers on Link Clicks
-
Triggers on Prices
-
Abandoned Cart Trigger
-
Global Triggers - Targeting and Re-Targeting Leads
-
Working with Webhook Triggers
-
Bulk Actions
-
Global Snippets
-
What is the Difference Between Automations and Auto-Responses?
-
-
0 / 9
Marketing & Affiliates
-
0 / 18
Integrations
-
Integrating Simplero With Your Website
-
API Keys
-
Zapier
-
Acuity Scheduling for Bookings
-
Leadpages
-
WebinarJam
-
EverWebinar
-
How to Integrate Simplero with Mailchimp
-
Twitter
-
How to Configure PayPal Payment Processor3:15
-
Authorize.net
-
How to setup MobilePay
-
Embed Your Google Docs, Sheets, and Slides into Simplero
-
Install Google Tag Manager on Simplero
-
Facebook Messenger Chat
-
Embed a Facebook Page Widget
-
Facebook Pixel and Verifying Domains2:12
-
How To Use the New Zoom Integration
-
-
0 / 15
Trouble Shooting
-
Can't access the content they purchased?
-
Email Shows "Read" But not "Delivered"
-
Troubleshooting Stripe payment issues
-
Troubleshooting Email Addresses
-
Troubleshooting Opt-in Form Issues
-
Why is my E-mail not being delivered?
-
Troubleshooting Forum Notifications
-
Troubleshoot Price Issues
-
Debug a Facebook Share / LinkedIN share
-
When a PayPal Payment Doesn't Show in Simplero
-
QuickPay Payment Doesn't Show in Simplero
-
Troubleshooting Space Access (A deprecated feature)
-
Troubleshooting Videos Not Playing
-
Troubleshooting Upload issues
-
Microsoft Says a File Has a Virus
-
-
0 / 16
Deprecated Features
-
Spaces (deprecated)
-
Space FAQ (deprecated)
-
Space and Space Page Access (deprecated)
-
Page Types (deprecated)
-
One Space Multiple Products/Classes (deprecated)
-
Free Spaces and Spaces with both Free and Paid content (deprecated)
-
Multi-Language Spaces (deprecated)
-
Postponing Access to a Space Until Later (deprecated)
-
Rearranging the Tabs/Pages/Subpages Within a Space (deprecated)
-
Embedding Videos in Your Spaces (deprecated)
-
Resurrect a Deleted Space (deprecated)
-
Podcast Feature in Spaces (deprecated)
-
FAQ Page in Your Space (Deprecated)
-
Adding a Home Link to the Navigation Menu in Spaces (Deprecated)
-
Deactivating Landing Pages (deprecated )
-
How to Embed a PDF into a Course
-
-
0 / 10
Nerdy stuff
Send an Email to an Individual or Single Contact
Emailing an individual subscriber
Do you want to send a direct email to a single contact or a select few contacts?
{Note: If you are wanting to send this email to more than a handful of people you might consider adding them to a new list that you use just for this purpose}
Option 1: A Templated Email
- Create your email and save it in your email library (email library)
- Select Marketing from your Simplero Dashboard
- Select Emails for Automations from the dropdown menu
- Click the blue + Write new email button in the upper right corner
- Complete all fields and click the blue Create library email to save
- Go back to your Contact list
- Select Contacts from your Simplero Dashboard
- Select All Contacts from the dropdown menu
- Locate the contact(s) you want to send the email to and click the box next to their name
- Click the Select action... drop-down menu at the top and choose the Templated email... option
- The Templated email pop-up screen will open. Select the Email to send from the Library emails drop-down list. Choose the email you wrote in step 1
- Click the Templated email button and you are good to go!
Option 2a: Write the email in real time
- Select Contacts from your Simplero Dashboard
- Select All Contacts from the dropdown menu
- Locate the contact(s) you want to send the email to and click the box next to their name
- Click the Select action... drop-down menu at the top and choose the Send a broadcast option
- A new Broadcast screen will open where you can create your email and send your broadcast (see the guide on how to create a broadcast)
Option 2b: Write your email in real time from Contact's profile
- Select Contacts from your Simplero Dashboard
- Select All Contacts from the dropdown menu
- Locate the contact(s) you want to send the email to and click on their name to open their profile
- In the upper right corner, click the white Send broadcast icon
- A new Broadcast screen will open where you can create your email and your customer will be added as a recipient
- Send your broadcast (see the guide on how to create a broadcast)
Note: This will not work and you will not have the option to do this if the "Do Not Contact" is turned ON.

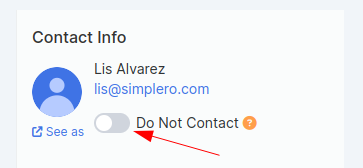
Option 3: Add individual contact(s) to a broadcast
- Select Marketing from your Simplero Dashboard.
- Select Email Broadcasts from the dropdown menu
- Select the blue + Create new broadcast button in the upper left corner
- Complete your Broadcast information:
- Give your broadcast a Subject name that your reader will see
- Give your broadcast an Internal name that is what you will see in your broadcasts screen
- Select an Email email design template (see guides)
- Enter the Sender name, email from and Reply-to information if you want to override your account default settings
- Click the blue Next button
- Type Email body and insert images as desired by clicking the Media library icon
- Click the blue Next button
- Click the blue Choose recipients> button located at the bottom left corner or upper right corner of the screen
- Type Email body and insert images as desired by clicking the Media library icon
- Click the blue Next button
- Click the blue Choose recipients> button located at the bottom left corner or upper right corner of the screen
- Scroll down to the Contacts section and click the hyperlink to Add contact
- The Add single contact screen will open.
- Start typing the name of your Contact, select from the drop-down list and then click the blue Add button
- Make sure the box is selected under the Include column for the contact to appear under the Recipients section and then click the blue Save changes button
Last updated 31 Jan 2021.