

To locate it...
-
Locate the purchase either within the Product or via the Purchases tab under Products
-
You will be taken to the Purchase screen, where you'll see the "Charges & Payments" box

The Charges and Payment Box in a purchase screen is broken into 5 tabs:

-
Statement details
Summary Tab
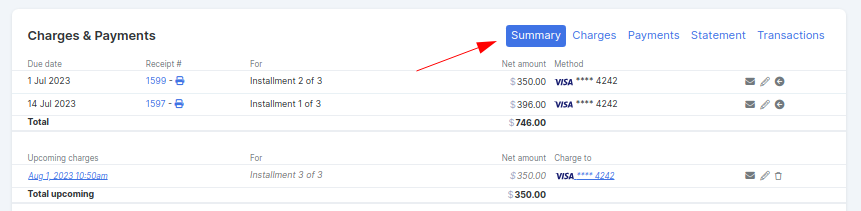
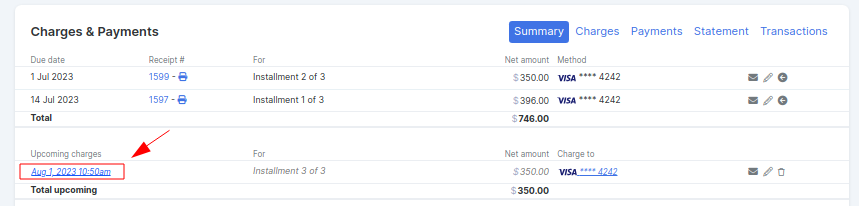
The Summary tab is going to give you a brief picture of the charges associated with the purchase. This tab will also show you the receipt due date, receipt # if processed, what it's for, the amount, and payment method.
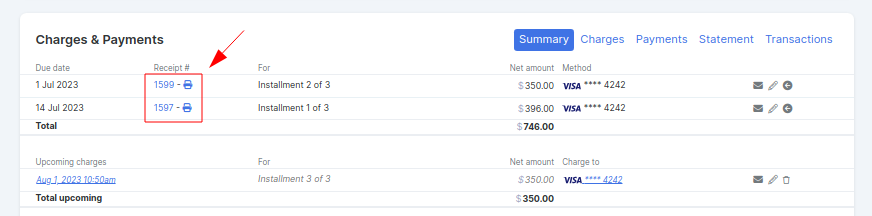
It's broken into two lists. The first is the charges that have already been processed. Here you can..
-
Click on the Receipt # and see a preview of the receipt the customer received.
-
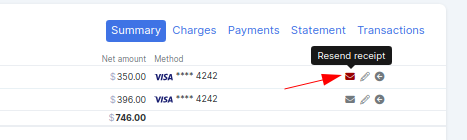
Resend the receipt by clicking on the Envelope icon to the far right of the charge.
-
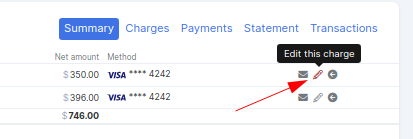
Edit the information about how the charge was processed by selecting the Pencil icon to the right of the charge. Please note that this will not create a refund or a new charge, but it will affect your reported revenue and taxes in Simplero.
-
Create a new charge with the same amount but negative by selecting the Arrow icon next to the processed charge.

Below the completed charges, you will see any charges that are to come due. You will see this only if the customer has purchased a product on installments or if they have pending charges.
In this section, you can...
-
Change the charge date by clicking on the receipt date underneath the Upcoming Charges
-
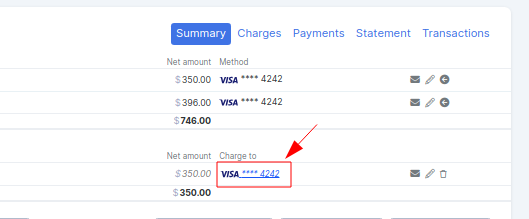
Update the credit card on file manually by clicking on the 4 digit card number that appears underneath the Charge to
-
Resend the reminder by selecting the Envelope icon to the right of the charge.

-
Edit the amount, date of charge, quantity, or tax by selecting the Pencil icon to the right of the charge.

-
Delete the charge by selecting the trash can icon to the right of the charge.

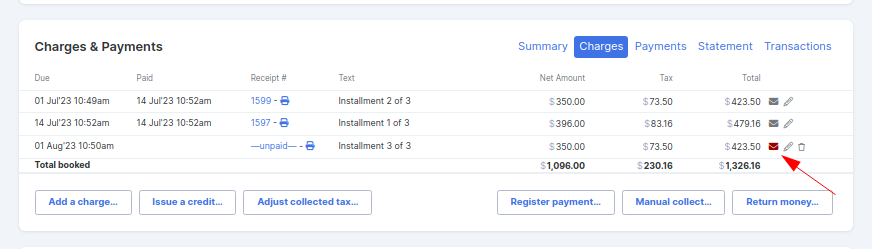
Charges Tab
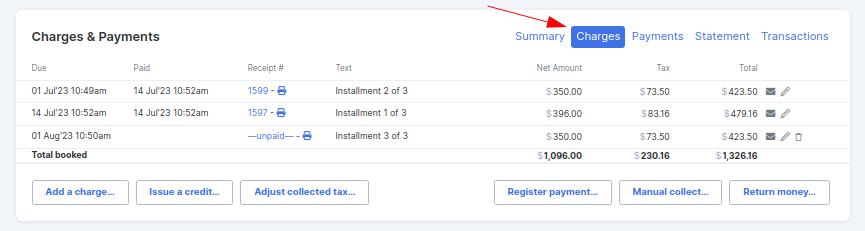
In this tab, you can...
-
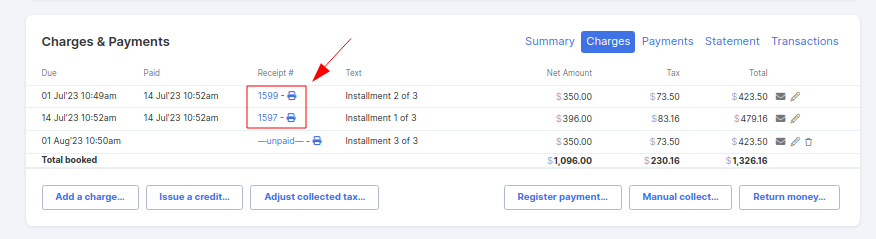
Click on the Receipt Number and preview the receipt
-
Click on the Envelope icon of the processed charge to resend the receipt
-
Click on the Envelope icon next to the future charge to remind the customer
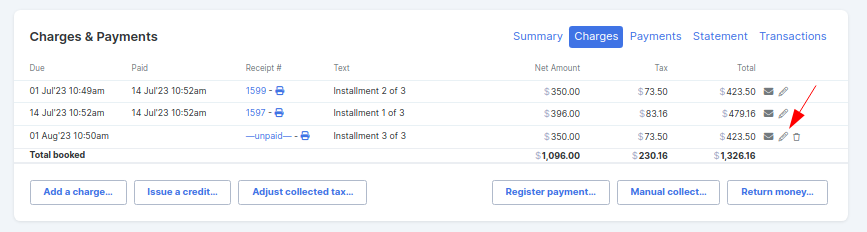
-
Click on the Pencil icon to edit the charge
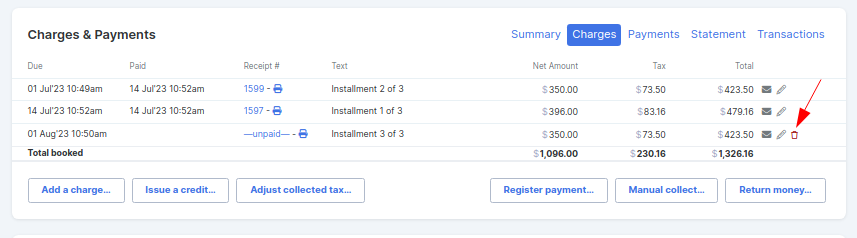
-
Click on the Trashcan icon to delete a future charge
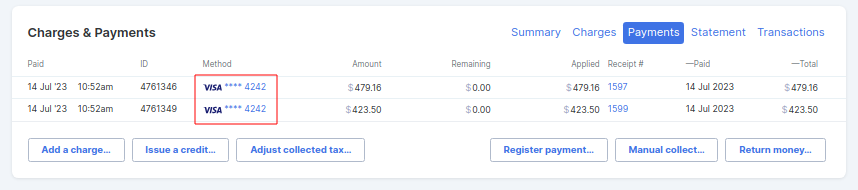
Payments Tab
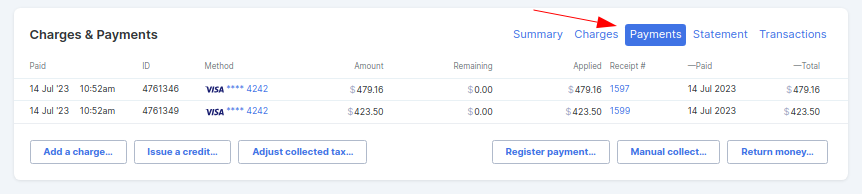
In this tab, you can see all the payments that have been processed. If you'd like to preview the receipt, simply select the receipt number.
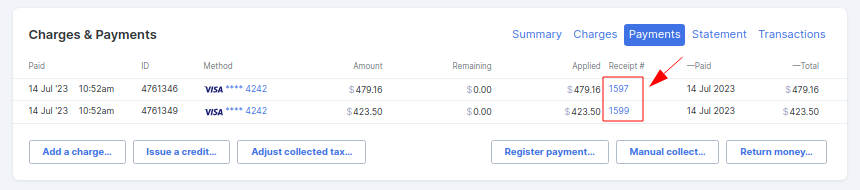
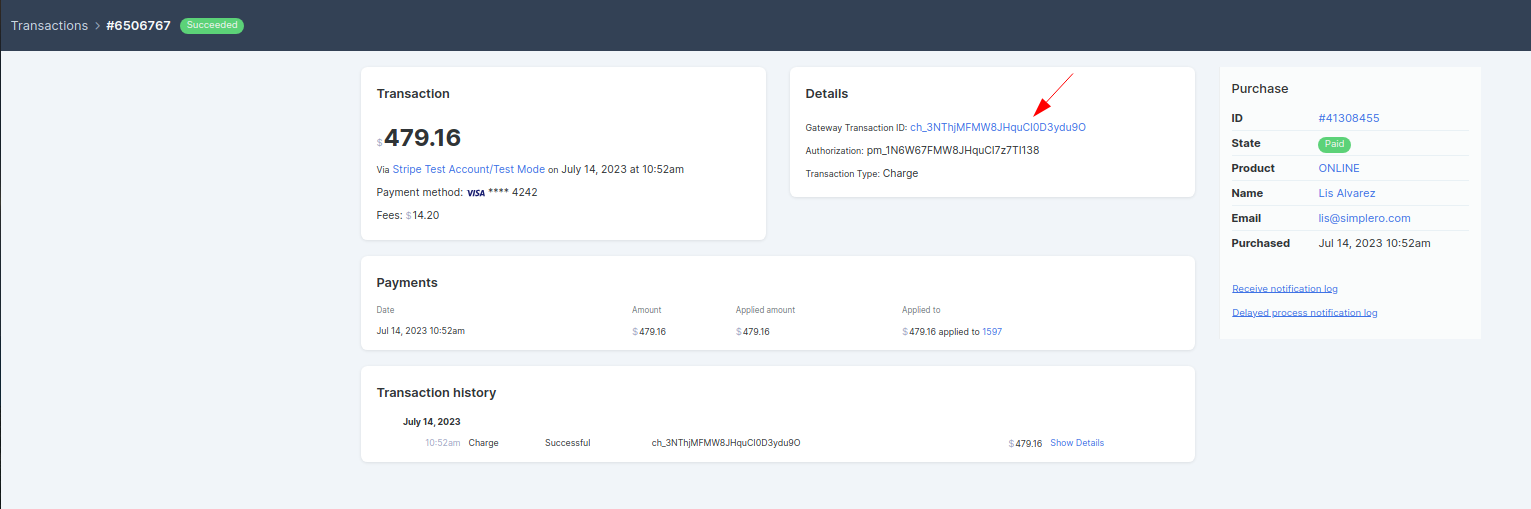
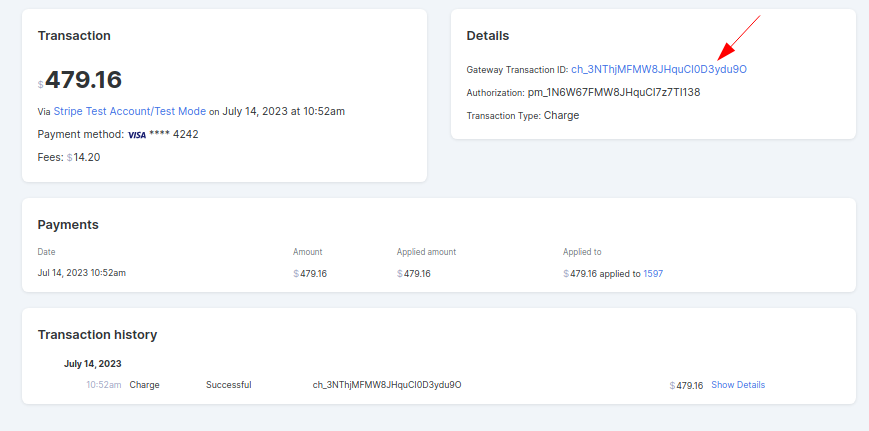
If you click on the credit card number, you will be directed into a transaction detail screen of the payment which will give you Transaction IDs and Authorization codes that may be useful to you and your customer when troubleshooting charge issues with the bank or payment processor.
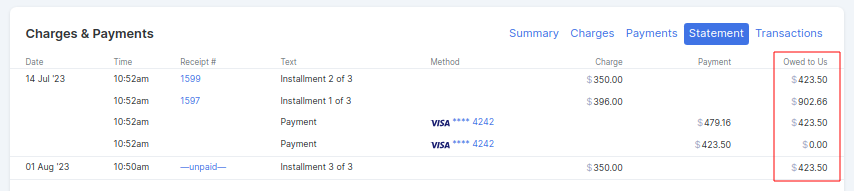
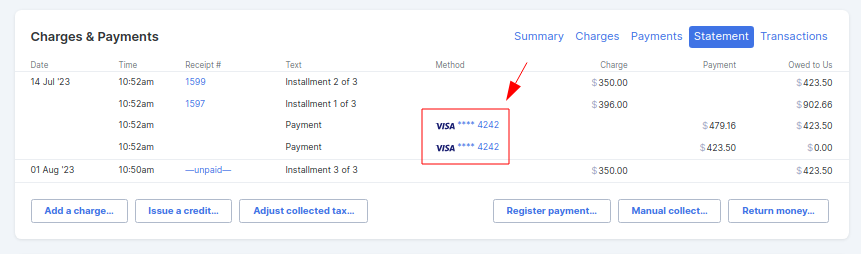
Statements Tab

This tab allows you to see a view of the processed payments including balance underneath OWED TO US. This would be helpful if a partial payment was made and you want to see the balance due.
If you click on the credit card number, you will be directed into a transaction detail screen of the payment which will give you Transaction IDs and Authorization codes that may be useful to you and your customer when troubleshooting charge issues with the bank or payment processor.
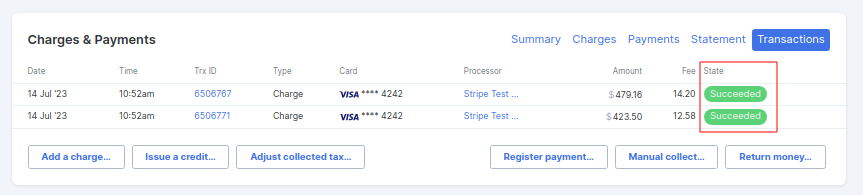
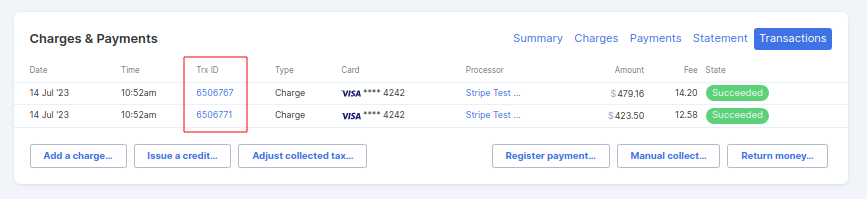
Transactions Tab
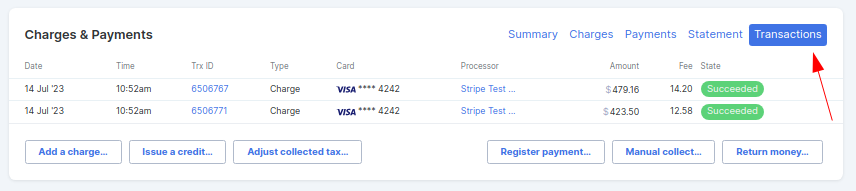
This tab will give you a view of exactly what happened associated with the purchase.
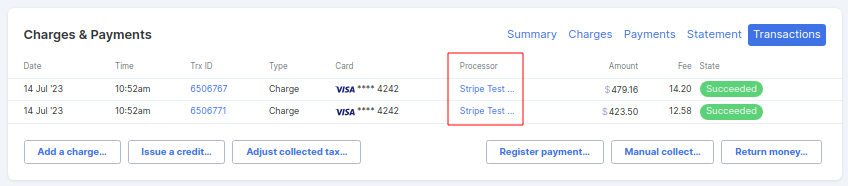
-
You can see the payment PROCESSOR, if you click on it it will take you to the payment processor edit screen.
-
You can see the STATE of the charge such as if it Succeeded or Failed.
-
You are also able to see the Transaction ID which will be helpful to you when working with your payment processor support.
-
You'll also have Action Buttons to choose from.
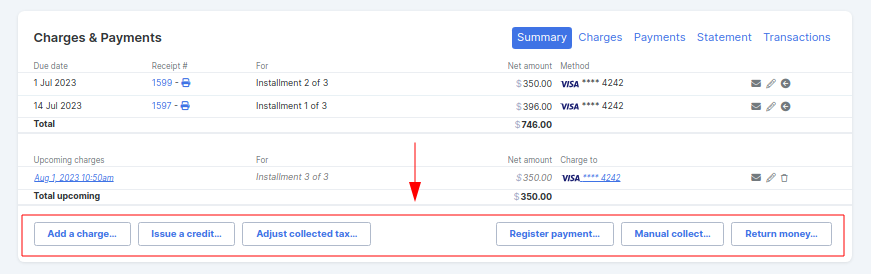
At the bottom of the Charges & Payments box, you have Action buttons.
-
Add a charge: This button allows you to manually add a charge to your customers' purchase. This could be used if you decide to break their payments into smaller amounts, or if they have decided to purchase an add-on.
-
Issue a credit: This button allows you to put into the system if you owe the customer money. This is usually used for processing a partial or full refund.
-
Adjust collected tax: This allows you to either refund tax you've collected or collect an additional tax. This adjusts the collected tax without affecting anything else. Do this if the initial tax percent was wrong.
-
Register payment: You would use this button if they have paid you outside of simplero such as in cash.
-
Manual Collect: Allows you to collect a manual charge just like the add a charge button. However, this is instant and not in the future. This will be done via the payment processor that is on file for this customers purchase.
-
Return money: This allows you to return money to the customer through their credit card without creating a credit note.
Suite 92530
New York, NY 10003
United States