

If you've followed the steps described in the previous lessons on this module, you should now have a Scheduling Link ready to use.
You'll find the scheduling link ready to be shared on the top right corner of the Scheduling link screen:

Note you can edit the URL slug using the Edit icon next to it:

This is how it will look like for your members when they get to the Scheduling Link:
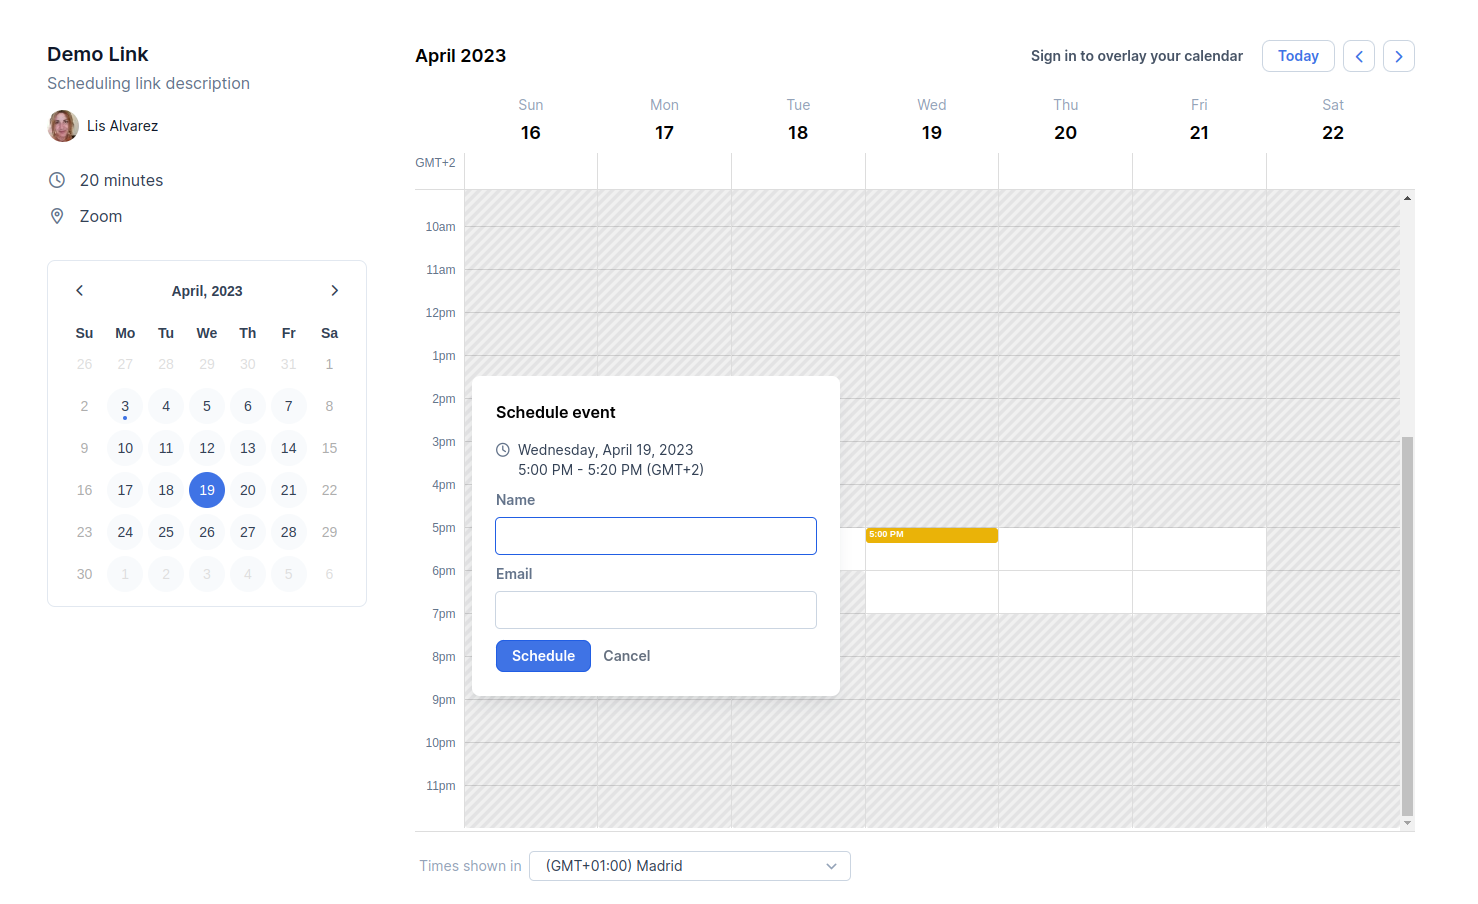
On the left side there's info about the event itself: Duration, Location, Name, and Description. There's also a calendar overview where you can click on the day to jump onto that date right away.
They can change the time zone at the bottom of the page to make it easier for your members to schedule their appointment or event with you.
If they click on an available slot, they will be asked to provide their name and email address to schedule with you.
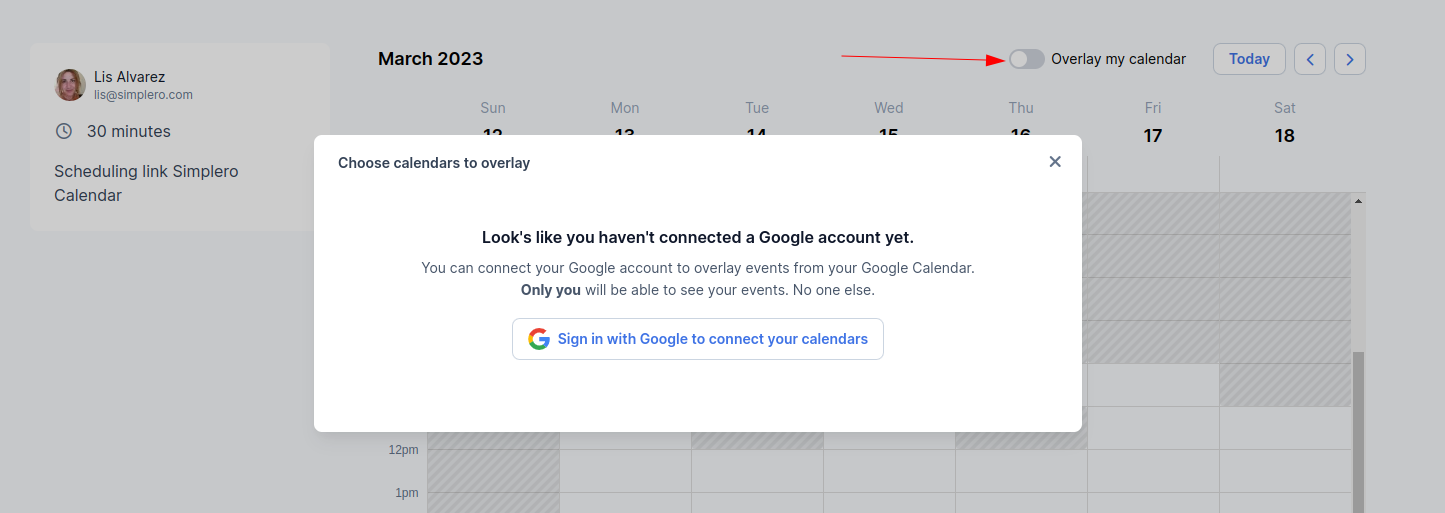
In case they'd like to also see their Google Calendar overlayed to yours, they can connect their Google Calendar too!
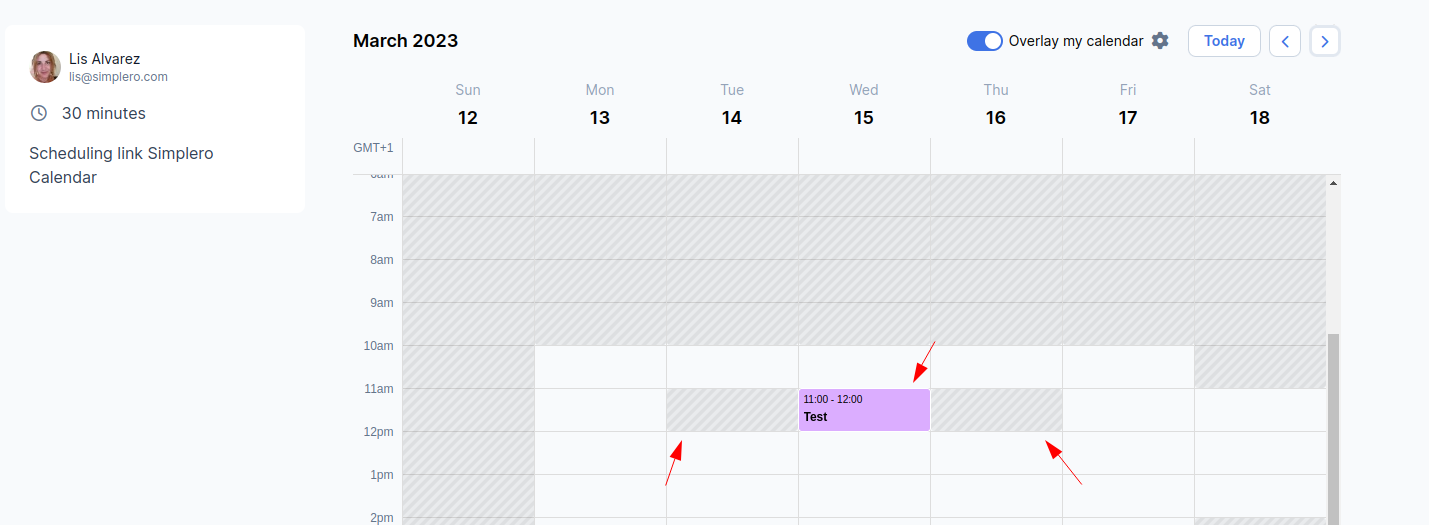
They'll see your current events as greyed-out presets overlayed with their Google Calendar:
As soon as they schedule the appointment, we will create an event in your Simplero account and (if you’ve connected your account and chose a default calendar for creating events on) in your Google calendar.
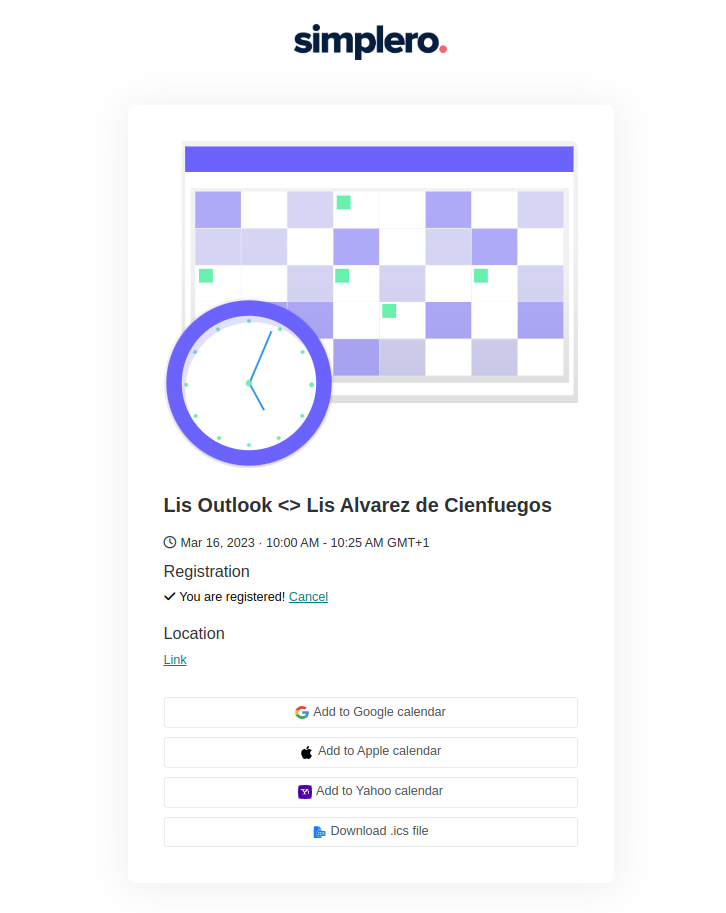
From the Event page, your member will receive the Link to the Zoom event (if you chose Zoom as the location).
They can also cancel their registration or add the event to their calendars from this page too.
A calendar notification will be sent to both the admin and the contact who booked the appointment with you.
NOTE! Simplero won’t send a notification if the event gets rescheduled or canceled.
Events
This is where you'll find scheduled appointments. Navigate to the Scheduling Link page >> Events tab:
You'll notice your Scheduled events also show up on the Calendar Preview:
Suite 92530
New York, NY 10003
United States