

In this guide:
How to Set your pages/courses to Dripped
When you want to give people access to content at different times, dripping in Simplero is the perfect feature to use. With Drip pages, you can create evergreen products and drip-content, where a module is released each week after a purchase, regardless of when customers make the purchase.
Drip pages also allow you to use the same site over and over again for different groups/classes going through the same course. For this reason, they're optimized for use with Drip and Automations, which are also designed for content and courses that are used by different people at varying times.
Dripping Content
Each page, course, module, or lesson inside a Membership Site can be automatically dripped out over time using the Drip status.
What this means is that the page, course, module, or lesson is ready to go, but when a new customer first gets access to your membership site or space, they won't be able to see it. You have to give them access first either through a trigger, automation, or broadcast/email within Simplero.
How to Set your pages / courses to dripped
On a Membership Site Page
Note: Your site has to be closed to be able to drip pages
Go to your site and select the Pages tab
Select the pages you want to drip
Click on Select action
Click on Drip

On a Course
Go to your Content tab and click on Courses
Go to your course settings:

Scroll down to the Publish state section and click on dripped

On a Module and Lesson

How To Release Access:
Using Auto-Responses
Create an auto-response and schedule it for x number of days after a customer subscribes to a list or purchases a product.
Make sure you have set up the content of the list or product to give access to the site or course your drip pages, modules or lessons belong to.

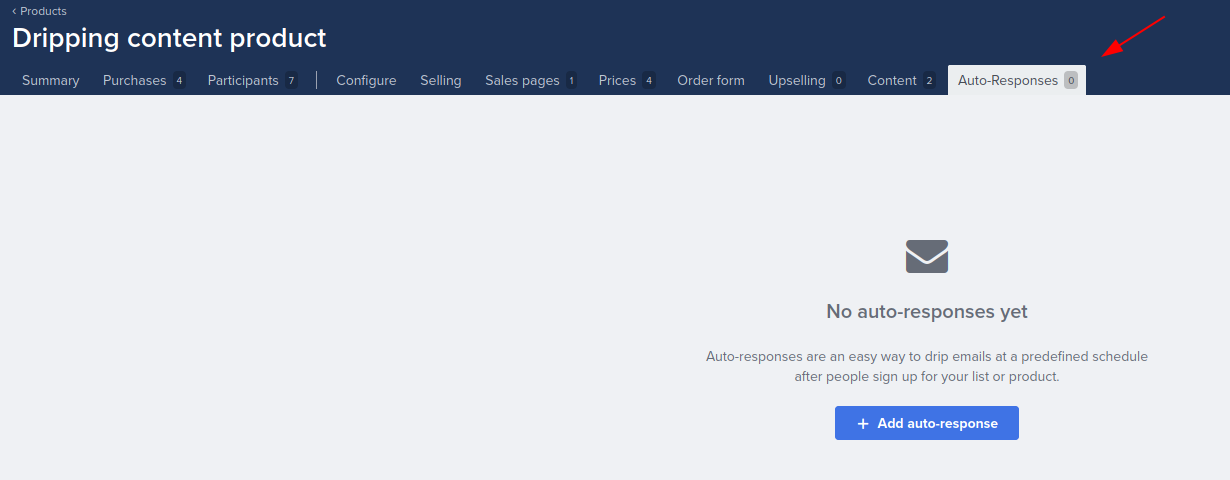
Navigate to the Auto-Responses tab.
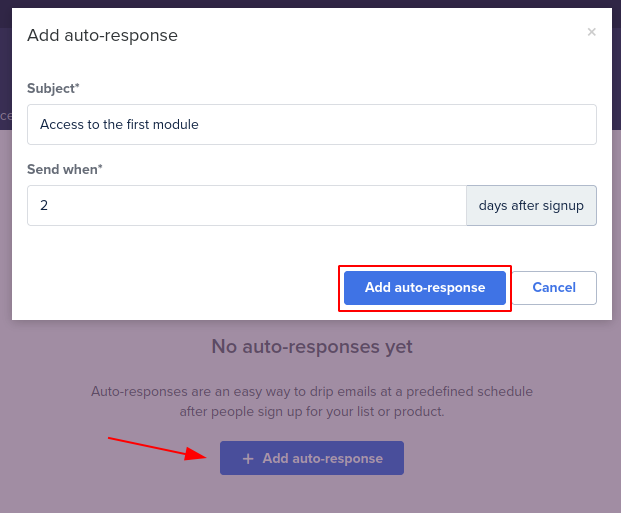
Click the + Add auto-response button.
Enter the Subject and fill Send When in with the number of days after signup/purchase you want your auto-response sent, and click the Add auto-response button.
-
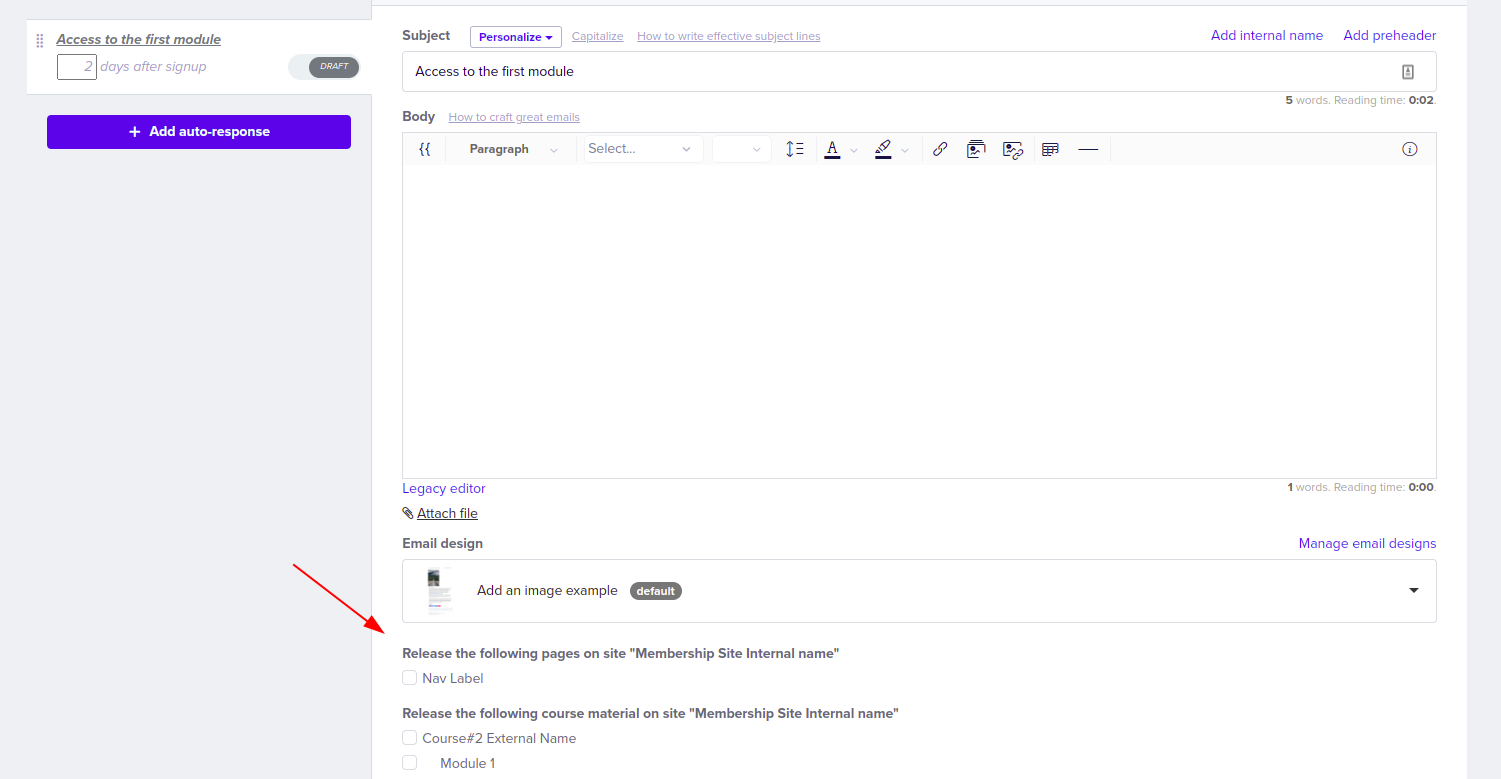
Complete your auto-response information:

Subject - What customers see (this should stand out in an inbox).
Internal name - What admin screen calls the email (only you can see this).
Preheader - The first part of your email to grab people's attention in inboxes (this is greyed out).
Email body - This is where you type the email that you want to use for the auto-response.
Email design template - Choose the email template to use for the auto-response.
Triggers - This section is not required for an autoresponder, but it does allow you to have the system perform an automated action when an autoresponder is sent. Check out our guide on triggers for more information about how they work.
Click the Save changes button.
At the bottom of the page, below the email body box, you'll have checkboxes next to each page and course content that is set to drip. If you tick those boxes, the auto-response will give access to that content as soon as it is sent.
Note: The list or product needs to be giving access to the site/course through the content in order to use that option
To Release Access Using a Broadcast
Create a new broadcast. Check out our guide on Dripping a Page in a Broadcast for more information on this.
-
Be sure to select a list or product that is giving access to this membership site/space. You can't have additional recipients that don't have access to that same membership site/space; if you do, the drip option won't be available.
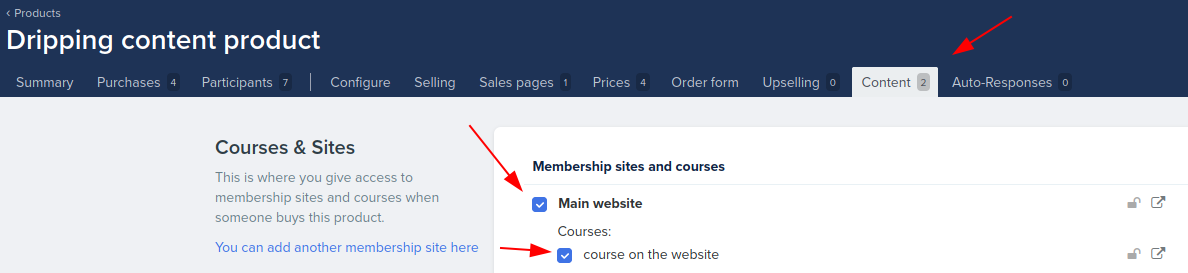
If you haven't given access to a membership site/space yet, go to the List or Product, then go to Content, under Courses & Sites check the box next to the membership site you want to give access to.
Select the broadcast recipients: participants on a product or subscribers of the list edit the content.
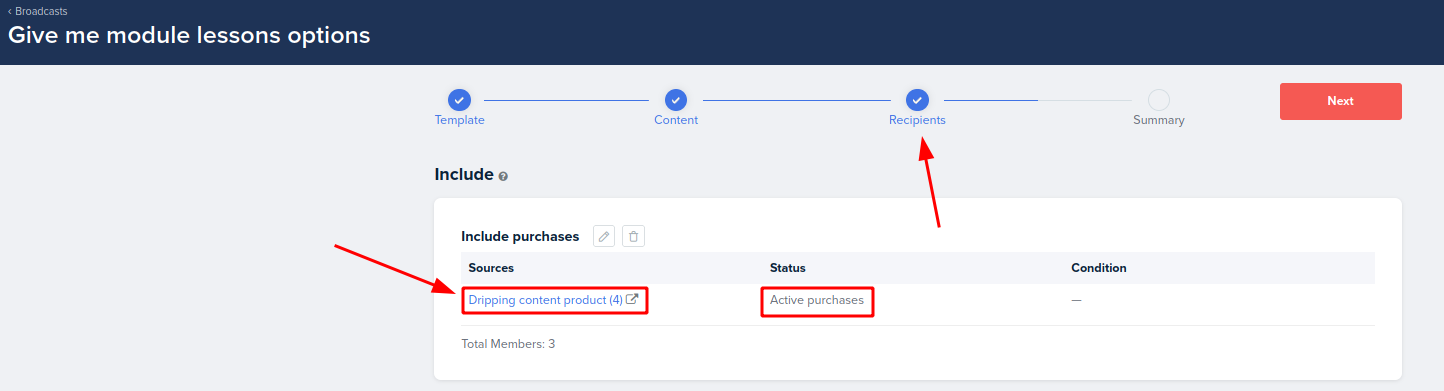
You'll now see a set of checkboxes under the content editor that you can check to release course modules and lessons on the membership site/space.
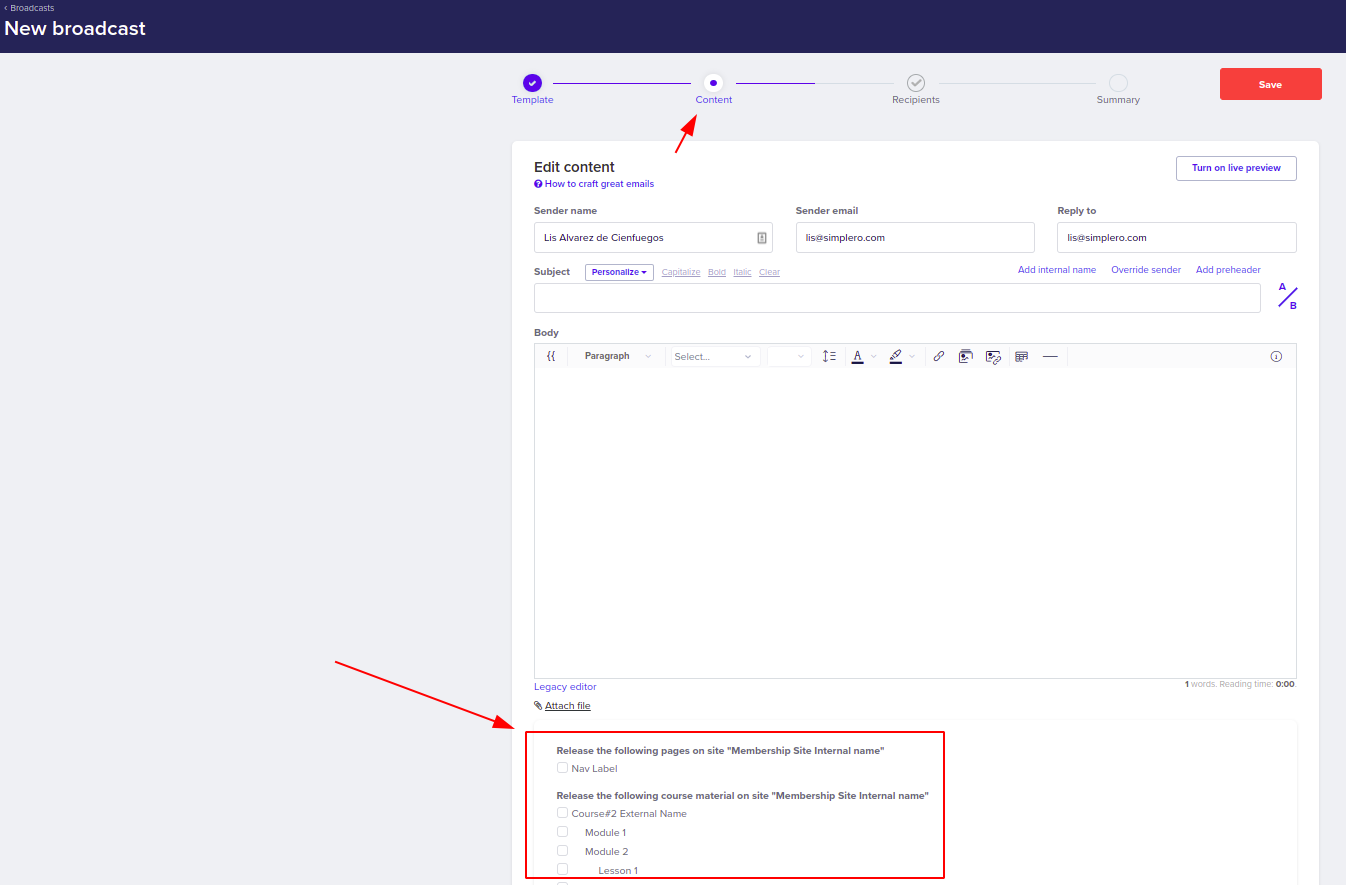
Check the page you want to drip. This will place a link in your email with the page title. You can use that link in the broadcast, edit the text, or delete it. As long as the box next to the page is checked, the recipients will still get access.
Finish adding copy and send the email as you normally would.
As soon as the email goes out, whether as an auto-response or broadcast, the recipients will be able to view the pages you selected.
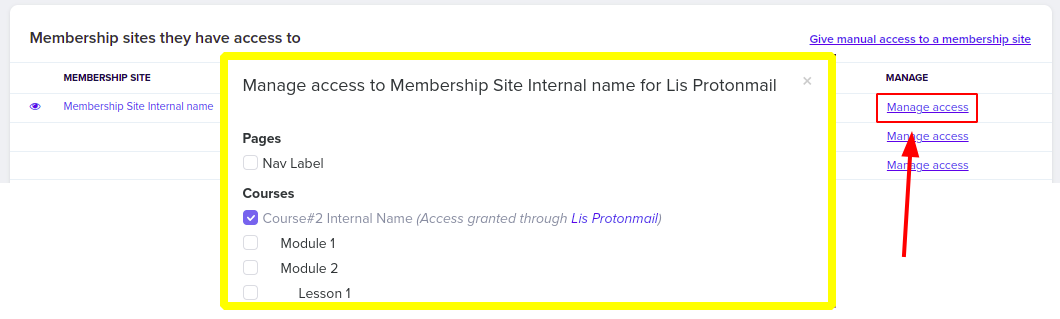
To override the pages that a contact has access to, find their contact page using the global search field in the top right corner of your account. Then find the membership site/space in question, and you should see a link that says "Manage access." Click that, and you can choose which drip pages the contact gets access to.
To Release Access Using Automations
You can also release content using automations.
-
Create an automation:
Select Marketing from your Simplero Dashboard and choose Automations from the dropdown menu.
Click the Create new automation button in the upper right corner.

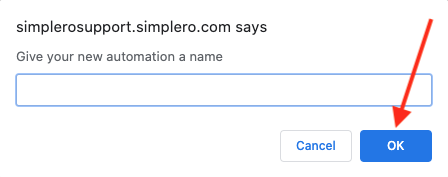
Give your new automation a name and click OK to save.
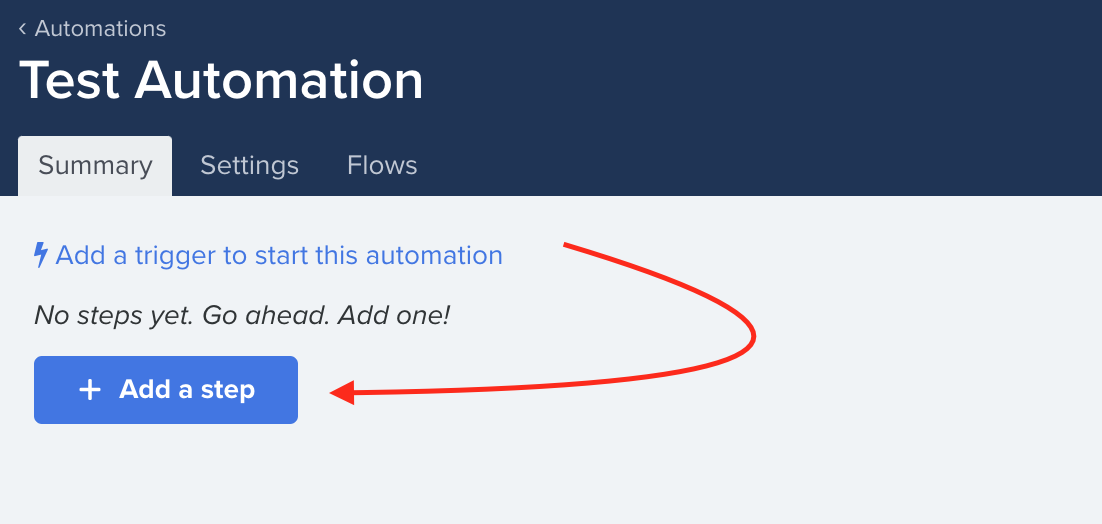
Click the + Add a step button to add your action step.
In your action step, click the drop-down arrow to choose the option "Give access to a site/page/course module or lesson," select the site/page/course module or lesson name and click the Save changes button.
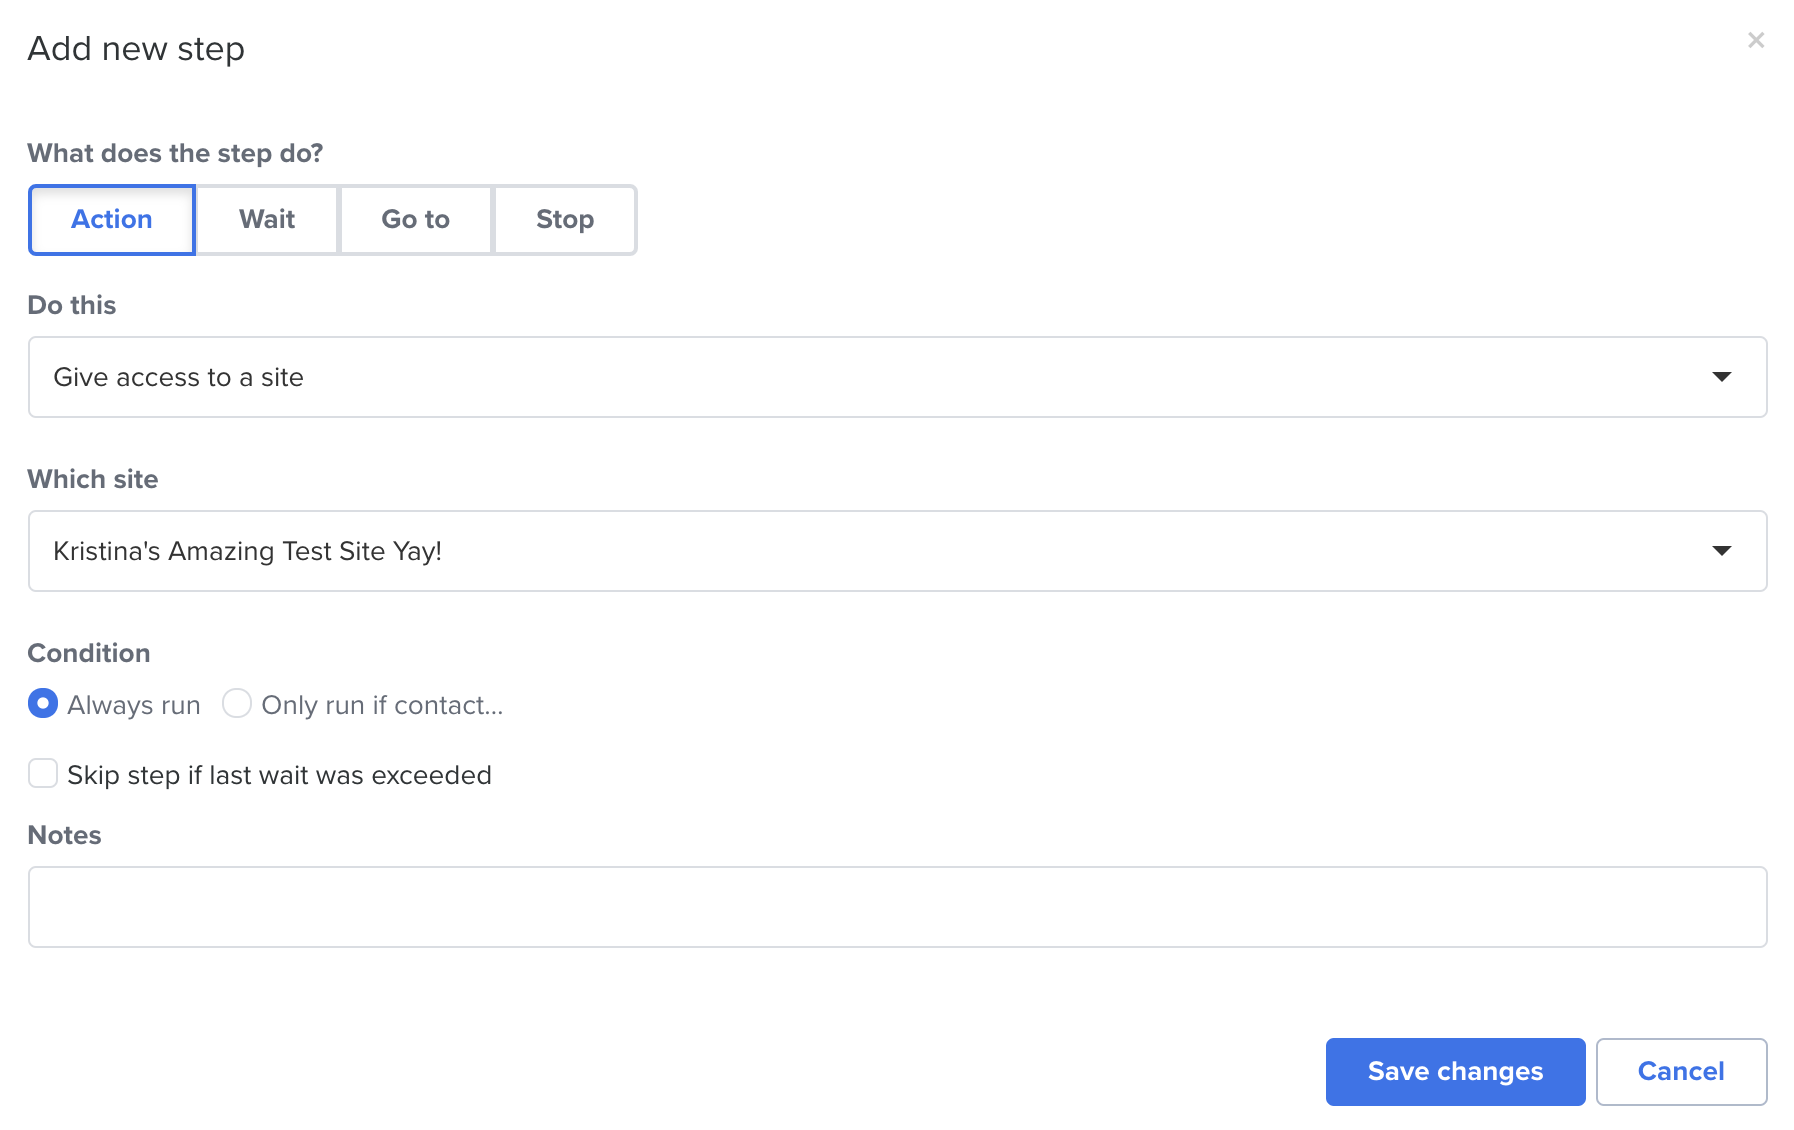
-
Then set up a Trigger on the product or list that starts the automation when someone subscribes to the list or a new participant is activated on the product for the first time. You can do this in two ways:
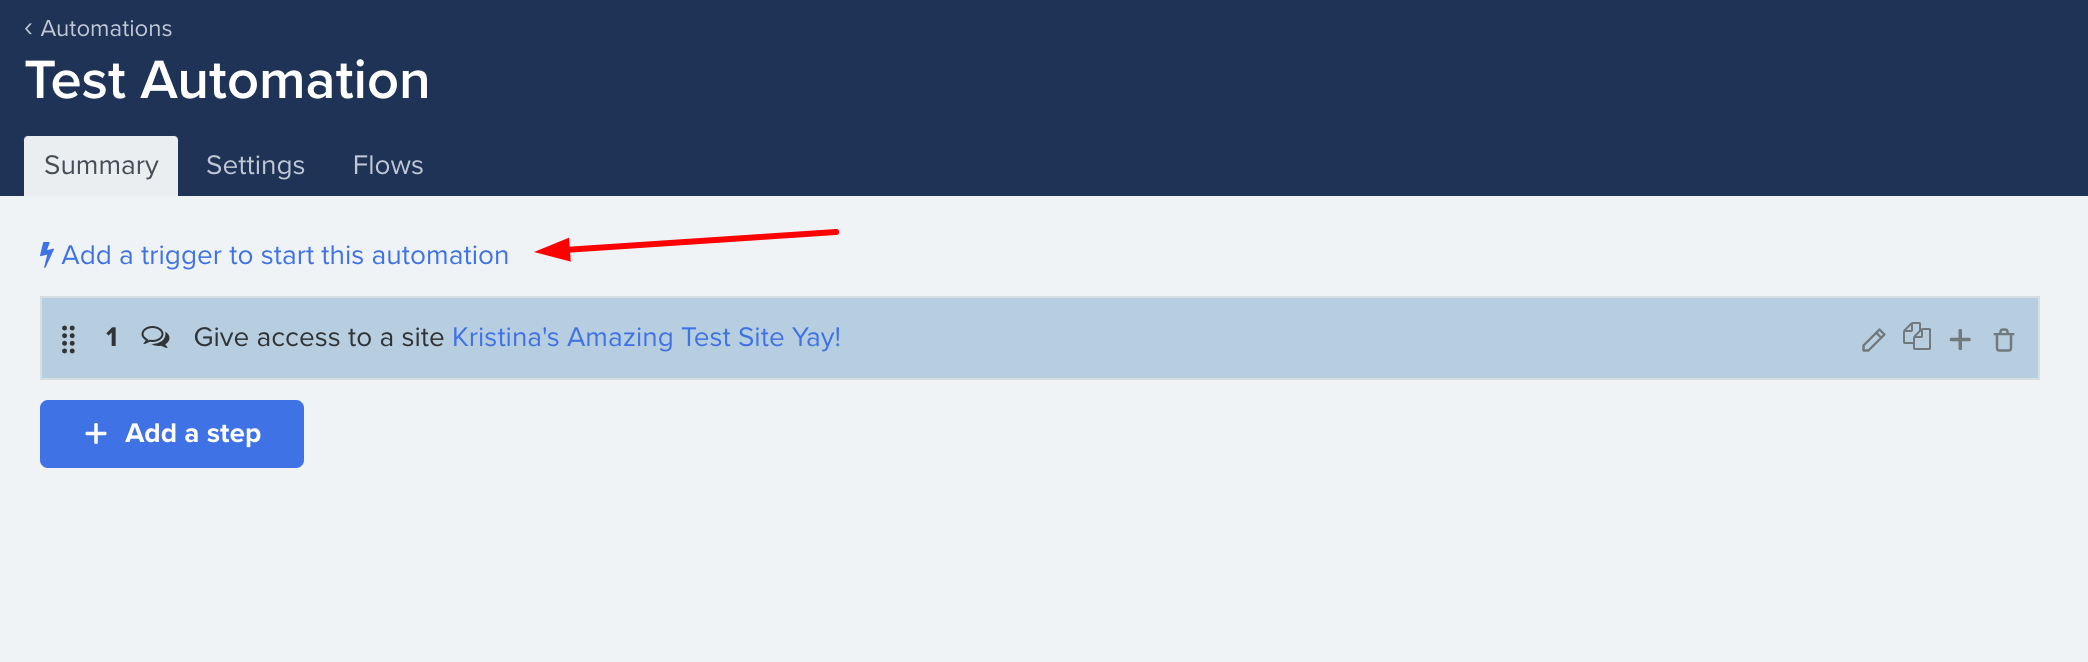
Click on Add a trigger to start this automation at the top of the automation before Step 1.
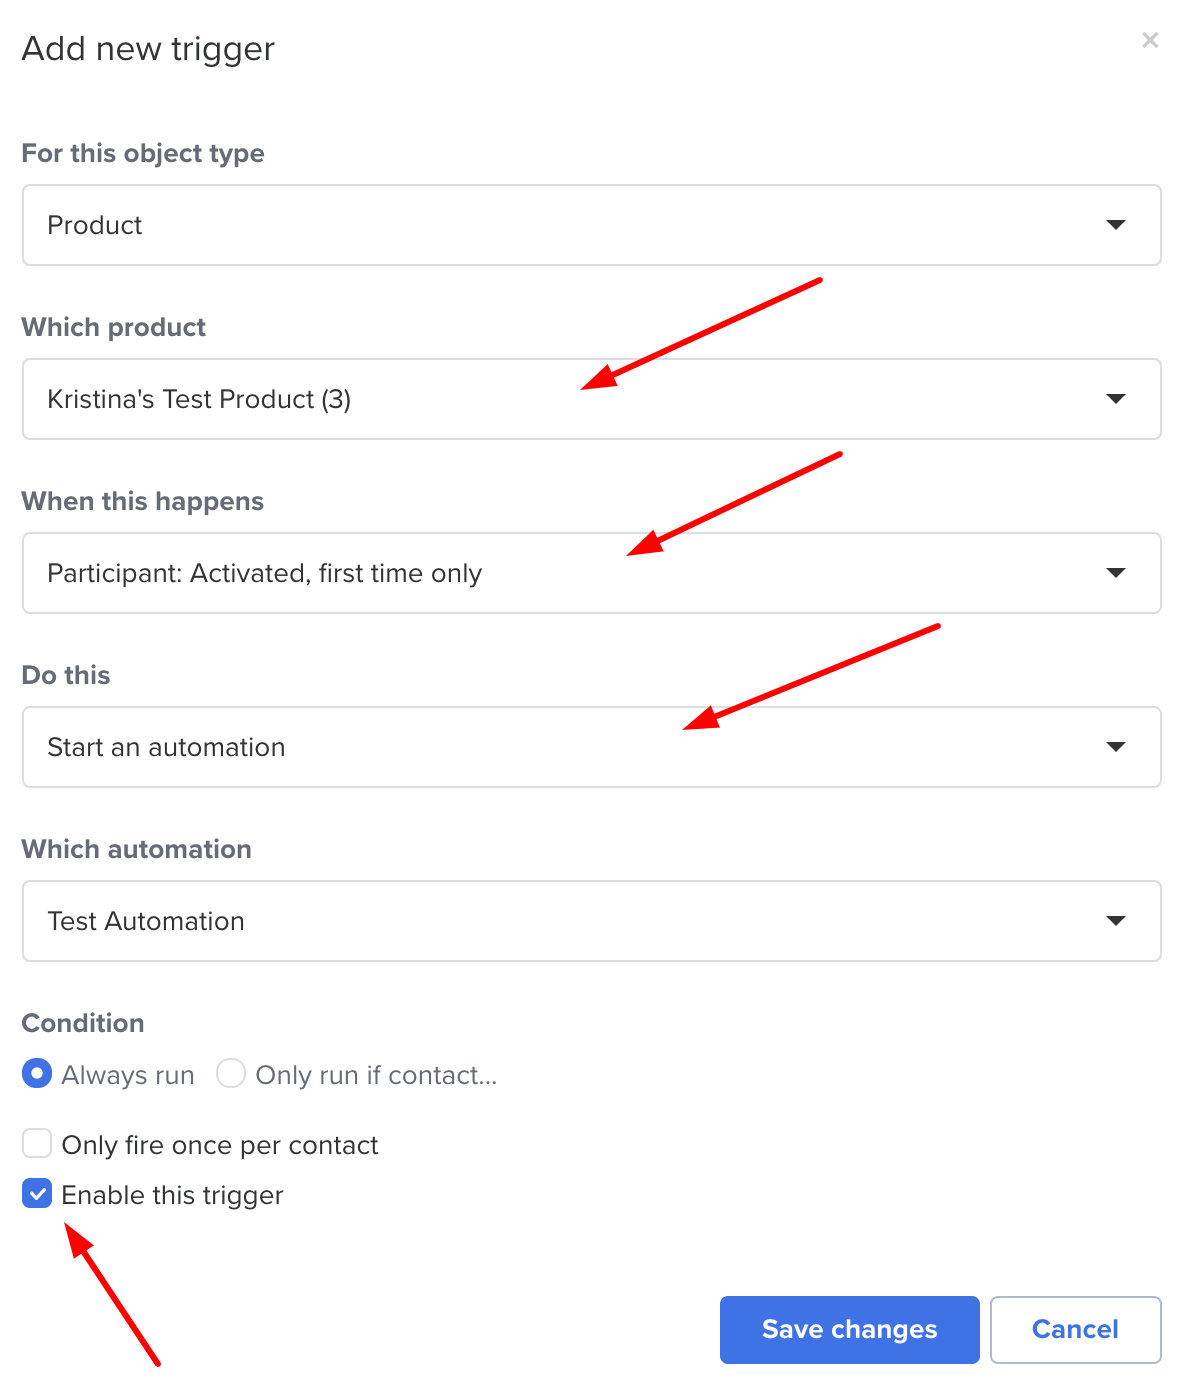
In the Add new trigger pop-up screen, click the drop-down menu to select the option for Participant Activated, first time only, Start Automation, choose Which automation and click the Save changes button.
You're all set! After these steps, the automation will be in charge of giving your customers access to the content.
NOTE: If you use an automation to release access to a page within the membership site/space, then the automation controls access, not the product. Therefore when you go to the "manage access" link within the client screen in the product, you will not see the page listed as viewable.
To Release Access Using Triggers
You can also give access to the drip page or course module/lesson with triggers. To release access using triggers, follow these steps:
Select Sales from your Simplero Dashboard and choose Products/Lists from the dropdown menu.
Select the product or list you want to add the trigger to.
Click on the Content tab.
Scroll down to the Triggers section and click the + Add trigger button.


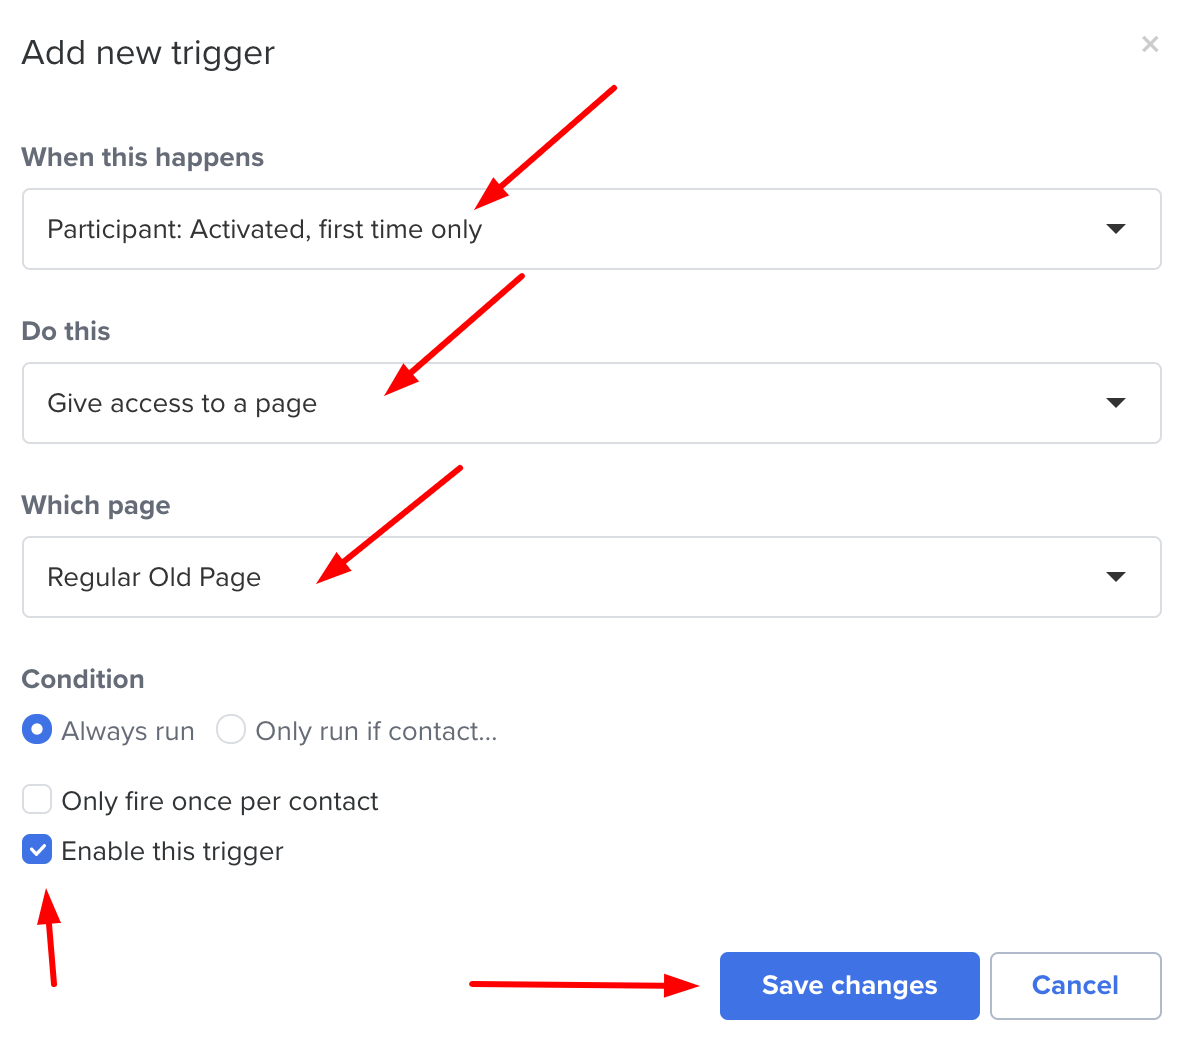
In the Add new trigger pop-up screen, click the drop-down menu to select the option for Participant: Activated, first time only, Give access to a page, choose Which page, and click the Save changes button.
To Release Access Through a Segment
You can also give access to a page to people across more than one product or list and without sending an email. Here's how:
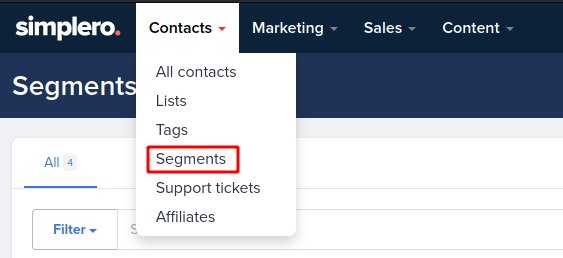
Select Contacts from your Simplero Dashboard.
Choose the Segments tab from the dropdown menu.
Click the Create a segment button located in the upper right corner.

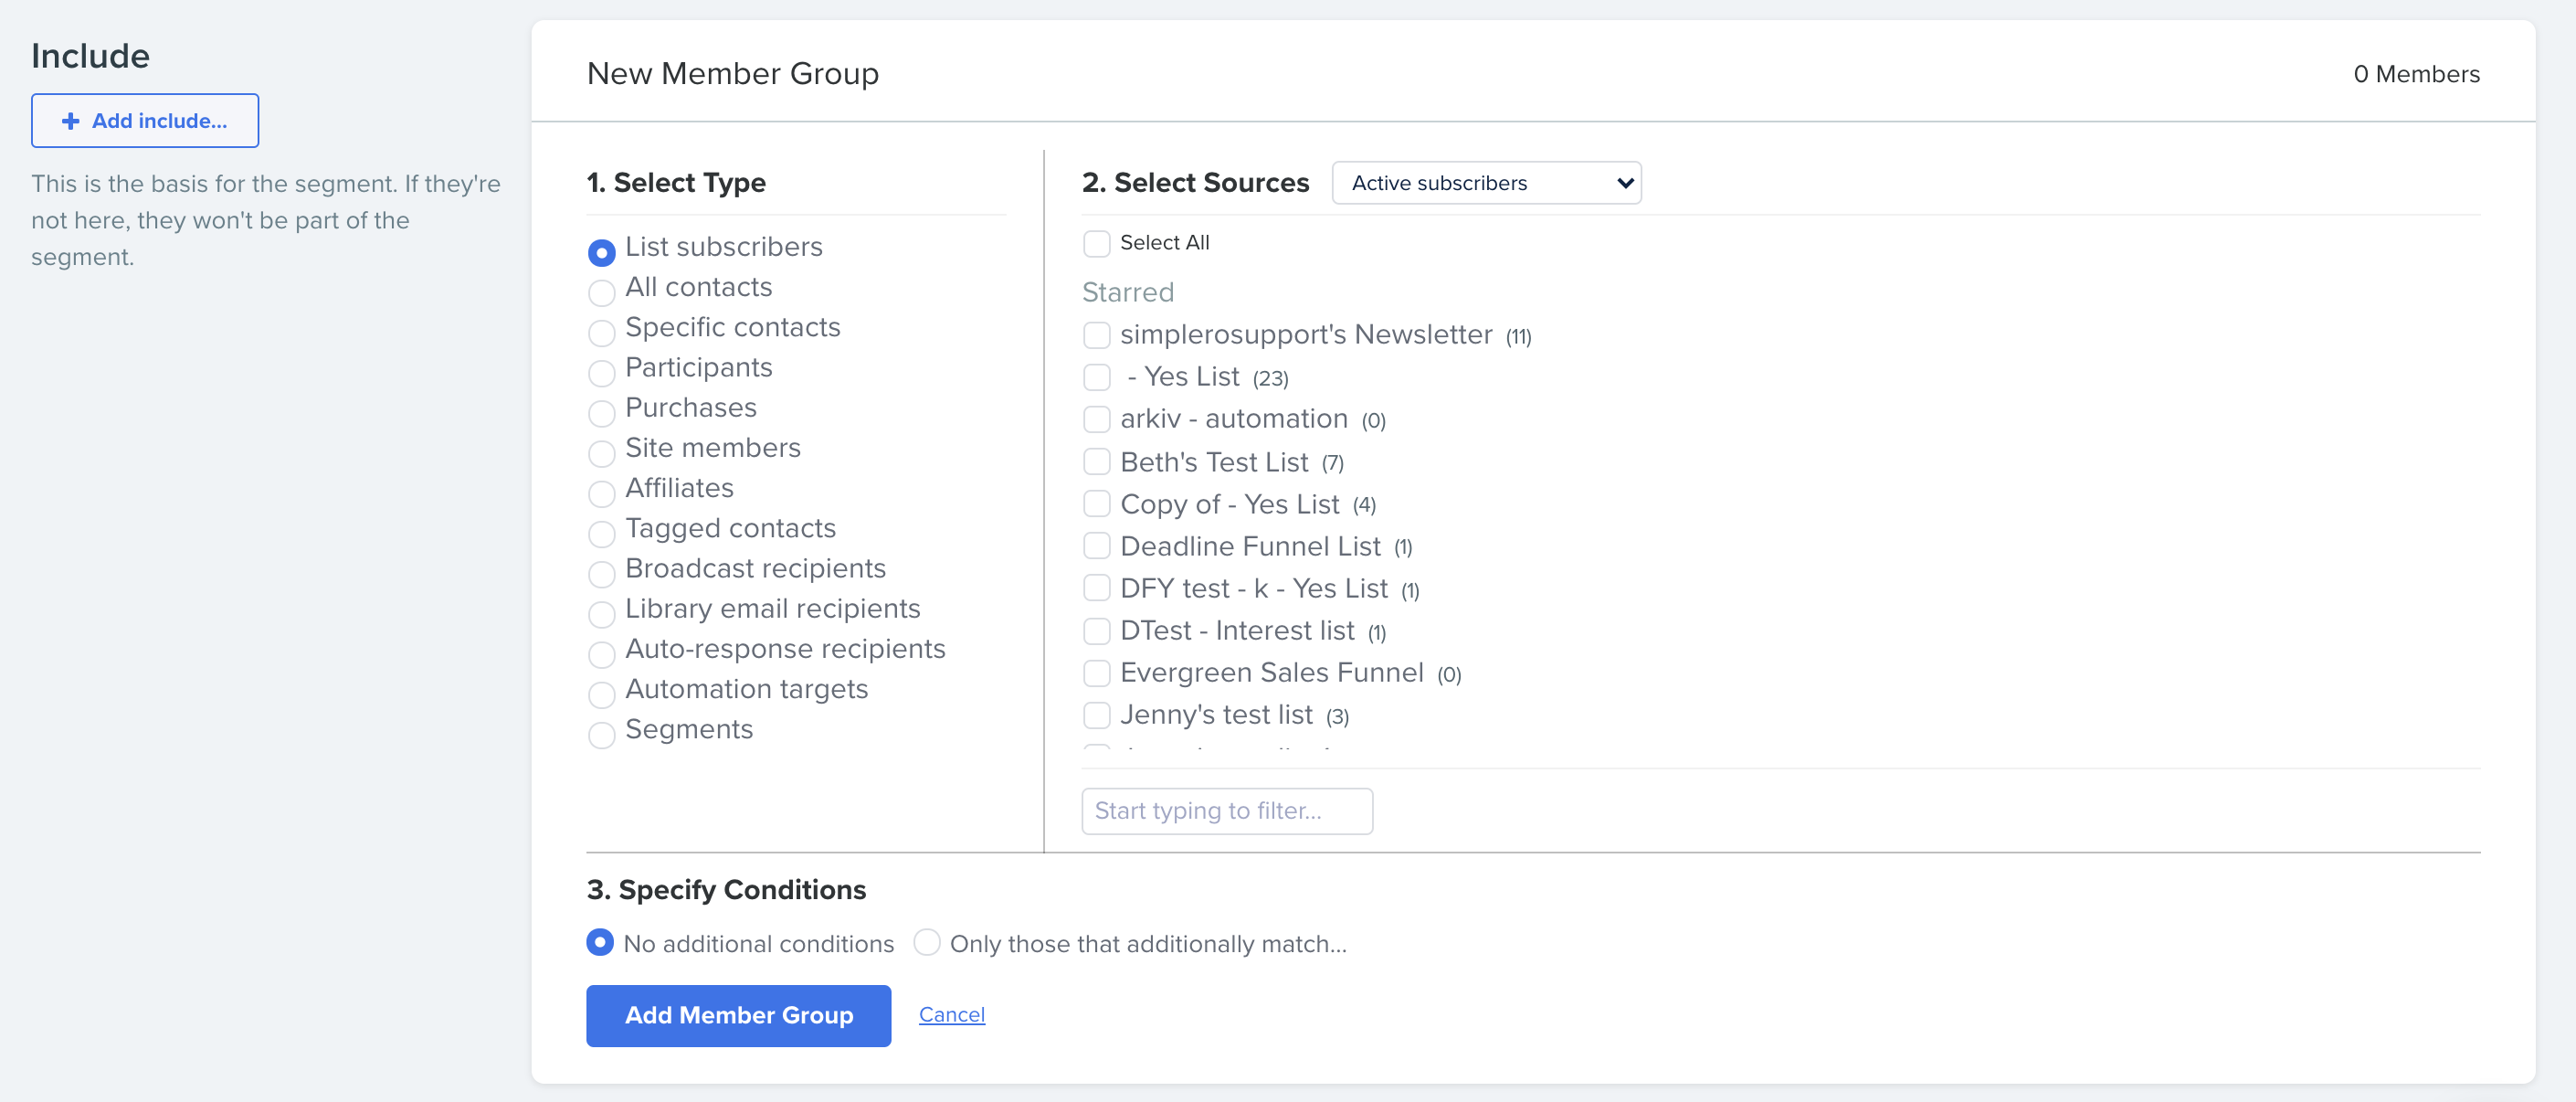
In the Include section, click the + Add include... button and choose all the products or lists of contacts you want to give page access to (for example, a list, broadcast, product, auto-response, automation, etc.). Then click the Add Member Group button, and this will start populating all the contacts for that segment.
Now perform the action for your segment by selecting the Perform action... button from the top action menu.

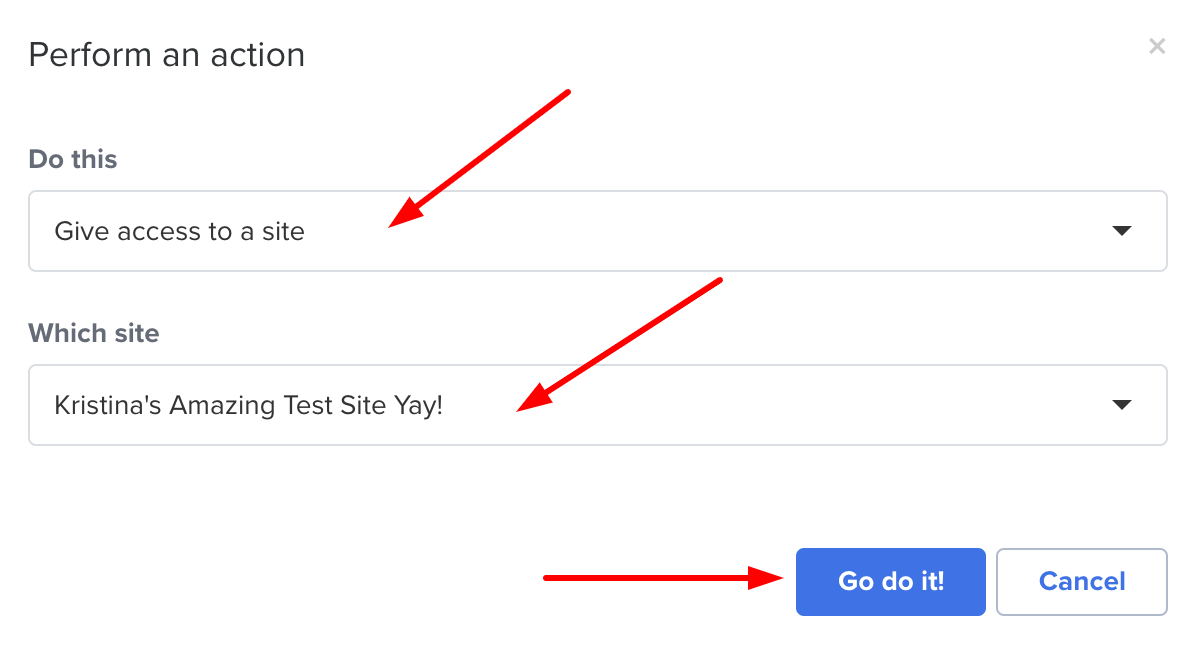
In the Perform an action pop-up screen, click the drop-down menu to select the option Give access to a site/page, choose Which site, and click the Go do it! button.
If you get stuck or have any questions about the steps in this guide, contact Simplero Support. We'd love to help you!
Suite 92530
New York, NY 10003
United States