After your customers purchase your product, they’ll be redirected to a Thank You page.
When creating your Thank You page, we have three options to choose from:
-
Default Thank You Page: Simplero generates a standard thank you page for every product you create. This confirmation page includes a link to the content and assures your buyer their purchase is complete.
You can add to custom text, images and videos to this default thank you page, but you can’t customise the rest of the design, ie. change the background colours, add other sections, etc).
- Redirect to site: when giving access to a site you'll be able to set it to Redirect to the site right after purchase.
-
Redirect URL: OR if you'd prefer to send people to a fully custom thank you page (where you customise the design, layout, add sections, etc), you can do that instead.
You’ll need to create your own thank you page inside Simplero (as a landing page), or send customers to an external URL.
To Use the Standard (default) Thank You Page
-
Go to your product and click on Content in the menu.
-
Scroll down to Thank You page.
-
Select Show thank you page, and you’ll see the box where you can add the text, images and/or videos you'd like to use:

You can also add your customer's personal information to the thank you page. This can become handy if you are selling tickets for a live event, where you need the customer to bring proof of the purchase.
To do this in the Legacy Editor, press the Insert button in the body field to insert personal information:

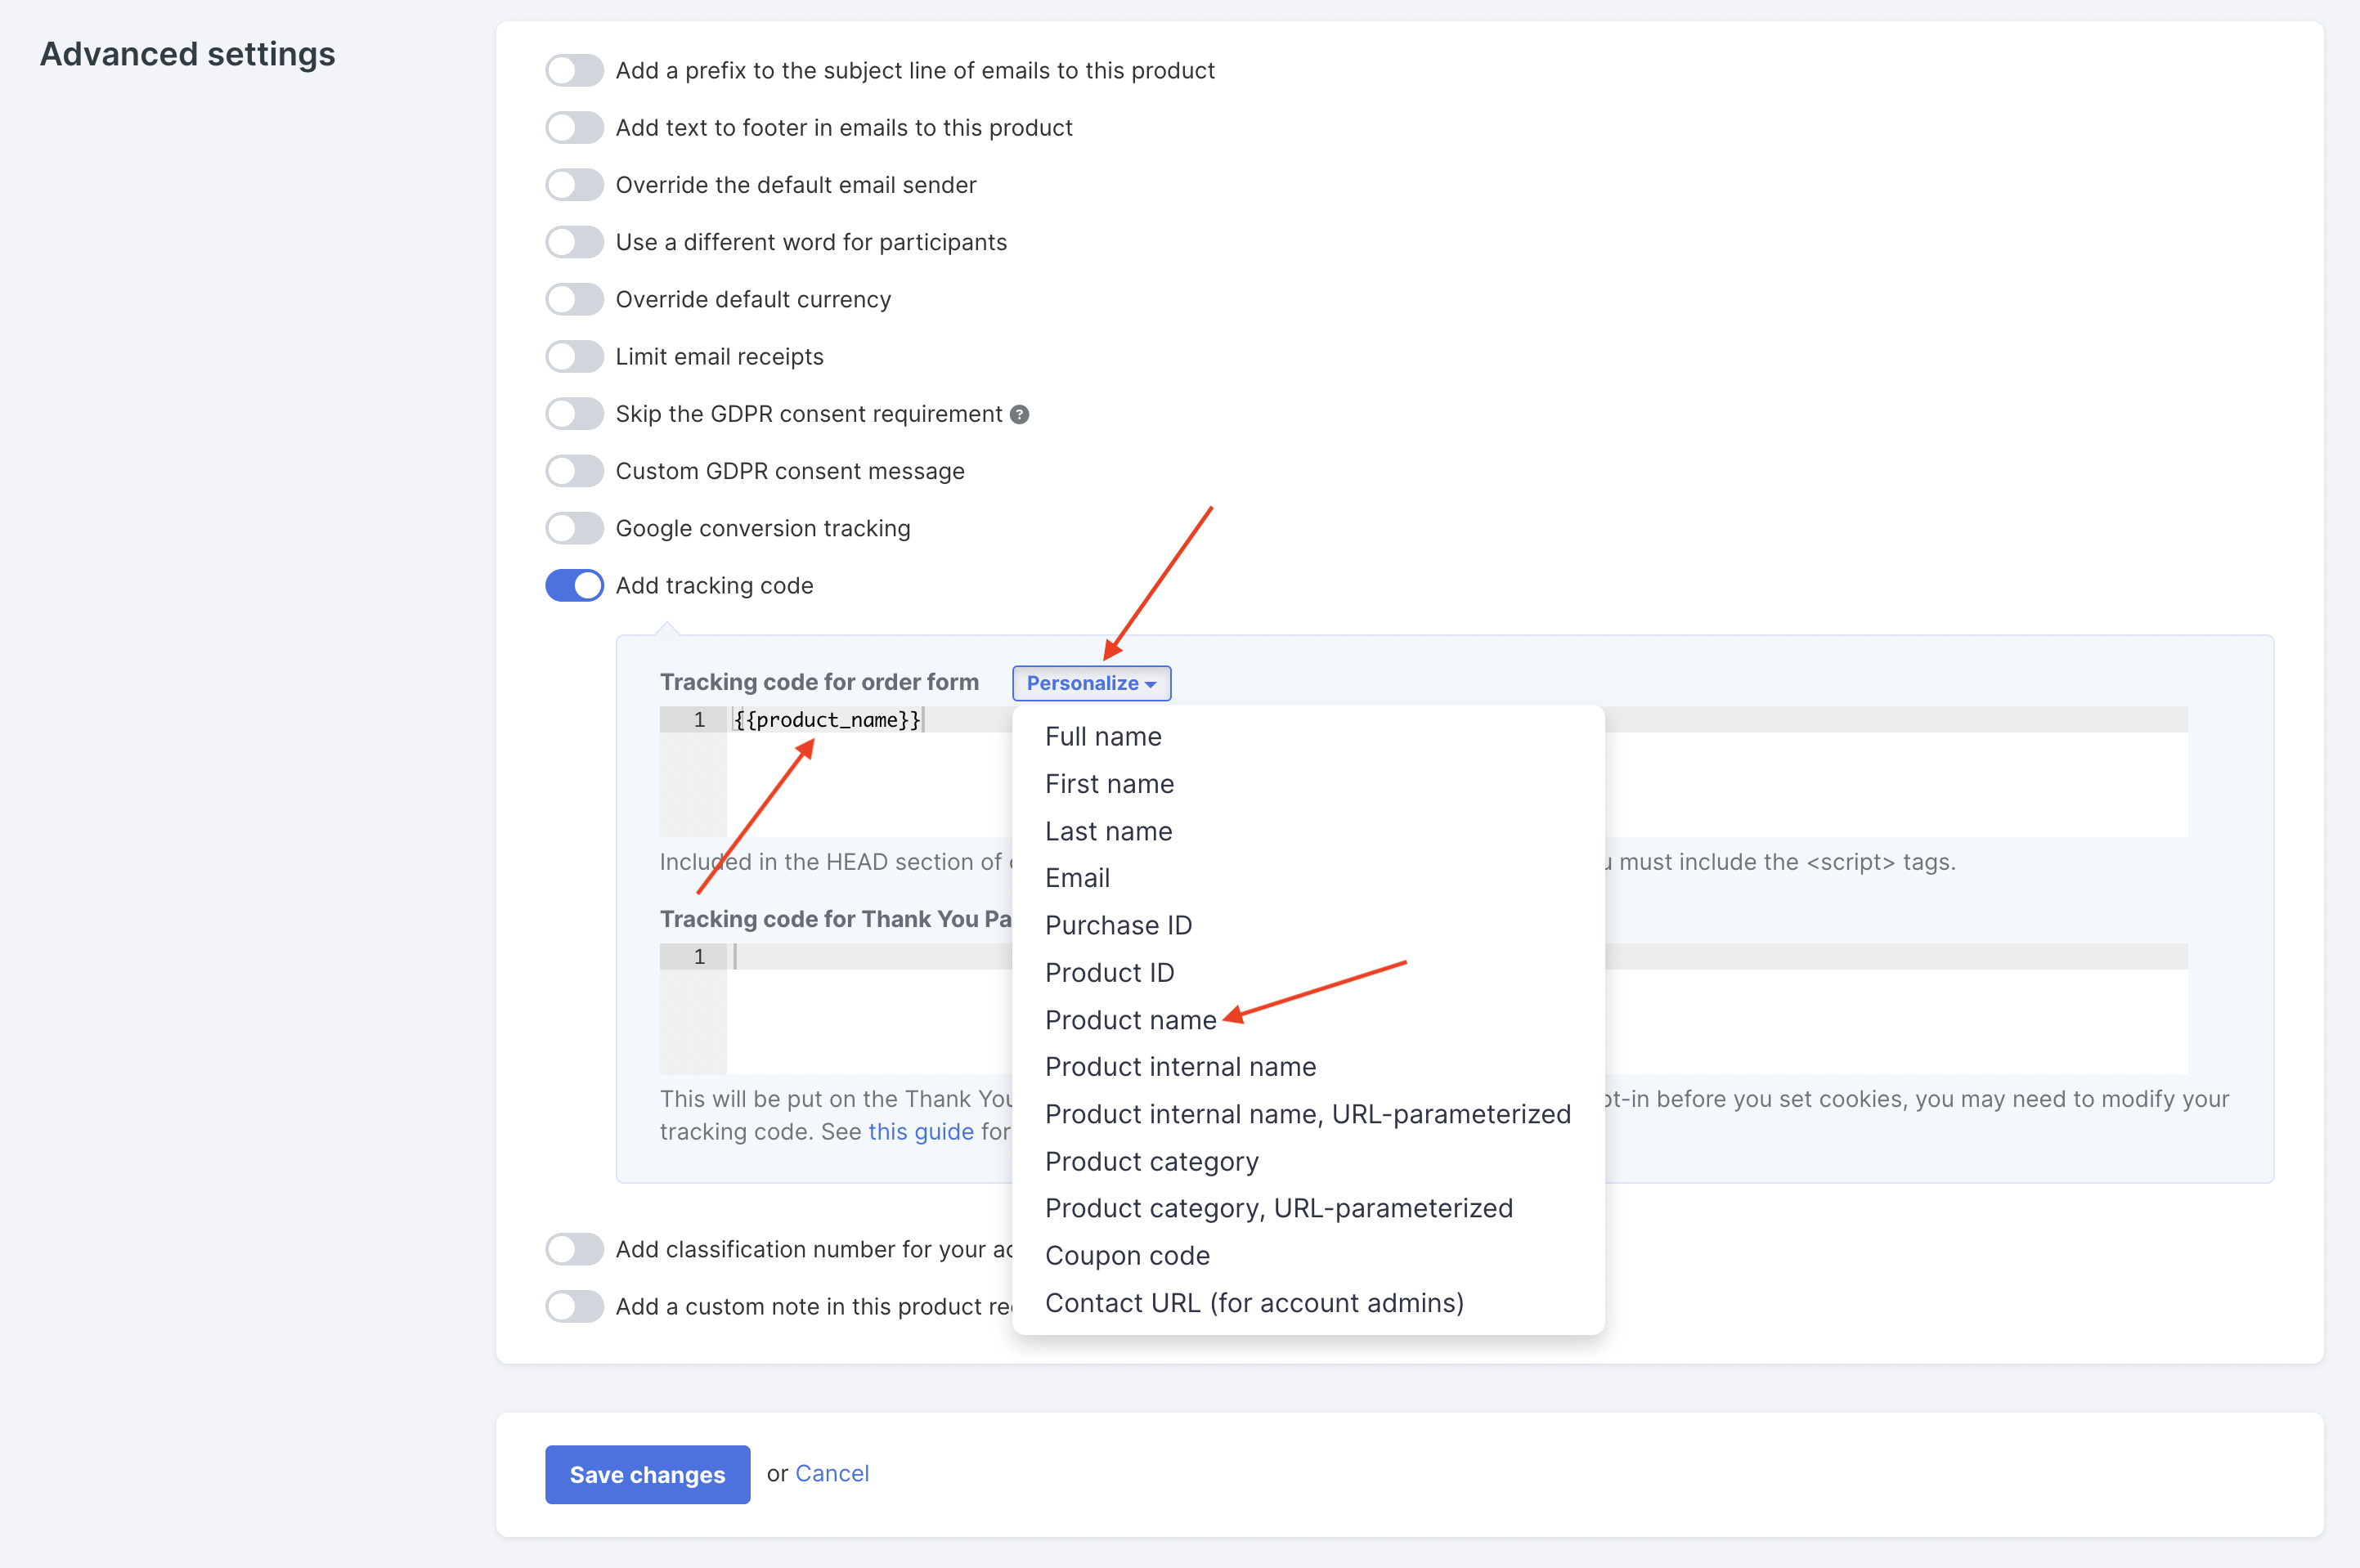
If you also want to include information from the purchase, you can find that under the Product >> Configure >> Advanced Settings >> Add tracking code:
-
Click on the button Personalize next to Tracking code for order form.
-
Choose the information you want on your thank you page
-
Copy the code that is generated and paste it in to your Thank you page.

-
Delete the code in the Tracking code section when you have finished your thank you page and remember to save your changes.
You can use the same technique for your auto-responses in your product to add personal and purchase information.
To Use a Fully Custom Landing Page
-
Go to your product and click on Content in the menu.
-
Scroll down to Thank You Page.
-
Select the option that says Redirect URL and either paste the URL of your Thank You Page into the field or select a link from the options given:

SUPER IMPORTANT NOTE! If you use this option, you need to make sure you add the link to the membership site or content provided with the product somewhere on the landing page. If it doesn't have this, your customers will have no way to access it - since Simplero will always direct them to this Thank You Page when they try to access their content.