How To Guides

0 of 399
0%
Contacts
0 / 8
Lists
0 / 16
Segments
0 / 3
Notes and Tags
0 / 2
Support Tickets
0 / 7
Surveys
0 / 3
Main Website
9:35
0 / 24
Triggers
0 / 8
Broadcasts
0 / 32
Newsletters
0 / 1
Landing Pages & Forms
0:21
0 / 11
Affiliate Programs
0 / 11
Automations
0 / 14
Emails for automations
0 / 1
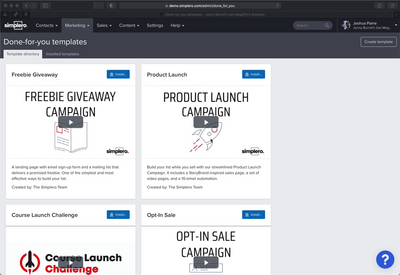
Done For You Campaigns
3:13
0 / 2
Funnels
0:25
0 / 3
Products
0 / 40
Catalog
0 / 2
Purchases
0 / 29
Receipts and Tasks
0 / 2
Pipelines and Deals
0:04
0 / 2
Sites
0 / 19
Sites [New Community Experience]
9:01
0 / 4
Courses
0 / 11
Events
0 / 3
Media Library
3:24
0 / 20
Worksheets
0 / 3
Scheduling Links
0 / 8
Account Settings
7:18
0 / 36

View your Simplero accounts, membership sites, and courses you have access to, as well as receipts of purchases you’ve made. Additionally, on the account settings page, you can change your name, email, phone number, password, and social media links.

How To Guides- Lesson1
How the Trial Works
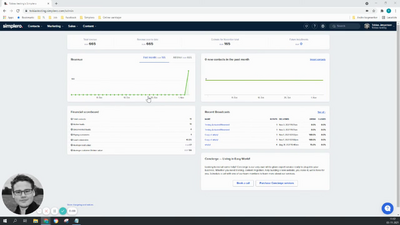
If you want to try out Simplero but aren't sure about signing up yet, then our 14-day free trial is perfect! This free trial allows you to explore everything in Simplero. However, there are a few restrictions. On the trial, you won't be able to: Send more than 10 emails per month Upload more than 10 MB of data Send text messages Even with these restrictions, you'll still be able to test everything out and have it all set up for when you're ready to officially launch.  Once you're ready to launch, simply activate your account under Account settings > Plan and billing. When you activate, your 30-day billing period starts, and you're officially a Simplero customer! Please note, we don't have a "pause" or "go back to trial" feature, so once you activate, you're activated. We want you to be profitable and stay with us for a very long time as most people do, so please reach out if you need anything. We're here to serve you! Features to Explore Financial Scoreboard This gives you a quick snapshot of your contacts, leads, and customers. It also allows you to gauge your success with lead conversion.  Contacts Here you can see how many new contacts you've gained over the past month with this detailed graph. Recent Broadcasts If you send broadcasts, you'll be able to see a detailed report including the number of recipients and open and click percentages.  Bounced Emails  Want to make sure all your contacts are receiving your emails? This report gives you a full list of bounced emails so you can handle them as needed.  My Trial is about to end... Need more time? Before your trial ends, you can request a one time 7-day extension by sending us a quick message via the link on the activate page. Just let us know why you need an extension- we're happy to help!  
How To Guides- Lesson1
How to See Your Account Overview
Simplero makes it easy to keep track of all of your account information in one place.  From any screen in Simplero, you can access your Account Overview. Simply click on your picture/name located at the top right corner of your Simplero Dashboard. When you click on your picture/name, a menu will appear, and you can select: Your Profile  Your Account (see below for details) Your Organizations (other Simplero accounts you have access to) Your Purchases Log Out When you select Your Account, you'll be taken to your Account Dashboard, which looks like this:  From your Account Dashboard, you can access:  Your Simplero Accounts - This is where you can access any Simplero accounts you own or are an Administrator of. Simplero Account Admin - If you're an Administrator of an account, you'll see the blue "Admin" button next to the account name, like this:  Your Products - This is where you'll see any Membership Sites that you're a member of. Your Worksheets (under Your Products) - This is where you can view your responses to worksheets you've completed for any Simplero site. Your Purchase History - Through your purchase history, you can manage and view any product purchases made in Simplero. Affiliate (when applicable) - If you're a part of our affiliate program, this is where you can see the details of your affiliate arrangements with Simplero accounts. You can also manage your Profile and Log Out from this screen. Several of the above options, like Purchases and Affiliate, can also be accessed from the Account Dashboard. 
How To Guides- Lesson1
Default Account Currency
Currencies Your account has one primary currency, which should be the same currency that your bank account is in. It is the currency we use to calculate your revenue in all the places where that is shown. In addition to this, you can add as many additional currencies that you can quote prices in, as you want. Both are under Settings > Account. Select Settings from your Simplero Dashboard In the Account tab, scroll down to the Currencies section and add your currency there. Setting Up Your Currency Select Settings from your Simplero Dashboard Select the Account tab In Currencies section, select your Primary currency Select the + Add currency button Select any additional currency from the drop-down list that you would like to be able to accept Click on the Add currency button. Repeat steps 4 through 6 until all your additional currency offerings are listed in your settings To add an amount in one of the additional currencies Select Sales > Products from your Simplero Dashboard From the Products tab, select a product from your list Select the Prices tab Select a Price that you want to convert Scroll down to the Installments section where you will see each amount on that price You can add an amount in another currency. We'll show you what the equivalent is in the new currency to make it easier for you to figure out what the amount should be. On the checkout form, your customers will have a choice of currency and will see the prices in the currency they choose. You can also set the default currency for a product, so if you have something that is targeted toward a particular audience that uses a particular currency, you can default the order form to that currency. In addition, when paying, customers can pay in pretty much any currency, and their bank or PayPal or whoever will do the currency conversion for them. Please note once a purchase has been processed the currency cannot be changed.  If you are running on international business check out this guide for more support.
How To Guides- Lesson1
Default Account Email Contact Information
Email Contact Information The steps below instruct you on how to set the email address on all emails sent from your account. These settings can be overridden at the Lists, Product, or Broadcasts level.  Select Settings from your Simplero Dashboard Select the Account tab Scroll down half way to Emails section Enter the information that will be defaulted in all your broadcasts. (You will be able to override this information for specific products if you choose.) Sender name - your name Sender email - your email address Reply-to email - your email address where you want replies to be sent "What to say in an email when the recipient's name is missing" - In this area, you can either include what you would like us to say or leave it blank for the default value of "Reader". Process Email Replies: when your customers reply to your broadcasts they can either go to the email you provided at the beginning of this section or you can allow Simplero to manage them for you.  If checked, Simplero will process replies to your broadcasts, auto-responses, and library emails, filter out people's vacation responses and other junk and then forward the replies to your email address. Scroll to the bottom and click the Save changes button Note! When “Process and filter email replies and forward them to you" is ON, the "reply to" setting on mailing settings is ignored and we set it so that the email goes into Simplero. If the account has "Use Simplero's help desk system for your customers" and "Forward replies to emails to become tickets in the ticket system" are ON in the Support tickets settings, then these replies become tickets. If either of those settings isn't on, then it will send an email to the Reply To address configured in the mailing. Support Email Information Verify what email address you would like to use for Support which will appear on invoices and other support areas Select Settings from your Simplero Dashboard Select the Account Settings tab Enter your email address in the Support email field under Name and address section: Scroll to the bottom and click the blue Save changes button
How To Guides- Lesson1
Account Location and Language
Language This is for the language that your customers see. Select Settings from your Simplero Dashboard Select the Account tab Scroll down to Localization section In Customer language area, choose the default language that your customers see But the logic is actually quite a bit smarter than that. Here's how it works: When someone visits the site, we choose a language based on the following order: If a locale has been set using query parameters (see below), we use that If the visitor is logged in, we take that user's preferred language (can be changed in the user menu in the top-right corner) If the browser has a preference for a language, we'll use whichever is highest (you can set this preference in your browser) Otherwise, we will use the locale you have chosen under Settings > Account The user preference can be a little confusing to you as an Admin if you run an account with multiple languages since when you are logged in, you will always see your preferred language.  To test what others see, use another browser where you are not logged in, and pay attention to the language preference settings of your browser. This is how these settings apply: Default language is used in many places. Usually setting the locale for a mail and site. Many times is used as a fallback in the case we don’t know the user preferred language.   Time zone setting is used for new event occurrences, purchases forecast, and in some other places as a fallback in case we don’t know the visitor or user time zone. When ‘Force order forms to always be in default language’ is turned ON, we override the user preferred language in order forms or in the shopping cart. Time format is used for times displayed mainly on the Admin side. Used in places like site view, automation step, broadcast, and participant/subscribers status. Also used for Events start time format and end time format. It is used for Date Pickers time format.  First day of the week is used for stats in the admin. Also for the Upcoming Events calendar in the page builder. Setting locale using query parameters You can override the choice of locale by adding this snipped to any URL: ?locale=en for English or ?locale=da for Danish When you do this, the choice of locale will stay for the remainder of the browsing session. Thus, if you have a Simplero account primarily targeted towards the Danish market, but you want to send out a link to a product for an English-speaking audience, you can add the ?locale=en to the link, and you can be sure they will see things in English. If you are running on international business check out this guide for more support
How To Guides- Lesson1
Cookie Consent Banner
A cookie banner is the fastest and most informative way to get cookie consent and now you can create one in Simplero!  Banner Settings You'll find its settings on your Account settings page: In your Account Privacy section, you have the option to either disable or enable the cookie banner, it's that simple. Cookie-Banner Appearance To customize the colors, layout, and positioning of your banner, navigate to your Website>>Theme>>Customize theme: Head to the Cookie Consent manager section right at the bottom and explore all the options: Be aware of how the "ask before we set cookies" will impact your tracking settings. Selecting this option will allow the end-user to reject cookies. If you're using custom tracking code, you may need to update it to properly respect the user’s cookie choice. This includes: Account-wide tracking, as set on the “Tracking” page of your account settings. Site-wide tracking, as set on the “Configure” page of a site. List subscription tracking, as set on the “Content” tab of a list. Product tracking, as set on the “Content” tab of a product. Tracking code inserted by editing your theme code. You shouldn't use tracking code that allows setting cookies until the user has consented (or until we determine that consent isn't necessary based on which country the user is from.) To accomplish this, we’ve built a method you can use to make sure your code only runs when cookies are allowed. When adding Global tracking on your account, click on Personalize > Cookie consent boilerplate: Then enter your code where it says "//Your tracking code here". The boilerplate code is intended to run immediately (as opposed to e.g. when something is clicked). If you would like to run the code in other instances, you'll need JS knowledge to adjust the code. Some examples below: myTrackingCode() You can change it to: <script> (function() { let yourTrackingCode = function() { // Your tracking code here } let simpleroCookieConsentWrapper = function() { if (typeof simpleroCookieConsent == 'undefined') { console.log("simpleroCookieConsent is undefined, running provided JS anyway.") yourTrackingCode() } else { simpleroCookieConsent.whenCookiesAllowed(yourTrackingCode) } } if (typeof simpleroCookieConsent != 'undefined' || document.readyState === "complete" || document.readyState === "loaded") { simpleroCookieConsentWrapper() } else { document.addEventListener('DOMContentLoaded', simpleroCookieConsentWrapper) } })() </script> Google Analytics code (function(i,s,o,g,r,a,m){i['GoogleAnalyticsObject']=r;i[r]=i[r]||function(){ (i[r].q=i[r].q||[]).push(arguments)},i[r].l=1*new Date();a=s.createElement(o), m=s.getElementsByTagName(o)[0];a.async=1;a.src=g;m.parentNode.insertBefore(a,m) })(window,document,'script','//www.google-analytics.com/analytics.js','ga'); ga('create','UA-1234567-1','mysite.com'); ga('send', 'pageview'); You can change it to: <script> (function() { let yourTrackingCode = function() { (function(i,s,o,g,r,a,m){i['GoogleAnalyticsObject']=r;i[r]=i[r]||function(){ (i[r].q=i[r].q||[]).push(arguments)},i[r].l=1*new Date();a=s.createElement(o), m=s.getElementsByTagName(o)[0];a.async=1;a.src=g;m.parentNode.insertBefore(a,m) })(window,document,'script','//www.google-analytics.com/analytics.js','ga'); ga('create','UA-1234567-1','mysite.com'); ga('send', 'pageview'); } let simpleroCookieConsentWrapper = function() { if (typeof simpleroCookieConsent == 'undefined') { console.log("simpleroCookieConsent is undefined, running provided JS anyway.") yourTrackingCode() } else { simpleroCookieConsent.whenCookiesAllowed(yourTrackingCode) } } if (typeof simpleroCookieConsent != 'undefined' || document.readyState === "complete" || document.readyState === "loaded") { simpleroCookieConsentWrapper() } else { document.addEventListener('DOMContentLoaded', simpleroCookieConsentWrapper) } })() </script> Note: Make sure you're using your own UA code within. GTag <script> (function() { let yourTrackingCode = function() { { const s = document.createElement('script'); s.setAttribute('src', 'https://www.googletagmanager.com/gtag/js?id=YOUR GTAG ID'); s.async = true; document.head.appendChild(s); window.dataLayer = window.dataLayer || []; function gtag(){dataLayer.push(arguments);} gtag('js', new Date()); gtag('config', 'YOUR GTAG ID'); } } let simpleroCookieConsentWrapper = function() { if (typeof simpleroCookieConsent == 'undefined') { console.log("simpleroCookieConsent is undefined, running provided JS anyway.") yourTrackingCode() } else { simpleroCookieConsent.whenCookiesAllowed(yourTrackingCode) } } if (typeof simpleroCookieConsent != 'undefined' || document.readyState === "complete" || document.readyState === "loaded") { simpleroCookieConsentWrapper() } else { document.addEventListener('DOMContentLoaded', simpleroCookieConsentWrapper) } })() </script> What about Facebook Pixel? If you provide Simplero with identifiers for Facebook pixels and you use the opt-in method, the pixels do not run until cookie consent is given. Things You Should Know Your code can run in any of the following situations: Cookie consent option isn't “ask before we set cookies” >> code runs immediately User is in a country without relevant cookie laws >> code runs immediately User already gave consent before this page was loaded >> code runs immediately User hasn't given consent yet >> code runs when consent is given Your code will only fire once per page load. You can call simpleroCookieConsent.whenCookiesAllowed multiple times to have multiple pieces of code run when consent is given. Consent on each domain is separate. simpleroCookieConsent will be defined prior to the DOMContentLoaded and load events firing, but may not be defined prior to that. There is no event when cookie permission is declined. Have you accepted cookies already but have changed your mind about it? No problem, find the cookie banner now collapsed at the bottom of the screen. Switch to ‘Decline’ and we won’t add any further cookies to the visitor browser. If you have any questions or get stuck with anything in this guide, reach out to our support team - we'd love to help! 
1
How To Guides- Lesson1
Using Your Custom Domain (URL) With Simplero
Custom domains offer several advantages, such as enhancing website visibility, boosting brand recognition, and ensuring a lasting impression. If you've acquired a domain name, integrating it with your Simplero site is a straightforward process. In this guide, we'll walk you through the steps to configure your custom domain, whether it's www.yourcustomdomain.com or courses.yourcustomdomain.com. If you learn better with a video, check our How to Video Setting Up Your Custom Domain Looking to add a subdomain only? Head here: Adding Subdomains  Step 1: Add Your Domain to Your Simplero Account In this step, we'll connect your domain to your Simplero account. Start by navigating to your admin dashboard and click on Settings. Then, choose Change your URL. On this page, click the +Add Domain button. In the pop-up window, you'll find all the instructions you need. Enter your domain, but before saving, make sure to copy both the A and CNAME records, you will need these in the next step. Then, save your changes both in the modal and at the bottom of the page. Don't point your domain to a site just yet. You'll need to wait until your DNS records have been added. Step 2: Find Your DNS Manager To add your records, you'll need to access your DNS manager. Head over to your domain registrar (where you purchased your domain—Google Domains, GoDaddy, Namecheap, Bluehost, Hover, etc.) or the service that hosts your nameservers if it's different. While each domain registrar has a unique interface, they all provide an area to configure the site's DNS. Locate this section. Look for DNS Settings, DNS Manager, cPanel, Advanced DNS, or something similar. Unsure about who your registrar is? No problem, search your domain here: WHO IS Lookup Step 3: Add the A Record Once you've accessed your DNS manager, follow these steps below to add the records you saved in step 1. 1. Find the option to Add a Record. 2. Select record type A, and set the name as ‘@’ or leave it blank (depending on your registrar). 3. Enter the value as 18.214.48.22 4. Save your changes. If your DNS manager allows adding multiple records at once, you can proceed to add the next record. Step 4: Add the CNAME Record Choose record type CNAME, enter 'www' for the name, Input your Simplero subdomain/(URL) [accountname.simplero.com] as the value. Save your changes afterward. Now that you've completed the domain host part, you can return to your Simplero account! Having trouble saving your CNAME record? Check this out —> Step 5: Point Your Domain Once the DNS is correctly configured, you'll notice a checkmark. Sometimes, it may take 15-60 minutes for all changes to become active. Afterward, you'll need to wait for the SSL certificates to be installed which may take approximately 24-36 hours to configure successfully. You can proceed to point your domain, but keep in mind that your new domain won't function until the DNS is verified and the SSLs are installed. During SSL configuration, your site's internal links will automatically redirect to your Simplero address. You can have this domain point to:  Your main site A membership site A landing page Simply make a selection from the Points to dropdown, and save your changes! More on SSL certificates --> Understanding Propagation What is propagation? In DNS refers to the time it takes for changes made to DNS records (like adding a new domain or updating an existing one) to spread across all DNS servers worldwide. During propagation, DNS servers update their records to reflect the changes, which can take anywhere from a few minutes to 48 hours to complete. You may notice the two following icons next to your recently added domain, and this is standard. Domain propagation can take up to 48 hours. That said, if the DNS is set up properly, the DNS icon will typically turn into a checkmark within 15-60 minutes.  What do the icons mean? During the propagation process, there are visual indicators to keep track of the status: DNS Column: An exclamation mark (!) icon indicates that the settings are not yet verified. SSL Column: A clock icon signifies that the system is working on the SSL configuration. Once the verification is complete: DNS Column: The exclamation mark (!) will change to a check mark, indicating successful verification. SSL Column: The clock icon will change to a check mark, showing that the SSL setup is finished & your site is secure. If your website doesn't show up right away, don't worry! Just keep checking back, and soon enough, your website will be up and running for everyone to see. You can always recheck for verification: Your DNS verification typically completes before your SSL certificate is installed. SSL Certificates Simplero automatically handles SSL configuration (https security). It may take approximately 24-36 hours to configure successfully, so please check back if you don't see the checkmark immediately. As a reminder, during SSL configuration, your site's internal links will automatically redirect to your Simplero address. Once SSL is verified, you'll see two checkmarks (below), and you should then be able to visit your site using your new domain.   Propagation in Different Regions Your website might show up in one part of the world but not in another. Remember, propagation refers to the time it takes for changes made to DNS records to spread across all DNS servers worldwide. It's like sending out party invitations, and some people get them right away, while others take a little longer. So, even if your website shows up for some people, there might be delays in other regions. But don't worry, it's just a matter of time before everyone gets the message. Here is a helpful tool to help you check on the status:  Propagation Checker  Having trouble seeing the new domain? When a new domain is connected or DNS changes are made, some devices and networks may still be accessing older cached information, which could prevent you from viewing the updated site. Clearing the browser cache or waiting for the cache to expire can often resolve this issue. Tech Tip! --> When your computer has an old answer for DNS records, but the records are set correctly, you can speed up getting the right answer by flushing the operating system-level DNS cache on your local machine. DNS Checker Final Note If you have been using Simplero’s domain for a while before setting up your custom domain, you might want to turn on the setting: Redirect non-admin requests from qatesting.simplero.com to yourdomain.com, right below your domain name. Links shared in broadcasts or added to your landing pages will automatically redirect to the custom domain if the toggle (below) is on.   Setting Up A Subdomain Only To add a subdomain, you'll follow the same steps as outlined above, but skip Step 3: Adding the A Record. Instead of using www for the CNAME record, insert your new subdomain name. Let's go through it quickly. Navigate to Settings --> Change your URL Click + Add Domain, add your subdomain (e.g.members.albusthedog.fun, or subdomain.yourdomain.com), copy your CNAME record, and save your changes: In your DNS manager, create a new CNAME record for your subdomain. Choose the record type CNAME, and input your new subdomain name as the name field. For instance, if your new subdomain is members for "members.albusthedog.fun," then you'd enter members as the name. Lastly, set the value as your Simplero address. In this case, it's summernicolesupport.simplero.com, and save your record.  That's it! By adding a CNAME record, your subdomain will correctly point to Simplero. Remember that CNAME records are the right choice when you want to alias a subdomain to another domain, making it easy to manage your subdomain's location within Simplero. ----- Notice anything wacky in this guide? Contact support by clicking the "?" button in your account, and we'll help you out. 
3
How To Guides- Lesson1
Troubleshooting Domain Verification Issues
Here are some errors you might come across while pointing your domain, along with settings that could hinder the successful verification of your domain. Common Errors: Encountering an error when adding your CNAME record? Experiencing a security error when visiting your site? Unable to see your domain after verification, but others can see it? If your domain isn't verifying, here are some things to check: Do you have multiple hosting accounts? (e.g. domain host and web host) Disabling SiteLock and Proxy Status Do you have domain forwarding set up? Is your domain parked? Do you have a wildcard (*) A record? Does your domain name include accent marks? Encountering an error when adding your CNAME record? If you're facing an error similar to the one shown below while attempting to add a CNAME record, it may be due to an existing conflicting record for the "www" subdomain, which could be either a CNAME or an A record. To resolve this issue: Identify Existing Record: Check your DNS records for any existing "www" records, which could be either a CNAME or an A record. Remove Conflicting Record: Once you've identified the conflicting record, simply delete it. Keep in mind that deleting it will break any connections that use it. Considerations: Website: If your website is hosted on a different platform using the "www" subdomain, removing the record might lead to downtime. Email: Removing the record might temporarily disrupt email services if your email is linked to the "www" subdomain. SSL: Ensure that your SSL certificate covers both the main domain and the "www" subdomain. Add the CNAME: After confirming that removing the conflicting record won't disrupt your services, proceed to add the CNAME record provided by Simplero to map your custom domain. Remember, DNS changes may take time to propagate. Always verify your setup after making changes to ensure everything is working as expected. If you're uncertain about the impact of removing a record, consider seeking assistance from your domain registrar or a technical expert. Back to top Experiencing a security error when visiting your site? If you encounter a security error message when visiting your site, it simply indicates that your SSL certificates are not yet installed. This is common, and Simplero handles SSL configuration (https security) automatically. It may take approximately 24-36 hours to configure successfully. During this time, your site's internal links will automatically redirect to your Simplero address. Example of the error message:  To check your site's security status from your browser: Navigate to your website's home page and look for a padlock icon or button next to the URL in the address bar. Click on it to open. You can also click on "Connection is secure" or not secure to view more details. Back to top Do you have multiple hosting accounts? (e.g. domain host and web host) When pointing your custom domain to Simplero, it's crucial to add your records in the DNS manager found in your domain host account, not your web host. Your domain host is where you originally purchased and registered your domain, and it is the authoritative source of your domain's settings, giving you full control and ownership. If you're uncertain where to add your Simplero records, you can quickly identify your account using GoDaddy's Who Is Lookup tool. Simply search for your domain example.com in the tool to find your domain host account information. Who Is Lookup Back to top Disabling SiteLock and Proxy Status If you're experiencing difficulties when pointing your domain to Simplero, you can try checking that SiteLock and proxy status are disabled.  How to Disable SiteLock: Log in to your hosting provider's dashboard. Navigate to the security settings or SiteLock section. Locate the option to disable SiteLock and follow the instructions provided. Why Disable SiteLock? SiteLock can sometimes interfere with domain pointing processes by implementing strict security measures that may restrict domain configurations.  How to Disable Proxy Status: Log in to your hosting provider's dashboard. Locate the proxy settings or proxy status section. Disable the proxy status or toggle off any proxy services associated with your domain. Why Disable Proxy Status? Proxy servers act as intermediaries between users and the internet, which can sometimes interfere with domain pointing processes.  Back to top Do you have domain forwarding set up? Domain forwarding can interfere with pointing your domain to Simplero because it redirects traffic from your domain to another destination, leading to verification issues. To remove domain forwarding, you typically need to access your domain registrar's settings or control panel, locate the forwarding option, and then disable or remove the forwarding rule. This allows your domain's DNS settings to function properly and point to Simplero. Back to top Is your domain parked? A parked record in your DNS can interfere when trying to point your domain to Simplero because it indicates that the domain is already associated with another service, essentially "parked" elsewhere. This prevents the proper configuration of DNS records needed for Simplero. To remove the parked record, you'll need to access your domain registrar's DNS manager. Look for an A record with the value "parked," and once you find the record, simply delete it. The process may vary depending on your domain registrar, so it's recommended to check their support documentation for specific guidance if you are unable to locate the record. Back to top Do you have a wildcard (*) A record? Another thing you could check for when troubleshooting is a wildcard record. While wildcard records can be useful for directing subdomains to a specific IP, they may conflict with A and CNAME records required for Simplero domain mapping. In your DNS records, simply search for an A record with the value of *:  Locate an A record with a host value of *. If the record matches the recently added Simplero IP, remove it. However, if you have another wildcard record directing to a different IP, it's advisable to consult your domain support to ensure you don't unintentionally disrupt any connected services. Back to top Does your domain name include accent marks? If your custom domain includes special characters like accents, you'll need to add the Punycode version of your domain when incorporating it into your Simplero account. Punycode represents Unicode characters with DNS-supported characters. Examples include letters with accents (é, è, etc.) or non-English letters (ø, æ, etc.). Example of a domain with special characters: www.café.com For Simplero custom domain verification: Convert the domain to Punycode if not already provided by your registrar (e.g., "café.com" becomes "xn--caf-dma.com"). Add the converted domain to Simplero's Change your URL page when you + Add Domain (e.g., www.xn--caf-dma.com). Add Simplero's CNAME and A records to your DNS manager per standard instructions. Allow propagation time. If you happen to need Punycode conversion, refer to the provided conversion chart or utilize an online converter tool. Punycode Converter Back to top Unable to see your domain after verification? If you're experiencing issues where others can access your site, but you encounter an error screen, consider the following possibilities: Cache Issue: Clear your browser's cache and cookies, then try accessing your site again to resolve any outdated cached data issues. Local Network or ISP Issue: Test accessing your site using a different network, such as mobile data, to rule out issues with your local network or internet service provider. DNS Propagation: Give DNS changes, like domain mapping, up to 48 hours to fully propagate across the internet. Don't forget about the Propagation Checker --> Firewall or Security Software: Check your computer's security settings and firewall to ensure they're not blocking access to your site. Browser Extensions: Disable browser extensions or plugins that might interfere with your site's loading. Back to top ----- Notice anything wacky in this guide? Contact support by clicking the "?" button in your account, and we'll help you out. 
How To Guides- Lesson1
Configuring Your Custom Email Domain (Step-by-Step)
Why You Should Verify Your Sender Domain Verifying your sender domain in Simplero enhances email deliverability by ensuring emails reach recipients’ inboxes, not spam folders, and boosts your sender reputation, reducing the risk of being marked as spam. It allows for consistent branding by using your domain in the "From" address, builds trust, and enhances recognition. Additionally, setting up authentication protocols like SPF, DKIM, and DMARC during verification protects against spoofing and phishing, aligning with best practices and improving compliance. This leads to better engagement metrics, higher open and click-through rates, and reduced bounce rates, making domain verification crucial for effective email communication. Adding DNS records might seem a bit technical, but we'll guide you through it step by step, it’s easier than you think! Steps Add Your Sender Email & Sender Domain inside Simplero Open Your DNS Manager Adding the TXT Records Adding the CNAME Records Check for verification Step 1: Add Your Sender Email & Sender Domain inside Simplero From your Simplero dashboard, click the settings cog in the top right corner, then select "Email Settings" from the menu pictured below. On the Email Settings page, add your sender email address. This is the email address you will use for sending emails to your contacts. After adding your sender email, you will receive a verification email in your inbox. Open the email and click the verification link. Until you complete this step, the sender email will show as unverified. Next, add your sender domain. For example, yourdomain.com. Setup Your DMARC After adding the domain, a list of DNS records will appear. Including 3 CNAME Records and 2 TXT Records. You will also need to set up your DMARC record. Why? Setting up DMARC is crucial for protecting your domain from being used for phishing by ensuring that only authorized emails are sent, thus safeguarding your customers and maintaining your brand reputation. Implementing DMARC increases trust with ISPs, enhancing email deliverability and performance which leads to better engagement metrics like open and click-through rates. It also boosts customer trust by securing your communications and provides detailed reports on email activity, allowing for better monitoring and informed decision-making. Moreover, DMARC aligns with industry best practices and may be required for regulatory compliance in certain industries, ensuring that your email security standards meet legal standards. To set this up, simply click + Add DMARC (pictured above), and then click the Setup DMARC button (pictured below). The email address is where you will receive your weekly reports. After setting up the DMARC record, you will have a total of 6 records to add to your DNS manager, now 3 TXT records and 3 CNAME records. Helpful Tools Before Getting Started Make sure to utilize the 'copy to clipboard' icons! These icons, when clicked, automatically copy text to your clipboard. This feature is especially useful for transferring data, like DNS records, to another location, such as your DNS manager. Using this icon helps ensure you copy the entire record accurately, preventing the common mistake of missing parts of the record when copying manually. Please also take note of the column labels; they correspond to the labels you'll find in a DNS manager record entry. This allows you to easily match and insert the values accordingly. Keep the email settings screen open so you can easily copy the records and transfer them to your DNS manager. At the same time, open a new tab and log into your domain registrar account. This way, you can conveniently switch back and forth between the two tabs. Step 2: Open Your DNS Manager To update your records, you'll need to access your DNS manager. To get there, navigate to your domain registrar account and log in (this is where you bought your domain—such as Google Domains, GoDaddy, Namecheap, Bluehost, Hover, etc.) Unsure about who your registrar is? No problem, search your domain here: Who Is Lookup Although the interface may vary among domain registrars, they all feature a section for configuring your site's DNS. Search for terms like DNS Settings, DNS Manager, cPanel, or Advanced DNS to find this area. Locate the section where you add new records in your DNS manager. Once you've found that, you're halfway there! The next steps are straightforward — you're almost finished! Step 3: Adding the TXT Records For the sake of efficiency, we'll start with adding the TXT records and then move on to the CNAME records. The order in which you enter the records does not matter, only their accuracy does. In this step, you are simply transferring the records from Simplero to your DNS manager using your nifty ‘copy to clipboard’ icon. Before adding the first TXT record, however, (the SPF record) check your current DNS records to see if you already have an SPF record. If You Have an Existing SPF Record When you have multiple SPF records, you need to combine them into a single record. Here’s how to do it: Find the Existing SPF Record: Look for the TXT record in your DNS manager that starts with "v=spf1". Combine the Records: Add the new SPF information to the existing record by placing it within the same line, separated by a space. Update the Record: Save the updated TXT record in your DNS manager. Example: Existing SPF Record: v=spf1 include:spf.oldprovider.com -all New SPF Record from Simplero: v=spf1 include:sendgrid.net ~all Combined SPF Record: v=spf1 include:spf.oldprovider.com include:sendgrid.net ~all Save the combined record, and you're done! This ensures all SPF information is included in a single TXT record. If You Do Not Have an SPF Record If you do not have any existing SPF records in your DNS manager, you will proceed with adding a new record. Record Type: Set the record type as TXT. Name Field: In Simplero, you will see that there is no value to copy for the name field. In your DNS manager, enter an "@" symbol or leave it blank (which one you use depends on your specific domain registrar, so try both if unsure; you will get an error if it's incorrect, and then you can try the other option). Value Field: Copy the SPF value from Simplero and paste it into the value field in your DNS manager. After the SPF record has been added, proceed with transferring the remaining TXT records (see below). Please note that some DNS managers require you to enter records one at a time rather than in bulk, as shown above. That's perfectly fine. Add each individual record and save your changes after each entry. Once all records are added, save them and proceed to the next step. Remember, the order in which you enter the records does not matter, only their accuracy does. Having trouble adding TXT records? See this troubleshooting guide --> Step 4: Adding the CNAME Records The CNAME records are straightforward to add. Simply copy each record and paste it into your DNS manager. Here is an example of how the CNAME records should look once they are created: Save your changes, and you're all set with adding the records! Great job! Step 5: Check for Verification The final step is to check for verification. If the records do not verify immediately, don't worry; propagation can take time. It's normal for some records to verify while others may take longer. Allow up to 24 hours for full verification. If your records are still not verified after this period, please contact the support team. You can leave the email settings page and work on other tasks, periodically checking back. You can also click the Check Domain link to manually initiate a verification check. What you eventually want to see is Verified next to all six records. Once you receive that confirmation, you're all set to start sending! Congratulations! Great job! ----- Notice anything wacky in this guide? Contact support by clicking the "?" button in your account, and we'll help you out. 
How To Guides- Lesson1
Understanding DKIM, DMARC, SPF, and CNAME Records
When setting up your Simplero sender domain, you need to verify certain DNS records to ensure email deliverability and security. Here’s a simple guide to understanding the purpose of each required record. DKIM DMARC SPF CNAME/Sendgrid DKIM (DomainKeys Identified Mail) Purpose: DKIM helps prevent email spam by verifying the sender's identity. How It Works: Domain-Based Verification: DKIM ties itself to the domain name you’re sending emails from (e.g., sending from "calvin@simplero.com" means the domain is "simplero.com"). DNS Records: Create specific DNS records on your domain that include a public key provided by Simplero. Email Signing: DKIM signs your emails using a private key. The recipient's email provider uses the public key in your DNS records to verify that the email was not tampered with during transit. Key Points: Simplero provides the public key; you add it to your domain's DNS records. Each DKIM key lives on its own subdomain, allowing you to use multiple email providers without conflict. Role in Email Sending: Authentication: Adds a digital signature to the email headers, allowing the recipient's server to verify the email’s integrity and authenticity. Security: Prevents email spoofing by ensuring emails are genuinely from the stated sender. Trust: Builds trust with recipients by confirming the authenticity of the sender, improving email deliverability. DMARC (Domain-based Message Authentication, Reporting & Conformance) Purpose: DMARC builds on SPF and DKIM to protect your domain from email spoofing.  Role in Email Sending: Policy Enforcement: Allows domain owners to specify how email receivers should handle emails that fail SPF or DKIM checks (e.g., reject, quarantine, or allow them). Reporting: Provides reports on how emails are processed and any failures, helping monitor and improve email security. Alignment: Ensures that the domain in the 'From' address aligns with the domains used in SPF and DKIM, enhancing protection against spoofing. Without a DMARC record, your emails are more likely to bounce because email servers don't have clear instructions on how to handle them, they are at a higher risk of being spoofed, your domain's reputation might suffer, and you lack the feedback needed to improve email delivery. Implementing DMARC helps ensure your emails get delivered successfully. SPF (Sender Policy Framework) Purpose: SPF prevents email spam by specifying which email servers are allowed to send emails on behalf of your domain. How It Works: Domain-Based Verification: SPF ties itself to the domain name you’re sending emails from (e.g., "simplero.com"). DNS Records: Create a DNS record listing the servers allowed to send email for your domain. Combining Records: If using multiple email providers, combine their requirements into a single SPF record. Key Points: Simplero provides the necessary information for the DNS record; you include it in your domain's DNS settings. Combine SPF requirements into one record if using multiple providers. Role in Email Sending: Authorization: Lists IP addresses and domains authorized to send email for your domain, preventing unauthorized senders. Prevention: Helps prevent spam and phishing by verifying that incoming mail is from an authorized server. Email Filtering: Assists email servers in filtering out unauthorized or malicious emails, improving overall email security and deliverability. CNAME (Canonical Name) Records for SendGrid Purpose: CNAME records alias one name to another, often used to configure custom tracking domains in SendGrid. Role in Email Sending: Tracking: Configures a custom tracking domain that matches your sending domain, ensuring links in your emails are branded with your domain rather than SendGrid's. Brand Consistency: Maintains brand consistency in links and images within your emails, increasing trust and engagement from recipients. Verification: Verifies the sending domain with SendGrid, ensuring that emails sent through SendGrid appear to come from your domain, improving deliverability and authenticity. Summary DKIM: Adds a digital signature to verify email integrity and authenticity. Simplero provides the public key for your domain’s DNS records. DMARC: Provides policies and reports to enforce and monitor email authentication. SPF: Lists authorized mail servers to prevent unauthorized email sending. You include these servers in your domain’s DNS records. CNAME/SendGrid: Configures custom tracking domains for branded and verified email sending. ----- Notice anything wacky in this guide? Contact support by clicking the "?" button in your account, and we'll help you out. 
How To Guides- Lesson1
Sender Domain Troubleshooting
Verifying your sender domain is crucial for maintaining high email deliverability. This step-by-step guide will help you resolve common issues that may prevent your domain from being verified. It covers common sender domain verification issues and best practices. Troubleshooting DNS Record Verification Issues If you are having trouble getting one or more of your records to verify, consider checking for the following common mistakes: It is Simply a DNS Propagation Delay: Changes to DNS records may take some time to propagate. Allow up to 48 hours for DNS changes to take effect. Use online tools to check if your DNS changes have propagated. Make Sure You Did Not Select an Incorrect Record Type By Mistake: The DNS record type might be incorrect (e.g., adding a TXT record as a CNAME). Ensure you are adding the correct type of DNS record (TXT, CNAME, etc.). Double-Check for Typographical Errors: Typographical errors in DNS records can prevent verification. Double-check for any typos or extra spaces in your DNS entries. Use the ‘copy to clipboard’ icon to avoid manual entry errors. Check for Conflicting Records: Existing records may conflict with the new records you are trying to add. Review existing records and remove or update any that conflict with the new entries. (See how to combine multiple TXT records and SPF records below.) DNS Manager Limitations: Some DNS managers have limitations or different ways of entering data. Refer to your DNS manager's documentation or support for specific instructions on adding and updating DNS records. Did You Add Records to Your Domain Host or Your Web Host?: Adding your email records to your web hosting DNS instead of your domain host DNS can cause verification issues. Add your email-related DNS records (SPF, DKIM, DMARC) to the DNS settings at your domain host. This ensures they are authoritative and properly propagated. Additional Common Issues and Their Solutions Having Trouble with TXT Records? SPF Record Won't Verify DMARC Record Won't Verify Already Have a DMARC Record? Use My Domain Host or Web Host? Having Trouble Adding TXT Records?  Some DNS managers have limitations or unique methods for entering data. If you encounter an error when adding multiple TXT records, there is a solution. Follow these steps only if your DNS manager requires it. Otherwise, combining TXT records is not necessary. Issue: You are getting an error when adding your TXT records, because your DNS manager only allows one TXT record with the same name value per domain. Solution: Combine the current and new TXT records into a single record. (only if they have the same name value) Example Scenario: Suppose you have the following two TXT records: SPF Record: v=spf1 include:sendgrid.net ~all Domain Verification Record: google-site-verification=abc12345 (notice the name column, both records share the same name value) Combining the TXT Records: To combine these two records into a single TXT record, you would write: v=spf1 include:sendgrid.net ~all "google-site-verification=abc12345" Step-by-Step Instructions: Identify all the TXT records you need to combine. Enclose each individual TXT record value in double quotes. Combine them into a single TXT record, separating each quoted value with a space. SPF Record Won't Verify Issue: Your SPF record is not verifying correctly. Solution: Avoid multiple SPF records. Ensure you have only one SPF record. If you need to include multiple sources, combine them into a single record. Example: If your Simplero record is: v=spf1 include:sendgrid.net ~all But you have another SPF record in your DNS: v=spf include:example.com -all Combine them: v=spf1 include:sendgrid.net include:example.com ~all DMARC Record Won't Verify Issue: Your DMARC record is not verifying correctly. Solution: Check the Syntax: Ensure that the DMARC record is correctly formatted. A typical DMARC record looks like this: v=DMARC1; p=none; pct=100; rua=mailto:example@domain.com Avoid Typos: Ensure there are no typos or extra spaces in your record. Already Have a DMARC Record? Issue: You already have an existing DMARC record and need to update it. Solution: Update the existing record to include the required settings. Do not create a new DMARC record as only one is allowed per domain. Example: v=DMARC1; p=none; pct=100; rua=mailto:example@domain.com; sp=none; aspf=r Domain Host or Web Host? Always add the records to your domain host's DNS settings. The domain host is where you purchased your domain.  Issue: Adding your email records to your web hosting DNS instead of your domain host DNS can cause verification issues. Solution: Always add your email-related DNS records (SPF, DKIM, DMARC) to the DNS settings at your domain host. This ensures they are authoritative and properly propagated. Why It Matters: Primary DNS Control: Your domain host's DNS settings are the primary authority for your domain. DNS Propagation: The DNS records at your domain host are the ones that propagate across the internet and are queried by other email servers to verify your domain's email settings. Consistency: Keeping all DNS records consolidated in one place avoids inconsistencies and simplifies troubleshooting. If you are unsure, you can check for your domain host using the WHO IS Lookup. The listed registrar should be your domain host.  Best Practices to Keep in Mind SPF: Ensure you have a single SPF record that includes all authorized mail servers. DMARC: Implement DMARC to enforce policies and monitor email authentication. DMARC: Combine multiple DMARC’s to include required settings. Keep DNS Records Consolidated: Maintain all your DNS records in a single DNS service. Remove Outdated Records: Remove any old or unused DNS records to prevent conflicts and confusion. Use Your Domain Host's DNS: Always add your email-related DNS records to your domain host's DNS settings, not your web host. Back to Top ----- Notice anything wacky in this guide? Contact support by clicking the "?" button in your account, and we'll help you out. 
How To Guides- Lesson1
Billing at Simplero
Here's what you can expect to see on your Simplero receipt and why. Looking for current prices? You can find pricing details for all of our plans right here. How it works We charge for the billing period ahead of time. That means when you pay your $99 monthly bill on January 1st, you're paying for the Launch plan for up to 1,000 contacts from January 1st to January 31st. If you upgrade or downgrade during that period, we'll pro-rate the charge and send you a receipt. In the case of annual plans, we charge upgrades at the time they happen.  We bill based on the number of active contacts. Contacts can be on multiple lists and still only count once for billing purposes. If you want to know who counts as an active contact for billing purposes, have a look at this guide.  Billing is every 30 days for monthly plans and every 360 days for annual plans.  Text messages are charged on a monthly basis. Storage & Text Messages Charges Storage When you sell ebooks, videos, or audio files, you first upload them into Simplero. We provide a generous amount of storage with each plan. You can see the details on our Pricing page. If you exceed your storage quota, the price is $10/month for each additional 100GB of storage. Only files you upload to your media library count toward your storage limit. Most people don't get anywhere near the upper limit. Your monthly bandwidth allowance is 5 times your total storage, per month. Don't worry. It's plenty!  SMS You can also use Simplero to send SMS messages to your customers.  Those SMS messages carry a fee depending on which country you're sending to. Here are the fee tables. SMS to the United States costs 1.5 cents, for example.  Messages are charged monthly regardless of the plan. Upgrades & Downgrades We figure your Contacts numbers will fluctuate- that's a given. That's why we pro-rate your bill!  We process upgrades for you whenever possible. If you're ready for an upgrade, and we haven't already done it for you, just send us an email and we'll be happy to move you up to the next tier.  If you clean out Contacts, and want to downgrade plans visit Settings >> Plan and Billing >> Change Plan and select a lower number of Contacts for your plan. See this manual for more details. Annual Plans We're in this for the long term. If you are too, we've got a deal for you. Our annual plans offer a 17% discount over the monthly plans.  Savings!  Because of the discounted price, we do not offer refunds on annual plans beyond our standard 30 day policy. Refund Policy We understand things don't always work out. If you do have to leave, we want what's best for you. Please see our Refund Policy and all our Terms and Conditions here. Where Can I View My Past Receipts?  Settings >> Plan and Billing Here you'll find your receipt history. If there's something you're unsure of regarding the receipt, reach out to us in Support (support@simplero.com).
How To Guides- Lesson1
Account Administrators
Do you have staff, colleagues, or just friends who you want to help with your Simplero account? If so, this guide will show you how you can provide them a login to your Simplero Account! In this guide we cover: How to add an Administrator How to remove an Administrator How to modify Permission How to Transfer Ownership Adding an Administrator Select Settings from your Simplero Dashboard Select Administrators tab In the upper right corner, select the + Add an Administrator button Follow the steps to add an administrator Email: the email of the person you wish to be an Administrator A personal message: type a message if you wish Auto generate username and password for the admin: we strongly recommend this as it makes your new admin enrolment a lot easier for them :) Role: Permission level: Co-Owner, Admin, Basic admin, Assistant, Support Specialist, Affiliate manager, Custom permissions (only available on Skyrocket plan) Settings (only show if you have Support tickets enabled in your account): enable whether they can be assigned tickets and listed as a support team member in the tickets system. Select the Invite administrator button when completed Your contact will then receive an email to accept your invitation. If their email is already associated with a user ID, or they are logged into Simplero they will be given the option to use that ID. If not, or they prefer not to, they will be able to create a new user ID.   Removing an Administrator Select Settings from your Simplero Dashboard Select Administrators tab If you would like to remove admin permissions temporarily, toggle the ‘Enabled’ switcher OFF. For a permanent removal, click the Trash icon at the far right that says "Kick" Admin Access without Full Access to your account You can add administrators to your account and not give them the keys to the entire store. The intention of this function is to be able to invite people to work for you without them being able to see how much money you're making. I know a lot of how you may feel uncomfortable sharing this information with your VA for example. This role will still be able to manage purchases and pay out affiliates, and if they're really keen to know, they can still add up all the numbers themselves, but we don't show them all the aggregates and the things that make it easy to see how much you're making. There are multiple levels of permissions. On this chart we give an overview of their access to main features in your dashboard. Each role in detail: Co-Owner Can do everything (including managing permissions for others). Admin Can do everything (except manage permissions) Basic Admin Can do everything except: Manage permissions View financial data (like transactions) Basic Admins can access Purchases and Participant info. Assistant Can do everything except: Manage permissions View financial data Manage sites Access purchases and participant info They can edit courses and they can also send broadcasts. Support Specialist They can only read, but they can read almost everything: contacts records, events, worksheets, products, affiliate programs, courses... …and manage tickets. They can't send broadcasts or see purchases. Affiliate Manager Can only manage affiliate programs (you can choose which ones specifically). They can also read contact records and list info. Custom Customize specific permissions on a per-administrator basis (only available on the Skyrocket plan) When giving specific permissions per administrator using the Custom role, you will be able to determine whether they can read-only or manage (make changes): Find the list of relevant content at the bottom based on the options selected above. For example, if you give read access to Worksheets, you’ll be able to choose whether to all or individual worksheets: If you’d like to save a Custom Role to re-use it, toggle On the option to Save the custom role. Give it a name and description. Done! If you ever need to edit a Saved Custom Role, navigate to the Administrators page and scroll down to the bottom. Click on the custom role to edit it. Transfer Ownership If for whatever reason you'd like to change the owner of your Simplero account follow the steps below: 1. Log in as the current Owner of the Simplero Account. 2. Navigate to Administrators, then click on the administrator you'd like to transfer the ownership of the account to. 3. Click on the top right "..." menu > Transfer ownership.
How To Guides- Lesson1
Setting Labels
Using Labels will give you a better overview of all your things in Simplero. You can add and filter by labels in most of the tables in Simplero, like media files, broadcasts, and landing pages. The Labels can give you easy access to your content and can be a good way to see who has created the content or what campaign the content has been used in. Creating labels Select Settings from your Simplero Dashboard Scroll down in the Account Settings until you get to the Labels section Give the Label a name and select a Color for it Click the white + Add a label button to add a new label and repeat step 3 Scroll down and click the blue Save Changes button  Adding a label to your content You can also add labels to your content such as Broadcasts, Media files or Landing pages Select Marketing from your Simplero Dashboard Select the Email broadcasts tab Add a checkmark next to the content you want to give a label Select and click the Label icon  In a pop-up screen, type a Label name in the field Click the blue Add label button to save Note: The same content can have several labels Use your labels to create tabs You can now use your labels to filter your content and sort them in tabs. Kind of like having your content in a folder on your computer. This will give you easy access to the content you are working on.  For example: Select the Marketing tab from your Simplero Dashboard Select the Email broadcasts tab Click on Filter  Select Label from the drop-down list Select the label name you want from the drop-down list to filter by When you have done that, you can click Save this view to create a new tab in the table
2
How To Guides- Lesson1
Merging Multiple Simplero IDs
With Simplero, everything is tied to your Simplero ID or your login. Each person has their own login. As an administrator on your account, you can give access to other people by inviting them, rather than sharing your Simplero ID and password. Sharing passwords is not only horribly insecure in itself, but it also prevents you from implementing additional security measures like two-factor authentication, which we support, and it prevents you from seeing who took a given action if something weird is going on. It also forces you to continuously log out and back in and sometimes you end up doing something while logged in as the wrong user.  All a needless complication and hassle. We like to keep it simple :) It also makes it harder for us to serve you properly because now we don't know who we're talking to. Instead of getting to know you better and better over time, and being able to serve you in a personalized way, we get more and more confused as someone who seems to be person A is really person B, C, and D. So our strong recommendation is that you use one Simplero ID for everything you do with Simplero, and simply get permission to the things you need access to as you need it, using the same Simplero ID. To Merge Simplero IDS Go to your Simplero account profile - https://simplero.com/profile/. You can also find this on the top right corner of your site.  On the left-hand side menu, select Have multiple Simplero IDs? Enter email addresses or Simplero IDs you may have used Click the Send confirmation email button
How To Guides- Lesson1
Closing your Simplero Account
How Do I Permanently Close/Cancel/Delete My Account? We’re sad to see you go but, we respect your decision. With great sadness.  This option will delete anything you have created in Simplero permanently. If you are looking to keep all that you have built while taking a break, you might want to pause your account instead. If you are convinced that leaving is your best option: Log in to your Simplero account. The URL is going to look like https://yourname.simplero.com/admin. If you don't remember where it is, try to see if you can find the welcome email you received when you opened it. The subject line is "Simplero Welcome". If that fails, try visiting this page, and see if it shows up there. You'll be asked to log in. Once you've found your account: Select Settings from your Simplero Dashboard Select the Plan and Billing tab On the Plan and Billing page, scroll down to the bottom and click on the button that says Delete my Simplero account. (If you are still on trial, check the section below on cancelling a trial) Complete the short Survey and Choose the option to Close your account on the final step. Note: Before you close your account you will want to remove your content, export your contacts, and any accounting you'd like to keep from the Invoices screen under Sales. If you'd like, you can book a 30 min free call appointment to talk to our team before you decide to close your account. Perhaps we can work out a business plan or find out how to better use Simplero. To do so, click on the link "Book a 1-on-1 session" and follow the steps forward. Cancelling a Trial If you are still on trial you will see the button to cancel the trial next to your current plan details: Reach out to the Support Team if you have any further questions!
How To Guides- Lesson1
Pausing your Simplero Account
How do I temporarily Pause my Account? We understand there are times when you need to step out for a bit, focus on other projects, or just take a break from your business. Simplero allows you to put your Simplero Account on hold. For a small fee, we can maintain your data and keep your business ready for when you are ready to start up again.  To do this:  Navigate to your Account Settings >> Plan and Billing page. Right at the bottom, click on Delete my Simplero account… link. After a short survey to get to know a bit more about why you are leaving Simplero, we offer the option to Pause your account at the very final step. You can also skip the survey and pause your account directly here. As soon as you Pause your account your dashboard will be limited to the Account Settings, Administrators and Plan and Billing pages. We will also show you: What’ Simplero storing for you while your account is paused. How many days you have left on your subscription and when you should expect the next renewal if you re-activate. You can Resume your Subscription at any time. Warning! Your Sites will show Page not Found while your account is Paused. Once you resume, they will automatically restore to the status prior to pausing (published, dripped, scheduled). Before you Pause your account… Update any active purchases in your Simplero account. Note that you will not be able to pause your account if there are any active purchases. You can either pause or cancel your purchases on the Purchase Summary page. Note: If you choose to pause your purchases and they have any current scheduled installment charges, they will continue to charge while the purchase is paused unless you delete them manually. Stop or Pause your automations and auto-responses Reach out to the Support Team if you have any further questions!
Global_Snippets 7:18
Global Snippets
Ever wanted to use one block of text across anywhere in your Simplero? Maybe the same exact sales pitch in the signature of a broadcast, on an order form, on a sales page and/or in an email autoresponder. Well, Global Snippets allow you to do this. You can create custom text one time and then place the snippet code anywhere you want and the text will be added. This allows you to have a uniformed message across your platform.  For example, I can create a global snippet called Feature Product and just add the global key in all the places I want that message to show up, and then to edit the message each month with the new featured product text from my global snippet screen rather than remember to update it in all the places I want to put it.  Below you will find instructions on how to both create the global snippet and how to use it.  Creating your Global Snippet Select Settings from your Simplero Dashboard Select the Global Snippets option Click the + Add a global snippet button In the Key box, enter your Interpolation key. This is a bit of text you are going to add the snippet code so it knows what text to populate. For example, if the text described the color red you might use "colored" as your key In the box to the right is where you will write the text you want to populate when the key is used  You can then select the add a global snippet button to add as many snippets as you'd like Scroll down and click the Save changes button Now that they are set up you are ready to use them. To use the global snippet you will place the textanywhere you'd like the snippet text to show up.  Remember to change the word key with the key you established.  For example, using our Colored example above if my key is Colored I would type  You can place this in the liquid code of a site page, a text box, or email broadcasts. 
How To Guides- Lesson1
Simplero Translation
How Do I Translate System-generated Content to Another Language? We support English and a handful of other languages so far. Languages like Danish, Norwegian, Spanish and German are either fully or mostly translated so far. We rely on volunteer help for language support, and we're always open to more translators. So if it's something that has enough value to you that you're willing to do the work, please send us a message using the Support link. We'll then send you an invitation to do the translation. You won't be compensated, and you will need to sign over the rights to your translations to us, but then it's just a matter of getting to work, and soon your language will be included in the software going forward. We are very grateful for your time! If you're interested in participating and contributing, get in touch via the Support link in your account. Why Is a Translation Sometimes Broken? Most of the localizations are crowd-sourced, and so the quality may vary. If a translation has not been made for a particular piece of text, we'll show it in English. Interpolation Translation strings can include Interpolation tags. Here's an example: Starting %{start_date}, %{name} will renew each %{duration} at %{amount}. This string will get a date inserted where it says: %{start_date}. Same for the other interpolation tags. It's VERY important that you keep the syntax for those EXACTLY as-is. Don't insert any spaces, don't add or remove any braces or anything else about them. Keep the surrounding white-space and punctuation exactly as it needs to be for the language you're translating to. HTML Tags Some strings with have HTML tags and HTML entities in them, like this string: The email <strong>&quot;%{subject}&quot;</strong> was delivered to %{collection_type} <strong>%{collection_name}</strong>. In that case, make absolutely sure NOT to change anything about either the <strong> and </strong> tags, or the HTML entities like ````"```. If you do, it's going to at least screw up the interface so it's unusable, or break things completely. Nobody wants that. Beware that the automatic translation in translation.io will often mess these up, so if you rely on that, make sure to double-check after. It'll tend to insert a space after the opening angle bracket, and that WILL break things. Make sure you double-check!
How To Guides- Lesson1
GDPR Consent
The GDPR regulation requires that... companies let consumers know when their data is being collected, companies cannot require a customer to consent to be on their email list or give you their email address in exchange for "free" opt-ins, and consumers must actively consent to be on your mailing list. Simplero provides special GDPR consent boxes that can appear on both mailing list opt-in forms and order forms. The GDPR consent terms are the same for your entire Simplero account. However, they can be turned on for specific lists as you choose. See the instructions below to determine the best fit for your business.  Account Level GDPR Compliance Select Settings from your Simplero Dashboard In the Account tab, scroll down to the Privacy section: Make a decision about adding an extra consent checkbox to opt-ins and order forms Require GDPR consent from all contacts means, it will show for everyone no matter where the customer is located Only for contacts from the EU/UK (Based on their IP address) means that Simplero will check the IP address and if the IP address is located in the EU we will show the checkbox. Keep in mind if you select this option and the customer normally resides in the EU but is completing the form outside the EU they will not see the box Never ask for GDPR consent means that you will not be using this Simplero feature  Set your GDPR terms. In the next two fields, you can edit the terms that will appear next to the checkbox. If you write nothing in these boxes, the light grey text you see is what will appear and it will be auto-translated where Simplero is able.  Click the Save changes button at the bottom of the page.  List Level GDPR Compliance Go to Contacts and choose Lists Select list you want to activate/deactivate the GDPR compliance settings for Select the Configure tab and scroll to Advanced Settings You can turn on the toggles based on if you want the terms established in your account settings to appear or not appear. You can also choose to customize the GDPR consent message This is what the field will look like on your opt-in form (with your customized text if applicable): GDPR at the Product Level Go to Sales and choose Products Select products you want to activate/deactivate the GDPR compliance settings for Select the Configure tab and scroll to Advanced Settings You can turn on the toggles based on if you want the terms established in your account settings to appear or not appear. You can also choose to customize the GDPR consent message This is what the field will look like on your opt-in form (with your customized text if applicable): Note that giving GDPR consent is required when processing a purchase. What happens when my customer checks or does not check the box? You can view your customer's GDPR responses on their contact record.  Select Contacts from your Simplero Dashboard Choose Contacts Locate and select the contact name In the Contact information screen, in the right sidebar towards the bottom, you will see notes about whether they have provided consent or not.   If consent is not provided the customer will still be taken to the thank you page and provided with any content associated with your list, as well as receive the Day 0 welcome email(s) but they will receive no other autoresponders or other emails from you. They will not even receive a double opt-in confirmation email.   Consent when using a Raw Form Opt-In and/or Custom Thank You Page Raw form opt-in When you use a raw form opt-in you can still obtain GDPR consent. After the customer completes the form they will be taken to a consent landing page where they will confirm their consent, rather than seeing a GDPR checkbox on the form.  Custom Thank you pages When using a custom thank you page or a program like lead pages where you are using the raw form and then thank you page is overridden, the contact will show as not having provided GDPR consent as the GDPR consent page will not appear. In these cases, you will want to be sure you are obtaining active consent through another option.  Right to Be Forgotten The Right to be Forgotten is defined as the complete removal of a contact and all the data collected on them. As of this writing (5/23/2018), Simplero is working on the ability for account owners to delete with purchases from your system. These are the options currently available.  You, as the account owner, can do a contact clean-up or go into an individual contact, edit and then delete them. Be careful deleting a customer who is actively subscribed or has a purchase will delete their access to those items. Both of these options will remove all contacts that are not actively subscribed, or have a purchase in your account.  Another option is for them to delete themselves. Be careful when suggesting this to a customer, because if they have purchased from other Simplero account holders they will be removed from the system completely and no longer have access to the content they purchased from you or those other businesses. 
How To Guides- Lesson1
How to Get Help in Simplero
In Simplero there are 4 distinct ways to get help. Below we'll walk you through who you can use for what, and which ones are free and which ones aren't.  Free options Help Site: Most of the answers to your questions will likely be on our help site: https://help.simplero.com/ From there, you can use the search bar or go straight to our How To Guides or How To Videos which are organized by topic. Help Site Support Tickets: The little blue icon in the lower right corner, when you're on your admin dashboard, is where you can find our support team. They can help with any small issues to any big issues. If you have a simple question on how to change the colour of a button, you can ask them. If you are encountering a bug you wouldn't expect, you can count on them too. They are free to use and always strive to reply as fast as possible, in fact at the last month they had an average response time of 29 minutes! Now that's awesome. You can also reach them on support@simplero.com, if you don't have access to your Simplero account currently. Live Implementation Q&A Calls: Want to quickly hop on a call with someone that works at Simplero? Live Implementation Q&A Calls are for you then. In these calls someone that works at Simplero will be at your and others' availability, to answer pretty much any questions you may have about Simplero, or how to set something up. This is really great for you if you prefer it to be a live call with a person. Sign up for an upcoming call Paid options Simplero Concierge: Simplero Concierge is a group of expert team members from within Simplero that can help you and set up things together with you, in Simplero. They have the expertise you can rely on, and with Concierge you get peace of mind, because working with Concierge, you will know that we have your back. There are practically no limits here, other than things will be done with you and not for you. They will teach you how to set up even the most complex setups in Simplero, so you too can become an expert in Simplero. Learn more about Concierge Simplero Certified Experts: The Simplero Certified Experts is a group of people that have been officially certified by Simplero, to be the top of the crop at working in Simplero. They are not Simplero staff. They are separate businesses each with their own field of expertise. If you need something done for you, these are the people you would look to hire if you want someone in your actual business, day-to-day, conquering each challenge along with you. Learn more about our Certified Experts Simplero Academy Group Coaching Program The Simplero Academy Group Coaching Program is a coaching program designed by Calvin, the founder and CEO of Simplero, to help you scale your business as quick and simple as possible. He blends spirituality, strategy, software and the support you need to reach your big vision for yourself and your business. Interested?  Learn more about Simplero Academy You can also email calvin@simplero.com for more info 💌
How To Guides- Lesson1
Child accounts
How to enable Parent/Child account functionality You can create your own DFY campaigns and automatically get them installed in other Simplero accounts you referred to. Before you start - Let the Support team know you would like to enable the DFY campaigns’ automatic installation in your referred Simplero Child accounts. Once we have enabled this option for you, you will be able to share it with your community/customers and have your DFY campaigns automatically installed in their Simplero accounts at the time they sign up. To select the content you would be willing to automatically get installed in your referenced customers Simplero accounts, scroll down to the DFY campaign Advanced settings and switch ON the setting: Install automatically on all new child accounts. You can also make DFY campaigns created in your parent account, visible in all your child accounts, so that admins of child accounts can install them. Keep in sync Additionally you can also turn ON the option to keep the content installed in sync with the parent account content. In that case, the content in your referenced customers Simplero accounts will have limited settings enabled for the account admins. If the campaign got installed while this toggle was On, then Products, Courses, and Automations included in this Done-For-You Campaign will be locked and synchronized with the Parent account Products, Courses, and Automations. For example, the Product, Course, and Automation below were installed using a "Keep in sync" Campaign. They show a simplified version of the admin view and edits are restricted or not allowed: They also reflect any changes or updates made on the Parent account to these objects on the Child account objects within 5-10 minutes. Note that: Courses added to the parent account after the DFY campaign is installed, will not be automatically installed or sync Moving lessons from one module to another module is not tracked by the “keep in sync” function. You will need to create a new lesson and copy the content Sites and other objects included in the DFY campaign that are not product, courses or automations will not keep in sync You can install a DFY campaign on child accounts in bulk from the list view > select action: install on child accounts… Then pick between ‘all child accounts’ and ‘only on accounts where it hasn’t been installed before’: Trigger on parent account when purchase is completed in a child account There's Also a Specific Trigger on Parent Accounts That Allows Setting up Actions when a Purchase Is Completed in a Child Account. Admin access to Child Accounts As an admin of the Parent account, you will be able to access as an admin any of the Child Simplero accounts that have been created using your Simplero offer. This means that you can navigate through the whole account and make changes as if you were the administrator.  You will find your child accounts on the Account settings > Child accounts page. As an admin of the parent account you can make changes to locked content courses. Once you have made a change to a synced item, like a lesson, an icon will be displayed to indicate that. You will also have the ability to Restore sync with original source from the 3 dots menu. Synced products/automations will not have settings tabs visible on child accounts. You can make changes to the parent product/automation instead, and the changes will reflect on the child product/automation. Royalty Products Get commission over products that are sold outside of the parent Simplero account, and through its Simplero child accounts. Create a new product where the commission purchases will be generated on. Click on the 3 dots > Royalty. Link the products that will be automatically installed in the child accounts where the commission will be taken from. You can choose between a percentage of the sale or a fixed amount: When your child accounts score a sale on the product linked above, a new purchase will get generated automatically in your parent account under the main product you’ve created on step 1. The royalty purchase will get generated under the Child account owner’s name. If you don’t have a payment method saved for their contact yet, the purchase will remain in failed status until you update the payment details. Note that Royalty products are only available once you already have at least one Child account under your Parent Simplero account. Purchases linked to Royalty products through child accounts can be found under the 3 dots menu as well. Reach out to Support if you have any further questions or would be interested in using this advanced Simplero functionality.
Integrations
2:12
0 / 23
Contacts Settings
0 / 2
Marketing Settings
0 / 10
Sales Settings
3:15
0 / 20
Content Settings
0 / 4
Deprecated Features
0 / 15