

Included in Simplero plans: Scale and Skyrocket
You forward your support email address, to an email address that Simplero provides when you turn on the feature. All emails to your support email address (often something like support@mybusiness.com) will then show up as support tickets inside your Simplero account.
You or your team can then respond to them and begin a conversation with your customer. When you have addressed their concern, you can mark the ticket complete and it will save in your Simplero account so you have it for easy reference.
Let's help you get set up...
First, enter the email that you will tell your customers to write to when they need support on your Account Settings. This may be something like support@mybusiness.com.
This will link to when customers click on the 'Customer Service' link in the default Footer Navigation menu on your Site and your Membership Sites:
-
Now, turn on support tickets:
Select the Settings gear icon from Simplero Dashboard
Select Support tickets:

Switch the box that reads "Use Simplero's support ticket system for your customers" ON:

Set up an email forward from your preferred support email address to the email address in the Support email section (jump down to this section for more info):

Choose which sites you’d like the Support widget to show up on:

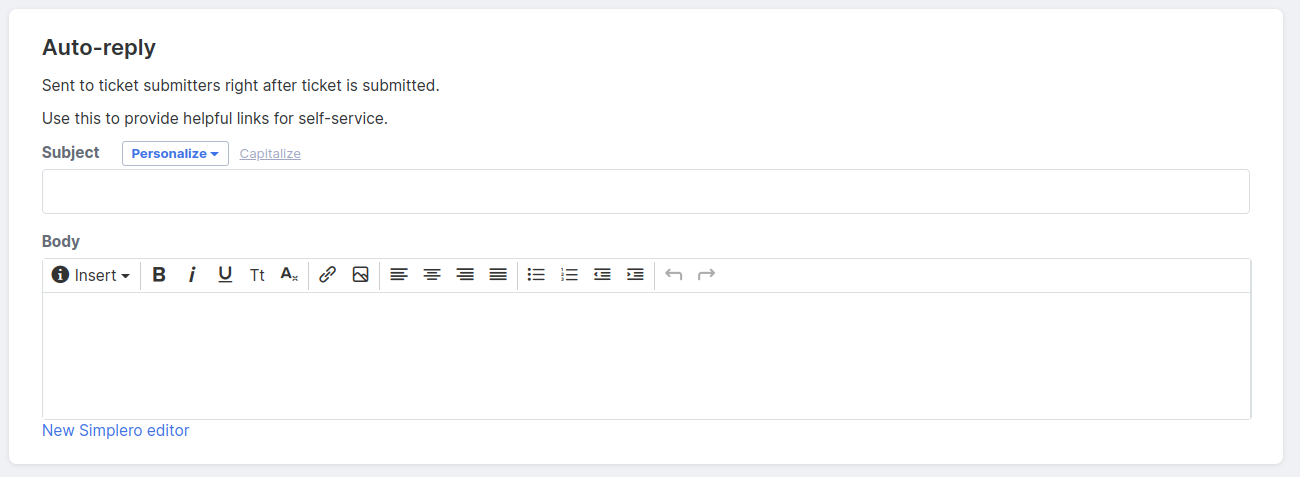
If you want to send an automatic reply to your customers after they submit a help ticket, enter that in the Auto-Reply section. This could explain how often you check the support email or give them some helpful information that might enable them to solve their problem:
You can send SMS to this number when a super-urgent ticket is opened under the Unassigned Tickets section:

You can get notified if someone puts a thumbs up or a thumbs down a ticket via the Ticket Ratings section:

You can create flags (or categories) for your tickets so customers can flag their ticket with a specific value a value when creating it (Priority level, Ticket Type, etc):

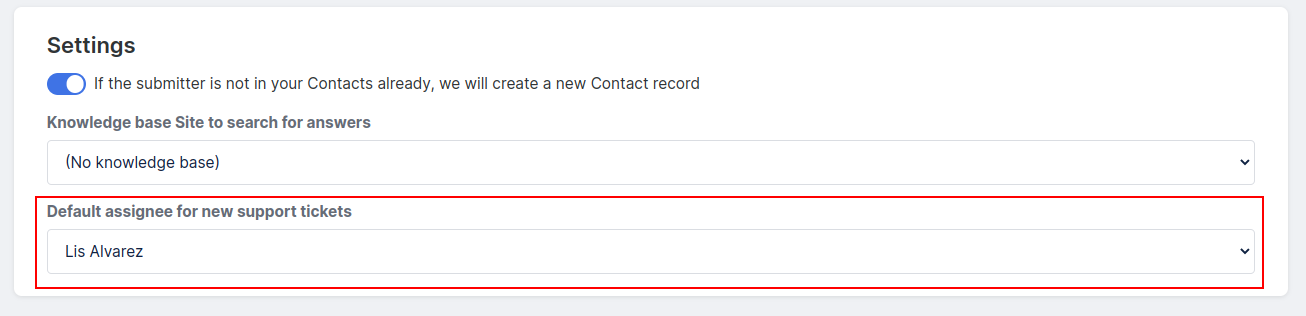
Set the default assignee for your support tickets under the Settings section. This person must be an Administrator on your account with Support tickets permissions. Alternatively, you can leave tickets Unassigned:
You can also set up Simplero to create a support ticket when someone replies to any of your emails:

Click the blue Save changes button
Forward Your Email
Reminder to forward the email address that you tell customers to write to when they need support to the custom ticket email address we provide you. That email address will appear in several places on the Settings > Support page and will look something like this:

You will need to do this through the company that provides you with your email address (Gmail, GoDaddy, One.com, etc).
Go See What It Looks Like
Make sure Support tickets are enabled on the More menu so that they are visible on your dashboard:

Select Contacts from your Simplero Dashboard
Select the Support Tickets tab:

Support tickets should now be an available option (If you don't see it, that means that you didn't save your settings in the steps above. Go back to the beginning of this guide and turn on the setting).
From this screen, you can change the default assignee (so your team members can take turns, perhaps) and turn on SMS Alerts, which would send a text message to the Admin who turned on the Alerts whenever a new ticket is received.
Simply click the Assignee button to assign another member and click the SMS Alerts off button to change the alert setting:
-
You can also click the three dots in the top right hand corner, and you’ll see the following options:
Create a ticket on behalf of a contact
Forward emails to tickets

Suite 92530
New York, NY 10003
United States