

Adding an Automation
-
Select Automations from your Simplero Dashboard
-
In the Automation tab, click the + Create new automation button in the upper right corner

-
Give your new automation a name and choose what it will be based on or leave it flexible if you are not sure or if it will be a combination of them.

-
Select the + Add trigger button for your automation. This will determine what will make the automation start.


-
Complete all appropriate fields and click the Create trigger button
-
Add steps to the automation using the blue plus button:

Types of steps
When adding a new step, you will have 2 different types to choose from:
-
Automation Control Steps
-
Action Steps
Automation Control Steps
Wait steps
After selecting ‘Wait’, you will see several options for Wait steps:

-
A while - general wait time such as a number of days or minutes. You can also choose to wait for a day of the week and at least a specific time.
-
A specific time - Waits for a specific date and time in your Simplero account time zone (if the date is in the past, new contacts will continue the automation)
-
A specific time in the contact’s time zone - Waits for a specific time in the contact’s time zone. For example, if you set up to wait until Sunday at 7 pm, your European contacts will receive the email first (at their 7 pm), and a few hours later the email will be sent to contacts located in America.
-
A custom field value - The date will be based on a custom field that you set up for your contacts, for example, a customer’s Birthday. To use this option you will have to first set up your fields. Learn how to do it in this manual.
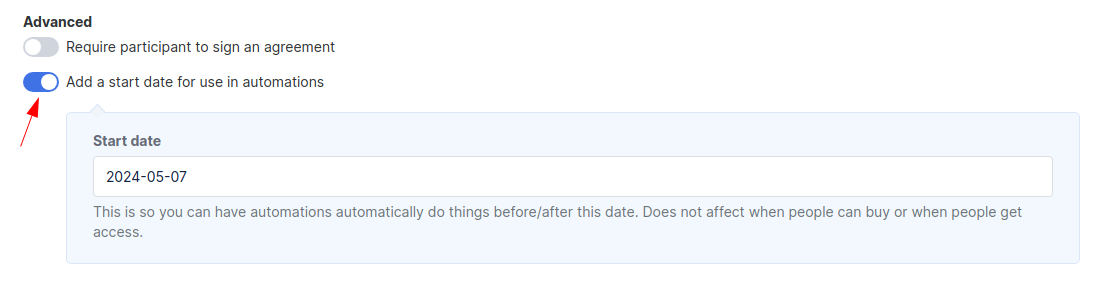
*Product start date - This option is only available when it’s connected to a product, and a start date has been added on the Configure tab > Options within the product.
*Subscription renews/ expires - This option can be used when an automation is in conjunction with a subscription purchase.
*Event start - Based on an event date (learn how to create events in this manual)
*Event end - Based on an event date (learn how to create events in this manual)
Important: Editing an automation wait step affects those already waiting in that step. For example, John enters the wait step 7: wait 1 day. If you change step 7 to wait 1 week, John would now wait 1 week in that step, not 1 day. We do not recommend making changes to steps where there are currently active contacts.
Go to steps
Goes directly to another step in the automation. This might be useful when adding conditions. For example, if you want your customers with a certain tag to move directly from step 10 to step 20 instead of going through every single step.
It can also be useful when you want to start directly on a specific step. See how to do that in this guide.

4. Stop
Stops the automation for that contact. Once stopped they won’t be able to get back to the step where they were. If you want them to simply pause for a while and then continue, you can pause the automation instead.
Action
Action steps perform an action to the contact or an object related to the contact (a purchase, a tag). For example, if you choose to subscribe a contact to a list, it will ask you which list and give you the option to skip the welcome email and auto-responses:

Sending Emails through an automation
One of the most common actions to perform in automation is sending emails. To do that:
-
+ Add a Step
-
Choose the Action ‘Send email’:

-
You have two options now:
Option One: Create a unique email for this automation step >> Add a Subject and the email Body >> then Save changes. You can then save a copy of this email in your email library so you can use it in other Steps or Automations. 

Option 2: Reuse an existing Email from the Email library:

Then you will be able to choose from the dropdown from your email library:

Suite 92530
New York, NY 10003
United States