Full (Dark UI) Help & Knowledge Base
Full (Light UI) Help & Knowledge Base
⌘K
Help Guides
Calendar
tTraining Workshops
Favorites
Playlists
History
Events

Events

7 lessons
0 of 7 0 of 7 completed
0%
Eventts-Features-Guide
Introduction to Events
Discover how to effectively manage your time-based events, including workshops, webinars, and one-on-ones, with features for creating, customizing, and automating reminders and registrations. Lear...
Events
Events
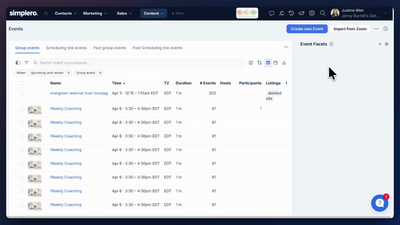
Do you have an incredible event coming up? Wouldn't it be great if you could give your contacts a way to easily add your events to their calendars? With this Simplero feature, Events, you can! Read on to see how simple it is. Create a New Event First Click on Events from the Content dropdown.  Click on the ‘Create new event’ button in the top right corner.   You will be directed to the events settings where you can set all the details of your event in several sections: Event info You can fill in the Event information about what is the event about, where should it be listed on, and who can register to it: Date & time of the event Recurrence settings Under this section, you can choose between a one-time or a recurring event: 1. When do you want this event to repeat: Daily Weekly (fe: on Tuesdays and Thursdays) Monthly At a specific time of the month (fe: the third of every month) On a specific day of the week (fe: every Tuesday of the second week of the month) 2. When the Event will Stop recurring After a specific number of occurrences (fe: 2 repetitions) On a specific date (fe: Jan, 1st 2023) TIP! When using links to your recurring events note that the link you can copy to your clipboard on the top right header will always take you to the next upcoming event occurrence. If you would rather link to one of the specific occurrences pages you can copy the link from the Upcoming events section: Location Under this section, you can share the details of the event location (if it is a physical event, in person) or share the link to the virtual meeting (online): Use TBD (to be defined) if you don't have the event location confirmed yet. You can edit it at a later time :) Presentation details These will be used on the Calendar page and sections on sites where the event is set to be listed. Also on the registration page. Registrations settings Under this section you can require your customer to register for your event, and choose how to manage their approval : No Registration: The event page shows the details without needing to register: Automatic Approval: The Register button will now be visible on the Event page for your members to register for the event: They’ll see the confirmation right away and the option to cancel the registration if they change their mind or cannot make it: The participant will now show as Approved on your dashboard where you can also cancel the registration manually if needed:   Manual Registration: The participant will see their registration as Pending as soon as they Register for the event: The participant will now show under the participant tab with the options to approve or deny registration: Once you require registration for your event (either Automatic or Manual approval) a new section will appear, which will allow you to send a calendar invite to your event registrant by toggling this option On : You can also set a limit of participants to the event when registration is required (either automatic or manual approval). You can customize the message shown below the disabled registration button, as well as a waiting list for them to subscribe to: This is an example of the Event page when its already reached its max capacity: NOTE! If you select Automatic Approval or Manual Approval under the Registration section, the system will generate login information for them when they register and email it to them: If they already have login details, we will remind them they need to log in with those details to see their registration status and access the event details: The same goes for Zoom events. Why do we require login info? We generate login information for event registrants so they can reschedule or cancel their spot if needed, and so we can show them the location of the event only after they sign up. Limit Registration Time You can also limit registration time with Automatic or Manual approval and close registrations a certain period of time before the event: Contract Pick a contract to sign before participants can register to the event. You can pick from existing contracts or create one on the spot! When participants click on register, they will be prompted with the contract to sign it before confirming their registration. Collect payment Make it a Paid Event by connecting the Event to any Product. The first listed price will show on the Event registration page: They will be redirected to the order form with a reservation time of 15 minutes. Triggers Under this section, you can add triggers based on registration settings to the event: Manage your Basic Event You can update the details of an event at any time on the Event admin page: There are several options displayed in the top right corner : Send broadcast: You can create a New Broadcast which will be sent to the Approved participants of the event Copy Link: You can copy from here the link to share with your contacts View Event page: Link to the page that contains the event info and the option to add the event to different calendars. Edit event: You can access from here to the event settings Additional options: From where you can either duplicate or Delete your event Pro Tip: Be sure to check out our Mastering Events in Simplero Workshop where our Experts do a deep-dive into setting up events in Simplero! Note: When adding events on the admin dashboard, they are not automatically added to your Google calendar. You would need to register for them if you want to add them Add a Host On the Events admin custom view, click on the checkbox next to the event and select the action: Set hosts… It will show on the Event and the Calendar page/sections: Time Allocation report Click on the meatballs menu at the top right corner to see a time allocation report showing all admins available and current upcoming booked times. Available Time Booked Time - Shows the number of hours that the administrator has been booked for in their scheduling links Percentage Booked - Percentage of available time that is currently booked
Events
Zoom Events
To use this kind of event you only need a Zoom account that you can sync with your Simplero account through a simple integration. If you haven't yet, please see this guide on how to get your Simplero and your Zoom account connected! Once you’ve imported your Zoom events, you will be able to see them in Simplero under the Zoom tab: If you look at the upcoming events, for example, on the top left you will see : 1- S icon if the event was created from Simplero 2- Z icon if the event was created on Zoom and synced with Simplero If you click on the Event Title and press the pencil icon in the top right-hand corner, you’ll see the settings option: This will allow you to update most of the basic settings of the event or the event series. Note: Occurrence repetition, date, and time of a recurring series will direct you to Zoom to edit those details.   You can also automatically import your Zoom recordings to Simplero by following the steps in this guide Registration Settings When setting up your event to require registration inside of Simplero, it will sync to also require registration in Zoom. However, when you require registration in Simplero, this will automatically turn off the setting to send a calendar invite email after registering through Zoom. Due to Zoom having a unique participant URL to sync participant attendance, each participant will get a unique 'event location' URL on their Simplero registration to be able to sync their registration to Zoom.  This will also allow for you to track when people join as well as when they leave. For example:  This will allow you to utilize the 'join' and 'left' triggers as well as have a clear idea of who truly did attend your event. Why We Generate Login Info If you select Automatic Approval or Manual Approval under the Registration section in Simplero, the system will generate login information for them and email it to them if they use Simplero’s registration page to sign up: If they already have login details, we will remind them they need to log in with those details to see their registration status and access the event details: The same goes for Basic events. Why do we require login info? We generate login information for event registrants so they can reschedule or cancel their spot if needed, and so we can show them the location of the event only after they sign up. Triggers on Zoom Events Under a Zoom event, you will see the same triggers available for all events (when registration is activated) plus these triggers : A participant joins an event. A participant leaves an event or the event ends. Create a Basic Event with a Zoom Location If you don’t want to sync your Zoom account or if you want to use a different account from the one integrated with Simplero, you’ll first need to grab the meeting room link from Zoom (by using a recurring Zoom link, or creating the event in Zoom and grabbing the link that’s generated for it). Then create a Basic Event in Simplero and pick ‘Online’ as the location. Add the meeting room link that was generated from Zoom to the Location section of the ‘Event location URL’ in Simplero: Paste the Zoom link in the Link to the event section, and click on save changes: This is how it will be a non-recurring Zoom event created by Simplero: This is how it will be a Recurring zoom event created from Simplero: On the events summary you will see all upcoming events, Under Location you will see if they will occur on Zoom. There will also be the Zoom icon the event card and all past events on the bottom portion.  NOTE! If you create a Basic Event and give it a Zoom location (following the steps above), the participants will not sync with your Zoom account. If you want the event to sync with Zoom, you need to use the Zoom integration - see our guide on how to do this. (Once your account is linked, pick ‘Zoom’ as the location for the event). Deleting an integrated Zoom event in Simplero will delete that same event in your Zoom account. How to Start the Zoom Meeting: If you create or import an event using the Zoom integration, you can start the meeting from the click of a button inside Simplero! Just open the Zoom event under Content > Events > Choose the event, then press the Start Now button: You’ll then be prompted to sign into Zoom if you’re the host: If you create a Basic Event and give it a Zoom URL for the location, you must start the meeting from Zoom. Here’s a guide from Zoom on how to do this.
Events
Simplero Livestream: Host Live Events Directly in Simplero
Note: Simplero Livestream is currently free for all plans while usage costs are being evaluated. A notice is displayed in the admin. It may become a paid feature in the future. Simplero Livestream is a location type for events that lets you host live video sessions directly from Simplero — no Zoom or third-party tools needed. 🎥 What you get Built-in video streaming right on your event page Simplero Chat for real-time interaction with attendees Two switchable layouts during the live call Standard controls: pick your audio/video inputs, send reactions, etc. Camera & mic preview before you go live Automatic recording works like the import recording feature for Zoom events. If there are multiple recordings in a session, each one is added as an attachment to the lesson. Create a Simplero Event Go to Content -> Events Click on your Event Under location, choose Simplero Live Stream Choose your settings Default target quality — set the video quality for your stream Chat toggle — enable or disable chat for the event Start the Livestream as an Admin Go to Content -> Events Click on your Event A Start now button appears in the admin header at all times. It takes you to the event page and opens the stream automatically. Use this to start early, test your setup, do a sound check — no notifications are sent to participants. What Participants See On the Events Page If the event is far out → they see the normal event page with a badge like "in 5 days". 1 day or less before the start → a countdown appears on the event page. 15 minutes or less before the start → a "Join waiting room" button appears so they can preview their camera and mic, plus a "Join when the call starts" button to auto-join. Once the session is live → they see a "Join now" button. Important! If the event requires registration, participants must register before they see any join buttons.
1
Events
Creating Calendar page or an Events List section on Your Page
By creating a calendar or list, you can easily show all your upcoming events at a glance. For example, if you are a coach and you want to have a coaching call calendar. Or you want to show all the live events you are doing in the next couple of months. Or if you want your members to have a calendar with all the upcoming webinars that they can join. Any of this can be shown in a very visual and simple way! In this guide, we show you how to create: A Calendar page on your site  An Events List section on your page  This is what the Calendar page looks like: It is added as a new page to your site. Your members will be able to choose between calendar and list view: This is what the Events List looks like: Pro Tip: Be sure to check out our Mastering Events in Simplero Workshop, where our experts do a deep dive into setting up events in Simplero. Creating a Calendar page on my site Do you want your site to have a calendar with all your events? Follow the steps below: Go to the settings on each one of the events that you want to show. Choose your site under Sites to List on (tip: you can choose more than one site!) Go to the site you want to add the calendar page to and click on Edit Layout & Navigation on the top right corner of your site settings On the left side, click the + sign to add a new page Choose Calendar This will add a new page to your site that shows all the events linked to that site. On the top right corner, your members will have the option to choose between list format and calendar format.  Creating an Events List on my page This is an element that you can add to any page. Just follow the steps below: Create your Events (Check our Basic Events Guide if you want to know how!) Go to the page where you want to add your calendar or create a new one Click on + Add Element Choose Events on the right-hand side Once added, you will see some options to personalize it on the left-hand side: Format options Which events - Choose upcoming or specific Limit number of events - Turn on the toggle to choose how many events to show Limit by label - This will only show events that have a certain label. This is very handy if you only want to show some events. For example, if you are a coach and you want to only show your public events. You will need to first label the events that you want to show (check how labels work in this manual) and choose that label on this setting. This allows you to have two different calendars that show different events depending on the label they have been given. It could be handy for academies that have more than one cohort or if you want to create a calendar on your public site different than the calendar on your membership site.  Styling - Margin, padding, border and corners Advanced Settings Choose the Advanced tab to access these settings: Shadow Z-Index Show conditionally - Show events based on a condition: By tag By list By product Visibility period - Choose when to start and stop showing this element Background - Image, video and/or color overlay
Events
Automatically Importing Zoom Recordings to a Course
At the End of This Lesson You will know how to automatically connect your Zoom Recordings to Simplero. Every time you hop into your Zoom calls, those will be automatically added to a course in Simplero without any extra work!  This is especially useful if you are doing regular calls, such as weekly coaching or workshops, that you want your customers to have access to.  Before You Start Zoom integration is already connected in Simplero You have at least one Zoom event in Zoom, or you’re ready to create one in Simplero If importing recordings: Zoom Cloud Recording available (Pro plan or higher) A Simplero course + module where the recording lesson should go (if needed) Overview of the Steps Import your Zoom Events Edit the event’s basic settings Set recordings to import automatically into a course lesson Start the meeting correctly so the recording import triggers Step-by-Step Instructions Step 1: Import your Zoom Events Go to Content -> Events  Click on Import from Zoom Note: If your event is not already in Zoom, you can create the event in Simplero and choose a Zoom location Enter the URL of the event on Zoom   Step 2: Edit the event’s basic settings Click the Event Title. Click Settings  Edit the basic event details. Note (recurring events) If it’s a recurring series, editing repetition/date/time will send you to Zoom for those changes. Step 3: Set recordings to import automatically into a course lesson Go to the Zoom event settings Scroll down to Recordings. Turn on Import Recordings as Course lessons  Set: Course Module Lesson title and position Which recording version is the main asset (Optional) Add other versions as additional content Whether or not you want to import chat messages The recording's publish status -> This will determine the status of the lesson immediately after the recording is published. You can choose draft, dripped (to all participants or only attendees) or published.  Important considerations: Only Cloud recordings can be imported (Zoom Pro plan and above) Minimum recording length: 5 minutes Step 4: Start the meeting in a way that triggers the recording import To ensure Simplero receives start/end signals (and imports the recording): Log in to the Zoom account under which the event was created. Start the event: inside Zoom, or inside Simplero, or by clicking the event’s Zoom URL After the event ends: Zoom notifies Simplero that the event ended Simplero imports the recording into your Media Library and your selected lesson The event card will show a link to where the recording was added Conversations recorded via chat will also be added to the lesson content. Troubleshooting My Zoom events aren’t showing in Simplero Confirm the Zoom integration is connected, then check Events → Zoom again. Make sure the Zoom URL is not the location of the Zoom call, but the URL on the Zoom admin side I can’t change recurring dates/times in Simplero Expected — change recurrence/date/time in Zoom. Recording didn’t import Check that Cloud recording is enabled and that there is enough storage on cloud for the recording Recording is ≥ 5 minutes, and the meeting was started from the correct Zoom account. The Zoom account is at least a Pro and not a Basic account The meeting itself is being started from the specific event/meeting on the account it was created on. Typically, via Zoom or Simplero’s event view is best. If it's not started via the event, it will not import Ensure you have permissions to share the recording with 3rd parties via Zoom account settings as well Set to import into a course before the event starts Attendees aren’t syncing If you used a Basic Event with a pasted link, syncing won’t happen—use the Zoom integration instead. You’re Done When… Your Zoom event appears in Simplero under Events → Zoom (If enabled) The recording appears in your Media Library and in the lesson you selected after the event ends
Intro to Simplero- Building your content
Events
Our events feature makes it super easy to host live sessions like webinars, group calls, or in-person meetups. You can set up simple one-time events or recurring events that follow a repeated interval pattern, such as daily, weekly, or monthly. You can create events, send invites, track RSVPs, and even add reminders—all in one place. It keeps everything organized so your people know where to be and when. Check the How-To Guides here. You might also want to check how to set up the Zoom integration in this manual. You can also check the Workshop ‘Mastering Events in Simplero’
Simplero
Features Why Simplero? About Pricing
Partner
Become a Partner Work at Simplero Get certified
Get Help
Support Guides Concierge Certified Experts Implementation Workshops
Tools
Mobile App Simplero Coach
Resources
Online Course Creation Guide
Compare
Kajabi Teachable Thinkific ClickFunnels Kit (ConvertKit) Skool Lumant Mighty Networks Circle ActiveCampaign Keap/InfusionSoft WordPress
Legal
Privacy Policy Terms of Service Disclaimer
Copyright © 2026 Powerful Through Grace, Inc. dba Simplero · 1 Chestnut Hill Plaza ·#1139 ·Newark, DE 19713·United States
powered by