Adding a new coaching program
Coaching programs use scheduling links, meaning you should first create the scheduling link you are going to use for your coaching program.
Learn more about how to create scheduling links here.
Add a Coaching program
First, make sure they are enabled in the More menu:
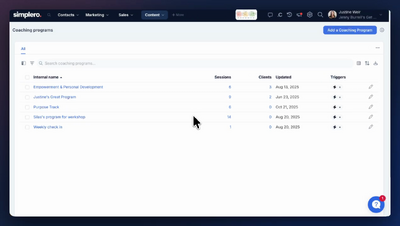
Navigate to the Coaching Programs page under Content.
Click on ‘Add a Coaching Program’ on the top right.
Give it a title/name, choose a card image, and add a description, then click on ‘Create coaching program’ at the bottom.
Once created, you’ll see the option to edit it, add sessions, and manually add clients.
Adding sessions
Click on the button +Add a session.
Set number of sessions, give it a title, connect it with the relevant scheduling link, Set a duration, and optionally add a description to the session.
Repeat the process for as many sessions as you would like to add to the Coaching Program.
Manually adding a client
To give manual access to your Coaching Program, click on ‘+Add client’, then search by Contact.
Here you’ll see their remaining coaching calls, as well as the option to deactivate access to the program.
See how to set up paid access to your program on the next lesson.
Upload the meeting recordings automatically to my Coaching Program
If your coaching program session uses a scheduling link with Zoom as the location, the client can see the recording after the session is over inside their coaching program view. This is done automatically (there is no setting for it).
Requirements:
The recording of the session needs to be stored in the cloud (either set to automatically record or manually start it)
The recording needs to be over 5 minutes